
|
Tulagi: The Second Day Guadalcanal #3 |
||
|---|---|---|
| (Defender) Japan | vs | United States (Attacker) |
| Formations Involved | ||
|---|---|---|
| Japan |  |
3rd Kure Special Naval Landing Force |
| Japan |  |
Tulagi Seaplane Base personnel |
| United States |  |
1st Marine "Edson's" Raider Battalion |
| United States |  |
5th Marine Regiment |

| Total | |
|---|---|
| Side 1 | 5 |
| Draw | 5 |
| Side 2 | 3 |


| Overall Rating, 13 votes |
|---|
|
2.69
|
| Scenario Rank: 846 of 913 |
| Parent Game | Guadalcanal |
|---|---|
| Historicity | Historical |
| Date | 1942-08-08 |
| Start Time | 08:30 |
| Turn Count | 32 |
| Visibility | Day |
| Counters | 82 |
| Net Morale | 0 |
| Net Initiative | 2 |
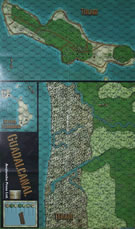
| Maps | 1: Guad-TTGT |
| Layout Dimensions | 84 x 55 cm 33 x 22 in |
| Play Bounty | 129 |
| AAR Bounty | 159 |
| Total Plays | 13 |
| Total AARs | 3 |
| Battle Types |
|---|
| Rural Assault |
| Conditions |
|---|
| Caves |
| Hidden Units |
| Scenario Requirements & Playability | |
|---|---|
| Guadalcanal | Base Game |
| Introduction |
|---|
|
Bottled up in the eastern end of the island, the remnants of the 3rd Kure SNLF awaited the 1st Raider Battalion and 2nd Battalion, 5th Marines. It had become clear that the Americans were in the Solomons to stay and the landing was no simple raid. For the Japanese there remained only a soldier's duty to the Emperor. for the Americans there was another day of digging out a stubborn defender. |
| Conclusion |
|---|
|
By late in the afternoon Tulagi was declared secured. The exhausted Raiders and Marines knew better. There were dozens of the Japanese naval troops still holed up in the caves and jungle hills. The battle had disclosed an enemy that gave and asked no quarter. Far more than the unopposed advance to the airfield on the big island, the bitter fighting on Tulagi and Gavutu-Tanambogo was a preview of things to come. |

|
|
|---|
| Imperial Japanese Army |
|---|
|


| Imperial Japanese Navy |
|---|
|


| Marine Corps |
|---|
|


| "They're coming right at us!" | ||||||||||||
|---|---|---|---|---|---|---|---|---|---|---|---|---|
The second day at Tulagi began with the American lines static, still trying to drive stubborn Japanese defenders from their caves in the central area of the island. The Japanese maybe learned a few lessons after the failed suicide charges the night before. Most of the intense fighting this time would take place on the eastern portion of the island where the one isolated platoon of marine raiders were blocked from breaking out by 3 hidden Japanese units; 1 reduced SNLF and 2 full SER platoons. This time I was able to do a lot better using Shad's solo hidden unit method. Hidden units were soon discovered but not before the raider unit found itself trapped. A daring relief attempt was made by some of the reserve Marine units but getting to the eastern area of the island involved exposing themselves in open, clear terrain. At 10:00/turn 7, the Americans take their first step loss as a marine unit gets gunned down by opportunity fire along with the loss of a 9-1-1 LT. Then another lucky shot later eliminates the demoralized and reduced marine unit that got left behind in the open. This rescue attempt did not go well for the Americans and they would lose a total of 4 steps in the process. Despite having lower ratings than their SNLF counterparts the Tulagi Seaplane Base personnel SER units were very effective defending against marine assaults. The one raider unit that was to be liberated actually aided it's would-be rescuers by assaulting and eliminating the one SNLF unit in an assault and then jumped into the assault against the remaing SER units. Finally, at 13:45/turn 22, the eastern portion of the island is secured but the Americans cannot take another step loss at this point. Back at the main line nothing is working at driving the remaining SNLF out of the caves and no American assaults on them are attempted as Japanese units are able to quickly rally after disruption and demoralization results. However, the same goes for the marines and this battle looks to end in a draw. At 15:45/turn 31, with nothing to lose and only victory to gain, SNLF units make a fanatical, death or glory charge straight at marine raider HMG units uphill. The Americans get first-fire and a +1 assault modifier from being on a higher elevation and fire on the 24 column. An unforgivable 1 is rolled and the M1 result only manages to disrupt one of the attacking platoons. The screaming Japanese plow right into the machinegunners and get a 6 on the 9 column, eliminating a step of the raider HMGS. This secures the Japanese victory with 5 American step losses and there are well over 2 Japanese steps left. The last turn is finished with that one assault gaining no further losses on either side. A few more shots of DF are exchanged and then it is finished. This scenario played out pretty well though a lot of turns were static. The Americans could of done a lot better if the isolated raider unit was left to fend for itself at the east end of the island but that just seemed unethical and un-marine-like. If that one platoon was sacrificed then it would of counted for just 2 step losses instead of the 4 steps lost attempting to relieve it. So ethics would have to of been abandoned for the Americans to at least get a draw. If they were down only 2 steps instead of 4 then more risks could have been taken in rooting the japs out the caves. Overall this one gets a "3" from me; sometimes play was very intense (more of a 4) and sometimes bland (closer to a 2). I think play is a lot more balanced than the first two Tulagi scenarios with a draw very likely. These Tulagi scenarios take both a lot of patience and nerves for both sides. I feel more comfortable with the Tulagi map now and 'Guadalcanal' in general. Hidden units solo will still have their limitations but feel that play is getting better with them. One of the things that worked in the Japanese favor this play was that despite a 2 point difference to start, they got lucky on a lot of initiative rolls. Also, the special rule of modified ties resulting in a Japanese first activation occured a lot. Next, everything learned from either success or failure on both sides will be put to the test going into the full Tulagi scenario and I get to do it all over again -the dress rehearsal is over. |
||||||||||||
| 0 Comments |
| Lunchtime on Tulagi | ||||||||||||
|---|---|---|---|---|---|---|---|---|---|---|---|---|
On their second day on Tulagi, units from the 1st Raider battalion and 2nd Battalion, 5th Marine Regiment continued to clear the remaining troops of the 3rd Kure Special Naval Landing Force (SNLF) and Service troops from the Island of Tulagi. The US troops had pushed the Japanese to the eastern end of the island and established a defensive line north of the caves on the south coast and then moving north along the trail that led towards the north Japanese seaplane base. SNLF units were in the caves along the south coast, and dug in hidden adjacent to the eastern jungle. In addition, elements of the 1st Raider unit and a group of Japanese service units were engaged near the south seaplane base. The Raiders moved east along the north coast road to enter the jungle east of the dug-in SNLF troops, while a pitched battle occurred at the south seaplane base between the units there. The eastern SNLF units were surrounded and then eliminated along with their Commander by 1000. Meanwhile, back at the caves, the Lt. Commander took over command, but the Marines had already cleared one cave, eliminating two SNLF infantry platoons by 0930. However, the remaining SNLF units in the second cave were much harder to unseat. It took three separate waves of Marine assaults to finally surround and eliminate them. The remaining seaplane base service units were dispatched by 1115, and the last cave was cleared at noon. The casualties taken by the Marines in cleating the last SNLF units from the second cave resulted in a draw. This scenario was played using 4th edition rules (including the updated cave rules), and the special rules regarding Hidden Units (#4) and Disorientation (#5) from the Kokoda Campaign scenario book. It basically requires the Japanese to eliminate 5 American steps, while the Americans must clear the Japanese from the island while not losing more than two steps. When the scenario started out with very good fortune for the US, with the strongest SNLF cave crew losing two steps and being completely demoralized in retreat from the cave, it looked like an Allied victory could happen quickly. However, the SNLF east group scored an HMG/INF step hit, so the Marines could only take one more step loss without getting into a draw situation. With three Japanese steps remaining in the last cave as the only Axis units left, the Allies had no option but to assault and hope not to lose two steps. As so often happens, the dice turned and the Axis secured a two-step hit despite having assault odds against them. So, the scenario ended up a draw, with the Japanese with 17 steps lost, and the Americans with two steps lost. |
||||||||||||
| 0 Comments |
| Caves can be monotonous |
|---|
|
In this scenario the Marines are trying to clean up and secure Tulagi, and must eliminate all but two steps of Japanese. The Japanese must eliminate five Marine steps to win. The Marines set up well led double stacks across the line established over night, and anchor it with a secondary line backing them up as much as possible. There is one platoon of raiders on the far eastern end of the island. The Japanese set up most of their SNLF troops in the caves adjacent to the Marine line, with the HMGs in the middle and a pair of infantry to the north. The remaining two and a half platoons are hidden and positioned to attack the raiders at the eastern end. The service troops are in the caves on the southern end of the line. This time I play more conservatively with the Japanese, figuring the Marines have to dig them out. The Marines start by trying to end run the north-east tip to get back to their lines, and the Japanese successfully pursue them while remaining hidden. They cut them off, and the raiders have no idea they have ended adjacent to two platoons of SNLF. The following assault wipes the raiders out, one turn from rejoining their lines to the west. And so starts another scenario based on who rolls lucky. The answer: the Japanese have far greater luck, and are able to roll snake eyes twice to take out two more Marine steps by turn six. One more step and this is over. The Japanese have only lost one step so far, and even the service troops are holding strong. The Marines maneuver around the Japanese flank to set up heavy firepower by combining direct fire against the caves. A strange twist of fate, however, and the eastern SNLF troops rush the new positions. There are two triple stacks against the northern most cave to its east ready to combine fire. The cave contains a full platoon in good order and a disrupted half platoon. To the east of the adjacent in the open Marine stacks is two good order platoons. But a mortar barrage disrupts the Lt Cmdr leading the two platoons, so he can’t bring his combat modifier into an assault. The platoon in the caves runs into the assault. It goes nowhere, but the Marines are pinned. The other stack unloads against the two platoons, and that fire fails to achieve effect (as normal for the Marines today). In a twist of fate, the Japanese win initiative on turn seven, the two other platoons enter the assault, and the Japanese score step five against the Marines. Game over. Showing more moxie than judgement, I choose to play out the scenario to see if the Marines can take out the Japanese and pull the draw. We go into the long game of massive Marine firepower barely scraping at the Japanese, while the Japanese seem to be more effective with less firepower. In a seemingly never ending die roll fest with little strategy, the Marines slowly take down the service troops and SNLF infantry, and eventually one HMG platoon. The Japanese inflict two more steps to the Marines in the process. The Marines get snake eyes once the entire scenario, despite at least four shots per turn, while the Japanese manage three with so much less opportunity. Finally, the Japanese are down to an unled HMG platoon in the caves, and a one step infantry with an ensign on the height of the eastern hill. The HMG survives all efforts against it. The single step platoon hold on until turn 32, the last turn of the game. The Marine assault does not kill it, but does cause the step to demoralize. The resulting recovery attempt causes it to flee, and the Marines gun it down, capturing the ensign. The Marines just barely manage to achieve their victory condition at the last second. Once again, a game mostly of who rolls lucky in a fairly static situation versus maneuver strategy. Another Tulagi scenario earning a 2. This one actually was pretty reasonably balanced, but it would have been rough to play two player. It was a slug match with the die controlling the event. If you like that kind of scenario, this would be a very decent one to play, but it just isn’t quite my preference. You could call this a strong two, but just didn’t tilt to a three. |
| 0 Comments |