
|
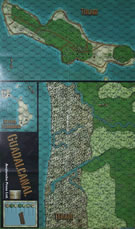
Tulagi: The First Day Guadalcanal #1 |
||
|---|---|---|
| (Defender) Japan | vs | United States (Attacker) |
| Formations Involved | ||
|---|---|---|
| Japan |  |
3rd Kure Special Naval Landing Force |
| United States |  |
1st Marine "Edson's" Raider Battalion |
| United States |  |
5th Marine Regiment |

| Total | |
|---|---|
| Side 1 | 8 |
| Draw | 11 |
| Side 2 | 10 |


| Overall Rating, 29 votes |
|---|
|
2.62
|
| Scenario Rank: 860 of 913 |
| Parent Game | Guadalcanal |
|---|---|
| Historicity | Historical |
| Date | 1942-08-07 |
| Start Time | 08:00 |
| Turn Count | 38 |
| Visibility | Day |
| Counters | 106 |
| Net Morale | 0 |
| Net Initiative | 3 |
| Maps | 1: Guad-TTGT |
| Layout Dimensions | 84 x 55 cm 33 x 22 in |
| Play Bounty | 125 |
| AAR Bounty | 105 |
| Total Plays | 29 |
| Total AARs | 12 |
| Battle Types |
|---|
| Amphibious Landing |
| Conditions |
|---|
| Caves |
| Hidden Units |
| Naval Bombardment |
| Randomly-drawn Aircraft |
| Reinforcements |
| Scenario Requirements & Playability | |
|---|---|
| Guadalcanal | Base Game |
| Introduction |
|---|
|
In the early morning hours of 7th August the transports of Task Group 62.2 hove to off the island of Tulagi in Sealark Channel between Guadalcanal and Florida islands. Tulagi, former seat of the British colonial government in the Solomon Islands, had been seized by the Japanese on 4th May 1942 and built up as a seaplane base. the American invasion of Guadalcanal Island 17 miles away meant Tulagi too had to be taken. At 0800, supported by the anti-aircraft cruiser San Juan and the destroyers Monssen and Buchanan, the 1st Raider Battalion and the 2nd Battalion, 5th Marine Regiment began landing. |
| Conclusion |
|---|
|
The raiders landed without a casualty and quickly crossed the island. Turning to the southeast, the four companies advanced down the island toward the day's objective identified as the Phase A line, which they reached at 1120. To this point opposition had been slight, but as the raiders moved off the Phase A line resistance stiffened. By the end of the day Marine reinforcements had landed and the western half of the island had been cleared. Indications were that the main Japanese positions had yet to be reached. |

|
|
|---|
| Imperial Japanese Army |
|---|
|


| Imperial Japanese Navy |
|---|
|


| Marine Corps |
|---|
|


| Navy |
|---|
|


| 2 Errata Items | |
|---|---|
| Scen 1 |
The Japanese 37mm AA gun is not included, use the counter from Waltzing Matilda. (campsawyer
on 2012 Feb 14)
|
| Scen 1 |
Setup hexes for Tulagi Seaplane base personnel should be within 1 hex of 1606 and 2210. (campsawyer
on 2012 Feb 14)
|
| Difficult Battle |
|---|
|
I like the Guadalcanal game set, and I know it’s old but there is so much good history in this set. And the map is great, it’s always super playing on a semi historic landscape. Well, the Japanese won by the fact that they knocked out 7 steps of Marines, but, those Marines took out all but a stack of SNLF infantry/machine gun troops and two leaders. A bloody fight it was. But in the end, these early war Marines have a very difficult time taking out SNLF fanatics in caves without tanks or flamethrowers. And that was where this group of die hards were lurking. But damn, the Marines secured everything else. But at a heavy cost. |
| 0 Comments |
| Fogged Out | ||||||||||||
|---|---|---|---|---|---|---|---|---|---|---|---|---|
Finally getting back to the first PG game that started my collection, and after 8 turns all ending early due to Fog of War, the Marines had already lost 4 steps with 2 more demoalized. Landings were bogging down before they could even get to the beach. Japanese dice were super hot, rolling 2s two turns in a row and taking 2 reps of Raiders each time. The only Japanese loss at that point was the AA gun to the shells of the CL. Love the game, but was reminded to read everything of the scenario at least twice. As the Japanese started forming a line across the east end of the jungle that included most of the caves, the Marines struggled to get enough men ashore to attack them, and already in a no-win game, I called it. I look forward to trying this one again in the future. |
||||||||||||
| 0 Comments |
| Tulagi: El primer día |
|---|
|
Este escenario simula el desembarco que tuvo lugar el 7 de agosto de 1942 en la isla de Tulagi, perteneciente al archipiélago de las Salomón, en la campaña que llevaron a cabo los norteamericanos para conquistar la isla de Guadalcanal. Se trata, por tanto, de una operacion anfibia en la que los americanos desembarcan con intención de desalojar a la guarnición japonesa. Las fuerzas niponas están integradas por elementos de la 3ª Fuerza Especial Naval de Desembarco de Kure (fichas de color azul brillante) y personal de la base aeronaval (fichas de color kaki). Los pelotones de la Fuerza Especial ( 7 de infantería, 2 de ametralladoras pesadas -HMG- y una batería antiaérea de 37 mm) son unidades de elite, con una elevada moral (9/8). El personal de la base (4 pelotones) es más "normal" (moral 8/6). Los americanos cuentan con una abrumadora superioridad numérica. Disponen de 14 pelotones de raiders, 4 pelotones raider de ametralladoras pesadas, 9 pelotones de marines, 5 de ametralladoras pesadas de marines, 2 de ingenieros, una batería de morteros, lanchas de desembarco, apoyo naval y aéreo. Las unidades de infantería americana pertenecen a los batallones 1 y 2 del 5º Regimiento de marines. Las fuerzas navales pertenecen al Grupo de Apoyo “Mike”. Las fichas americanas de infantería tienen un color verde intenso. El escenario dura 38 turnos. Cada turno representa 15 minutos de tiempo real. Tiene lugar a partir de la 08:00, por tanto con luz solar. Los americanos deben ocupar puntos estratégicos repartidos prácticamente por casi toda la superficie de la isla. Los japoneses deben evitarlo. Los americanos no ganan si pierden más de dos “steps” (medias unidades). El escenario comienza con las tropas de raiders americanos de la primera oleada recién desembarcadas en las playas al sur de la isla. Turno 1 Los americanos han conseguido desembarcar en las playas del suroeste de la isla seis pelotones de raiders y dos pelotones de HMG raiders. Las tropas de infantería de marina japonesas se aproximan a ls playas desde el interior de la isla y se producen los primeros combates. El resto de las fuerzas japonesas avanzan hacia las colinas del centro de la isla. Este avance es hostilizado por el fuego de los navíos americanos, que desorganizan un pelotón japonés y desmoralizan a su jefe. Paralelamente se prepara la segunda oleada americana de desembarco. Turno 2 Violentísimos combates en las playas. La infantería de marina japonesa efectúa un nutrido fuego de contención sobre las atiborradas playas. Varios pelotones americanos son desmoralizados o desorganizados. Los japoneses intentan arrinconar a los americanos en las playas. De momento, sólo dos pelotones de raiders consiguen infiltrarse en la jungla adyacente. La segunda oleada de desembarco aún sigue en el barco nodriza. La aviación americana aún no ha hecho acto de presencia. Turno 3 Sigue la lucha en las playas. En la playa más oriental (hex 907) la situación es crítica para los desembarcados. Sólo un pelotón de raiders hace frente como puede al enemigo. Otros dos pelotones desembarcados en esta playa han huido desmoralizados hacia el oeste. Nuevos pelotones de infantería de marina japonesa avanzan hacia las playas para presionar al enemigo y echarlo al mar. Por fin, la segunda oleada de desembarco se pone en marcha rumbo a la playa más occidental, donde los americanos han establecido una precaria cabeza de playa. Turno 4 El feroz tiroteo en la playa oriental produce las primeras bajas americanas (medio pelotón de raiders). Los americanos a duras penas consiguen avanzar hacia el interior (y sólo en la zona más occidental). En las playas se ha producido tal embotellamiento que los americanos sólo han conseguido desembarcar un pelotón de raiders de la segunda oleada. La situación está en un punto muerto. Barcos americanos empiezan a bombardear a dos pelotones de infantería japoneses desplegados en un sector de la jungla adyacente al mar. La aviación de la US Navy sigue sin hacer apariciones dignas de mención. Turno 5 Se prepara la tercera oleada de desembarco, aunque las playas siguen aún atiborradas. Los japoneses mantienen la presión sobre la playa oriental, aunque sus pelotones próximos a la costa están recibiendo un eficaz fuego de artillería de las naves americanas. La aviación americana hace más salidas, aunque infructuosas. Turno 6 Los americanos consiguen desembarcar varios pelotones más en la playa occidental. En la playa oriental los japoneses sufren el primer revés: medio pelotón de infantería de marina es eliminado. No obstante, la presión japonesa se mantiene. Los japoneses siguen llevando lentamente refuerzos a su línea de contención, que atraviesa la isla de norte a sur. La tercera oleada de desembarco sigue en sus transportes esperando que las playas se despejen. La actividad aérea americana se intensifica, aunque aún de modo poco eficaz. Turno 7 Los americanos consiguen hacer avanzar sus pelotones hacia el interior de la isla. De hecho consiguen llegar casi a la costa norte. Sin embargo, el avance decidido de uno de estos pelotones encuentra un trágico final al ser sorprendido por el fuego japonés. Medio pelotón americano es aniquilado. Los americanos han alcanzado el máximo nivel de bajas que pueden permitirse. La infantería de marina japonesa sigue manteniendo la línea, aunque cada vez más desorganizada ante la creciente eficacia e intensidad del fuego enemigo. Turno 8 Los americanos siguen introduciéndose poco a poco en la jungla, aunque aún sigue el embotellamiento en las playas. Dos de los barcos americanos se han retirado faltos de municiones, pero el destructor que queda bombardea un pelotón de infantería de marina japonés y lo desmoraliza. La línea japonesa aún resiste. Creciente actividad aérea americana, pero sin consecuencias. Turno 9 Turno negro para los japoneses. Tres pelotones de raiders asaltan un aislado pelotón de HMG de la infantería de marina japonesa en plena jungla. El ataque es por sorpresa y los japoneses ven aniquilado medio pelotón. Los americanos permanecen indemnes. Al mismo tiempo, el destructor americano dispara sobre dos pelotones japoneses en un hex de jungla adyacente al mar y destruye medio pelotón. El nivel de bajas japonés empieza a ser preocupante. La hasta ahora inflexible línea japonesa empieza a ceder. Turno 10 Eln la playa oriental los americanos sufren más bajas: medio pelotón de raiders es aniquilado. Esto significa que tiene ya tres "steps" de bajas y no pueden ganar la partida. Sólo pueden aspirar a empatarla si consiguen todos sus objetivos. Por si esto fuera poco, el destructor americano que bombardeaba las posiciones japonesas agota sus municiones y se retira. Los estadounidenses se han quedado sin apoyo naval. Sin embargo, en el sector central de la línea japonesa varios pelotones de raiders que asaltaban desde el turno anterior una unidad de HMG nipona, la aniquilan. Los japoneses se inmolan hasta el último hombre.. Los americanos hacen desembarcar lo que quedaba de la segunda oleada, que se infiltra rápidamente en la jungla. La línea japonesa empieza a tener serios boquetes. No obstante, el comandante japonés es optimista. Sabe que aunque ceda algo de terreno habrá ganado si mantiene alguna de sus posiciones. Turno 11 Los japoneses, incapaces de sostener la integridad de la línea, retiran a dos pelotones de infantería de marina -aún intactos- hacia la retaguardia. Por el boquete entran en tropel los raiders. La aviación americana deja de hacer acto de presencia desde este momento. Turno 12 Las primeras lanchas de la tercera oleada marchan hacia las playas. En el sector sur de la línea nipona, junto a la playa oriental, tres pelotones de raiders asaltan en plena jungla a una unidad enemiga. Los japoneses resisten bien de momento; los americanos resultan con un pelotón desmoralizado. En el sector norte, una unidad de raiders encuentra un hueco en el dispositivo japonés y rebasa las posiciones enemigas, avanza rápidamente por el camino y ocupa un poblado desierto. El mando nipón, consciente del peligro, decide formar otra línea defensiva, que irá desde desde el suroeste de la isla hasta el noreste (hexes 1208-1506). Turno 13 En la jungla, tres pelotones de raiders lanzan un impetuoso asalto y aniquilan medio pelotón de infantería de marina. Los japoneses supervivientes resisten estoicamente. Sin embargo, los japoneses empiezan a retirarse poco a poco hacia las posiciones de la segunda línea. Refuerzos americanos llegan a las playas, ahora expeditas de enemigos. Turno 14 Los japoneses van formando lentamente la nueva línea defensiva. No obstante, dos pelotones de infantería de marina nipones siguen resistiendo aislados en la jungla. Por el norte se cierne una sombría amenaza sobre las fuerzas niponas. El camino de la costa al norte de la isla ha quedado abierto y una creciente fuerza americana lo utiliza para aproximarse velozmente al punto más débil de la nueva línea defensiva japonesa. La cuarta oleada de desembarco se prepara para abordar las lanchas. Turno 15 Siguen los asaltos en la jungla. Las unidades niponas, a pesar de haber quedado aisladas, se defienden con el más ardoroso espíritu samurai. Sufren pérdidas, pero venden cara su piel. Las tropas americanas que avanzan sin oposición por el camino al norte de la isla se acercan cada vez más a la línea japonesa. Turno 16 Los combates en la jungla llegan al paroxismo. Dos de las tres bolsas de resistencia japonesas son anquiladas. Los nipones pierden dos medios pelotones de infantería de marina, que se han enfrentado al enemigo con valor suicida. La cuarta oleada de dembarco llega por fin a las playas. Uno de las unidades americanas que se aproximaba a la batería antiaérea japonesa de 37 mm que había quedado aislada en la jungla, es recibido con fuego letal por parte de ésta y pierde la mitad de sus efectivos. Turno 17 Grave revés para los americanos. Un pelotón de raiders que se aproximaba a la batería antiaérea japonesa recibe un devastador fuego sostenido y a quemarropa de las piezas niponas. Resultado: el pelotón completo se desintegra y un teniente es hecho prisionero. Por contra, medio pelotón japonés de infantería de marina que se retiraba por la jungla desmoralizado, es asaltado y destruido. Varias unidades de la cuarta oleada desembarcan en la playa. Turno 18 Unidades americanas inicial el acoso de la cota 80, pero los japoneses responden eficazmente y dejan fuera de combate a medio pelotón de raiders. En el noreste se produce el esperado ataque americano en el camino. Dos pelotones de HMG y uno de raiders maniobran hábilmente y se sitúan en posición de ataque sobre el extremo de la línea, precisamente el peor defendido, ya que la zona la cubren dos unidades japonesas muy castigadas. La batería antiaérea japonesa y su dotación es asaltada, pero de momento resiste. Turno 19 Hecatombe nipona. En el extremo nororiental de la línea, los americanos lanzan un estudiado asalto sobre las posiciones japonesas, que son conquistadas y sus defensores aniquilados hasta el últmo hombre (un pelotón del personal de la base japonesay medio pelotón de infantería de marina). La línea está rota. Los japoneses carecen de reservas para contraatacar. Viendo la situación, el comandante japonés decide olvidarse de la línea y mantener a toda costa tres puntos vitales: la cota 80, la cota 100 y el sistema de túneles y cuevas del hex 1709. Por otro lado, precisamente en la cota 80, el fuego de la infantería americana consigue abatir medio pelotón nipón. La partida está adquiriendo un cariz de extremo dramatismo. Turno 20 Nuevo asalto americano en la jungla contra una unidad japonesa de infantería de marina. Ésta, depués de resistir múltiples ataques, queda desmoralizada, pero antes consigue destruir medio pelotón de raiders. Esta acción ha sido decisiva. Los americanos han perdida ya siete "steps", con lo que los japoneses han conseguido una de las condiciones alternativas de victoria (la otra era mantener ciertas posiciones en su poder). En definitiva, los japoneses han cumplido sus condiciones de victoria y los americanos ya no pueden alcanzarlas (han perdido más de dos "steps"). La partida ha terminado. Victoria japonesa. Interesantísima partida. El comandante americano ha adoptado una táctica errónea. Pensaba que su abrumadora superioridad le daria una rápida victoria, destruyendo rápidamente todas las posiciones defensivas japonesas y ocupando los lugares clave de la isla tras un ataque decidido y sin contemplaciones. Olvidó que también era preciso ahorrar sangre. Tendría que haber utilizado una táctica más lenta, pero menos costosa en bajas. Debería haber evitado los asaltos contra unidades japonesas en buen estado, y haber desgastado primero éstas mediante la superior potencia de fuego americana. Sólo una vez desorganizadas o desmoralizadas las unidades japonesas, debería haberlas asaltado. Al final habría obtenido el mismo resultado, pero con menor coste. Téngase en cuenta que la partida ha durado casi la mitad de lo previsto en las instrucciones. |
| 0 Comments |
| Guadalcanal, scenario One, Tulagi: The First Day | ||||||||||||
|---|---|---|---|---|---|---|---|---|---|---|---|---|
Errata: Guadalcanal, scenario One, Tulagi: The First Day Victory conditions for this scenarios have a few incorrect hex numbers. In the victory replace hex number 1706 with hex 1709 and hex 2311 with 2309 Now for the ARR: Guadalcanal, scenario One, Tulagi: The First Day Posting #1 I am really into this scenario game play so far, after correcting the Victory hexes, it is going pretty good, after all, this is one of my first invasion scenarios that is not homemade. Besides, I am playing both sides so I have to win, one way or the other. I am at the point now where some heavy combat is taking place and the Americans have taken a few surprises or set backs, running into hidden Japanese units in the jungle can hurt but not as badly as having one of your LCVP sunk! That Japanese 37mm AA gun setup hidden, rolled an 9, has an AT attack value of 1 but target moved in preceding action segment -1 but the LCVP has a negative armor factor (-1) in the attackers favor, so really it's a plus 1. So the end result 9+1-1+1=10, so the LCVP is lost with two steps of Marine Infantry and one leader. The only thing that could hurt me badly as the Americans and it did. I can not loss another step as the Americans and win, so I must be very careful the rest of the game. I thought about starting over, but why, these things can happen in real life and even if I do loss a third step, I can shoot for a draw. But for now, I am after the difficult victory. Back to the game! P.S. I am presently blasting that Japanese 37mm AA Gun with the Naval & Air units! Posting #2 This battle continued with the Americans eventually getting control of their objectives but losing four steps of Infantry and one LCVP as I mentioned before and one LT-COL. The Japanese were not able to hold on to their objectives either, and lost most of their forces, so the game turned into a draw. This scenario played pretty well SOLO, even with the hidden units, as when you close a ring around the Japanese, it's not possible to go hidden again. Those two American Engineer Infantry units are key to assaulting those Japanese cave hexes, as they provide that extra column modifier to help off set the defenders cave modifier and the Marine Raider having the higher 9/8 moral as another column modifier helps as well. But still it's hard pressed for the Americans not to loss more then two steps of combat units. Playing this scenarios for the first time was enjoyable, as I got to use Naval units with landing-craft, Naval support ships & aircraft, caves and terrain types; jungle, ocean, beach, towns all in a tropical setting. A nice change-up from the normal PG. With Guadalcanal, you can tell a lot of work went into this game long ago. The maps, scenarios and counters make this a great game in the series and very unique. Not the usual stuff and I am glad AP took the risk on this type of PG game years ago. There is really enough unit types, terrain varieties and different scenario situations to keep the PG gamer interested in at least a few of 24 scenarios this games offers. I am a tank guy but this game still interests me and if you have to have armor, there are still five scenarios in this game that have Tanks/Armor in it. |
||||||||||||
| 0 Comments |
| Sbarco a Tulagi |
|---|
|
Scenario a mio parere difficile da vincere per entrambe le parti. La necessità di non perdere più di 2 step rende impossibile la vittoria americana. Le forze Jap sono talmente ridotte rispetto alle preponderanti forze americane che rendonono impossibili le condizioni di vittoria dell'asse. I Jap riescono ad eliminare 3 step già dopo il turno 5. Il resto è una lenta avanzata americana che che guadagna cm su cm terreno. La partita al di là delle condizioni di vittoria, che a mio parere andrebbero riviste, è stata interessante e piacevole. La stretegia delle forze di invasione è tutto sommato semplice : una lenta e attenta avanzata. |
| 0 Comments |
| Welcome to the jungle -fix bayonets | ||||||||||||
|---|---|---|---|---|---|---|---|---|---|---|---|---|
I had been debating about making 'Guadacanal' my next PG purchase for quite some time but when I found it for the low price of 35€ at the local game store here in Düsseldorf I didn't hesitate to clear it from the shelf. I had gathered from reading the errata and AARs here, at the site, that it was going to be a bit tedious adapting to an entirely new PG environment and didn't have the greatest expectations getting into it. Then once I got the game home and opened it up I was intimidated by the 3 pages of game rules along with the many SSRs. However, taking in as much as could I finally began to set-up for this first scenario. A lot of questions began to pop-up in my mind and after a while stopped posting queries here at the PG-HQ forum and just proceeded on. I did find Armyduck's AAR to be of a lot of assistance and Jay Townsend's notes a great help as well. I knew mistakes were going to be made and at one point was tempted to set the scenario up again and start all over but I pressed on. The first obstacle was with the Japanese deployment and had to take care to clarify which hexes were the proper ones to deploy in and count for VCs. Then there was the issue of "hidden" units playing solo. I used a method suggested by Shad with minefield counters placed but that didn't work as well as I thought it would. For every unit hidden two minfield counters were placed; one representing the real unit(s) and the other a decoy. The game rules state that each time a unit enters a hex within three hexes of a hidden unit it is spotted on 6/D6 roll, which can be modified. So it wasn't each new hex entered but each unit. So most of the time it was a triple stack of Raider units moving together, one at a time, giving three rolls for every hex entered. The problem was as soon as a decoy was uncovered then it was 100% certain that the other minefield counter represented were the actual unit was. So with all this in mind hidden units were found out well before any American units blundered into a very deadly surprise assault from the Japanese. In my next scenario I will try new things with "hidden" units but really think that only a shared play itself can make them fully effective. So the American invasion begins and right away there are problems, thanks mostly due to more frequent chance of fog of war (after two activations and 15+ roll) and that in jungle hexes units and leaders cannot be affected or subactivated by adjacent ones. This takes some getting used to. Air-support is available for the first 10 turns but is randomly determined and a lot of times was unavailable. Only once did the Americans get 3 SBDs at once and that air-attack failed to eliminate the Japanese 37mm AA gun. Luckily for the Americans all shots fired by the AA gun missed that were fired at the LCVP landing craft. Task Force Mike were deployed at the other end of the island and could not move through hex 1912 as it was not a full sea hex so warships were grounded from assisting to eliminate the AA gun; it had to be taken out by Raider units. The amphibious landings were slow going and a lot of times due to fog of war were postponed. By the end of the scenario there was still one unit of Marines at sea that had only just been able to load after 38 turns had passed! There are so many American units going up against the Japanese defenders that not all of them are needed so further landings after the first wave were last on the priority list. Most of the Japanese were in the central and eastern portion of the island but a token force of SNLF on west end proved to be very stubborn to remove. Only a small detachment of Raiders were sent after them but it wasn't until 14:45/turn 29 that the west end of the island had been secured. Of course the biggest stumbling block for the Americans would be the caves in the central hills. Just as dangerous were SER units that had dug-in at the top of the hill barring the way and getting a(+1) DF modfier firing down at units on lower elevations. I only chose to deploy Japanese units in just two of the caves, the ones that counted for VCs. Other units were used to manuever around and do more than just wait to be attacked; going on the offensive to do all they could to inflict American casualties as Japan only needs to inflict 7 American step losses to secure a victory if holding onto control of objectives fails. Step losses mean nothing to the Japanese as long as they can hold onto 3 of 5 hexes. The American VCs are a lot more stark. There is no and/or option for them to win like the Japanese. First case, the Americans can take no more than 2 step losses to meet their VCs; the catch 22 is in order to reach the other objectives they have to triple stack a lot to have effective firepower and brave a lot of opportunity fire getting to target hexes. In my play Japanese opportunity fire caused over half the American step losses, more so than assaults. Though it seemed inevitable that through the course of 38 turns that the Americans would lose more than 2 steps, the third step loss did not occur until 12:45/turn 21. At this point the entire American strategy had to change right away and all emphasis placed on preventing a Japanese victory to force a draw. Around this time is when I started to make the most mistakes with the Americans. Too many troops and to much time was spent worrying about clearing the caves instead of sending a sizable force east to clear VC hexes there. The caves could of been totally bypassed first and then attacked later. If those two cave VC hexes are the only ones left to clear then a Japanese victory can be averted. This mistake ended with the Americans losing 7 steps by 14:30/turn 28, sealing the Japanese victory. However I played out the last 10 turns to see if the the other Japanese VC could be prevented and looked at it as training for the full Tulagi scenario, #4; in which the first 3 scenarios are combined for a mini-campaign. Ultimately, by the end of play, the Japanese were also able to hold those three required hexes which would make it a major victory all-around. However, though a little too late, things started clicking for the Americans. The one cave in hex 1709 was taken and the really difficult cave, hex 1608, in jungle and hill was hit hard leaving both the HMG and SNLF unit in it demoralized. Of course both of those units easily recovered to disrupted status but they were weakened enough for a last ditch assault attempt on the last turn. The key to this was combining the fire of units in clear terrain, something that was overlooked a lot earlier. Of course this also makes the American units very vulnerable to DF but really was the only way to weaken the defenders effectively. Other than that, triple stacked units in the jungle, unable to combine fire from adjacent ones, were only able to fire on the 4 column of the DF table at cave/jungle hex 1608. American units in the jungle never really had much of a chance of keeping the defenders down and even then, with the caves counting as entrenchments for all purposes this added a (+1) recovery bonus along with the leader's morale modifier; making it so that a full strength SNLF unit only needed to roll less than an 11 to recover if disrupted/10 if demoralized. Occasionally a random event would affect play but usually, by chance, worked in favor of the Americans: A sniper was able to take out the highest rated Japanese army LT(10-1-1); Misunderstood orders caused one Japanese SER unit to leave the protection of the jungle and wander out into clear terrain and a thunderstorm occured once but only lasted 15 minutes/1 turn. Step losses were almost even; Americans losing 7 steps, the Japanese 8. American losses would have been lighter had they focused on the eastern portion of the island first and made that top priority, at least to force a draw. Anyway, I think I have written enough concerning my first foray into 'Guadalcanal' but despite the errata with this scenario I really enjoyed it, even more after the first half, even when it was clear that the Americans wouldn't win after the 7 step losses. I learned a lot by trial and even more error. My solo play ended with a "4" but because of the broken status of the scenario and that it is tough one for a first play can only rate it a "3" overall. Interestingly enough I would like to play this one against an opponent with either side but I think for a good shared play that both players should have already played this one solo first to get a feel for it. I am really looking forward to completing the next two Tulagi scenarios before into the mini-campaign of scenario #4 which runs at 137 turns. I think I have a good feel for the terrain now and overall very enthusiastic about completing 'Guadalcanal' and venturing into other Pacific theater PG games. I have a lot more motivation to continue with this than I did with my first impression of 'Airborne' but on the other hand would not suggest this one for beginners. I think after a solid year of other PG gaming I picked the right time to take this one on. |
||||||||||||
| 5 Comments |
The problem was as soon as a decoy was uncovered then it was 100% certain that the other minefield counter represented were the actual unit was.
Please allow me a moment to defend my solitaire hidden unit rules! :-)
The passage of yours I've quoted leads me to believe you took the decoy bit a little too rigidly.
Let's say you have 6 Japanese units. You then add another 6 units. You get your minefield tokens and shuffle them, then place them under all 12 units. There is no pairing off of units into real/decoy sets.
To the player there would be 12 Japanese SER units on the board. Once the first unit is discovered, if it is a decoy, then it is removed and you have 11 SER units on the board. The player knows that 6 of those are real and 5 are decoys, but has no further information.
If revealing one decoy meant immediately knowing another unit elsewhere on the map was the real version, you're doing something wrong. :-)
Aside from my little objection, I think the last sentence of your AAR is absolutely correct. I have tried to steer first-timers away from Guadalcanal for years. Not because it is bad, but because it is different and difficult.
That clears things up a lot and will try it that way with the next 'Guadalcanal' scenario, I knew something seemed wrong the way I went about the hidden units and probably should have read into your method a little more than just scanning it. I knew a lot of mistakes were going to made with this first scenario but realized most of them before the scenario ended. Thanks for letting me know before I moved on to the next one! :-)
Great AAR - I thoroughly enjoyed it (and thanks for the reference). I have not used Shad's hidden rules, so I am interested in trying them out. I totally agree with your assessment of Guadalcanal, and I want to play much more of it. I like the Pacific theater. Guadalcanal can be a turn off to players who want more speed and maneuver, instead of appreciating the slow cat and mouse slugfest created by the environment. When it comes to hidden units, I tend to think I am a "objective" solo player and try not to "game" with perfect knowledge of the opponent's positions. I try and role-play the commander on the ground and what information he might have and still have requirements to commit forces where he has imperfect knowledge. For example in my game of Tulagi, I had forces designated and committed to clear the west side of the island, though there were no Japanese on the West Side. It was still a tactical requirement to secure and clear the lest flank. Of course, there is no substitute for another player who might think differently and be able to exploit the hidden unit rules. I look forward to seeing your next posts... God knows I need to finish up my Alask campaign and play more Guadalcanal too.
I noticed that in your AAR Armyduck that you allowed units to dig-in jungle hexes and decided to let Japanese units do that as well but not until almost halfway through the scenario. There is nowhere in the core rules or 'Guadalcanal' book stating that units can't dig-in jungle hexes. I can understand that as digging-in does not necessarily mean digging foxholes (unless obviously in clear terrain) but also using surrounding material to give cover and protection. Jungles have a lot more resources for this than forests with sunken ground and scads of different tropical foilage, roots, fallen trees etc. So the same would go for swamp hexes along with other tropical terrain I suppose. Also the elevation lines are tricky at first but once understood correctly they deeply affect play for both combat and movement. My interpretation of the use of caves also was that they count as entrenchments in every way including for first-fire, recovery bonuses and that demoralized units do not have to flee from them after failing a recovery check. Of course they are handled much differently in 'Saipan 44' from what I read but this is not Saipan. In Guadalcanal units can fire into and out of caves with DF but not indirect fire, which especially would make sense with mortars! I am actually very much looking forward to the next one: "Tulagi: The First Night" as it is a night scenario combined hidden Japanese units with the Americans on the defense, which in reality must have been a nightmare for the Marines and seems like it was par for the course in a lot of jungle warfare. I think you have to be able appreciate the slower-moving pace of this, especially with at least three of the scenarios being 100+ turns.
I honestly can't recall my mindset for digging in the jungles. I might have assumed the literal interpretation since it wasn't mentioned, or, agreeing with you, you can improve any terrain.
| Spelunking on Tulagi | ||||||||||||
|---|---|---|---|---|---|---|---|---|---|---|---|---|
In the early morning hours of August 7, 1942, units from the US 1st Marine Battalion began landing on the shores of Tulagi Island in the Sealark Channel. By 0815, they encountered fire on the landing beaches from elements of the 3rd Kure Special Naval Landing Force (SNLF). A 37mm AA platoon was also hidden in the jungles above the beach and managed to destroy one of the incoming LCVP’s that carried Captain Rhodes and his Ranger platoon from C Company. A brief 30-minute thunderstorm broke out at 0830 slowing the landing, but obscuring the LCVP’s from further 37mm fire until the Rangers could get on the ridge above the beach and engage the forces there. By 0945, the Rangers had cleared the hidden units from north of the landing area, but a stubborn group of SNLF infantry had blockaded the spine east-west road along the ridge. The road was finally cleared at noon, and E and HQ Companies had disembarked in the landing areas. The north seaplane base was also cleared shortly thereafter, and the service units from both seaplane bases retreated to the caves on the south coast. By 1230 hours, all Japanese units were in the cave system. By 1315, one cave had been cleared, but Japanese units remained in two others. A mix of SNLF and service units remained in one cave at 1500 hours, but they were flushed out and eliminated by 1545 hours. The western half of the island was free of any Japanese troops by that time and the battle was considered a draw due to the level of Marine casualties. This is a classic invasion scenario that has withstood the test of time. It was played using 4th edition rules (including the updated cave rules), and the special rules regarding Hidden Units (#4) and Disorientation (#5) from the Kokoda Campaign scenario book. It still plays very balanced when played under those conditions. Since the game ended six turns early with the elimination of all Axis units, a better strategy would have been to slow the landings until the ridge above the beach could have been cleared, and the initial landing force from B and D Companies eventually accomplished that. An LCVP was destroyed on the second turn, which immediately put the USMC at a two-step loss; one more step loss would ensure that the best outcome for the Allies would be a draw. While it took until Turn #25 to lose that third step, the Allies would have won without the initial LCVP loss. On the other hand, the Allies had good fortune in only losing two steps while assaulting the Axis units in the caves, only losing two steps in the process despite several Axis die rolls on the “13” column of the Assault Table. The Allies had a decided advantage in initiative, winning it on 29 of 32 turns, and there were 21 fog-of-war rolls in the first 30 turns. The final step loss was 4 for the US and 27 for Japan, and the end result was a draw despite complete elimination of all Axis units. |
||||||||||||
| 3 Comments |
Yeah Bob, I am in the midst right now. That is pretty much how it has been falling out with us too.
"Great AAR!" It is interesting how closely this AAR is like yours from over six years ago. I had reviewed all the AAR's before playing this scenario, as well as the discussion on the forum related to treating caves, and decided to go with the current rules to see how timeless the scenario was; it is still balanced some 14 years later with the new adjustments!
| Turns into a long game of Marines fighting for the draw | ||||||||||||||
|---|---|---|---|---|---|---|---|---|---|---|---|---|---|---|
We played the first day of the invasion of Tulagi, the ex-seat of British government turned into Japanese seaplane base. In reality, the Japanese yielded the beaches to the Marines without a fight (one man injured when he cut himself trying to hack open a coconut). The Marines reached their objective of Phase Line A without much resistance, but then the Japanese Special Naval Landing Force (SNLF) troops (the Marines rightly feared the fanaticism of SNLF troops, the equivalent of Japanese marines) began to push back. The Japanese countered with nighttime assaults (the primary Japanese tactic finally questioned following Maj Ichicki's demise) that, while unsuccessful, exhausted the Americans and affected their combat operations the next day when the island fell. In total 155 Marines died in the two days it took to "secure" the island (never mind those guys in the caves!). This time around, the Japanese decided to contest the beach... A and D companies of the 1st Marine Raider Battalion landed on the beach only to find themselves met by a company sized reception committee of SNLF troops reinforced by 37MM anti-aircraft guns set up to fire at targets four to five feet off the deck. Well disciplined fire from the motivated Marines rattled the AA guns and their supporting infantry, but only a full charge into Japanese troops could hold back disaster. Disaster struck anyway. The AA guns and their support were quickly pushed aside, but the three remaining SNLF platoons reeked havoc among the invaders. While the Marines were able to eventually clear the beach, the fanatic defense by the SNLF caused horrific casualties amongst the Marines and kept the beach tied up for the better part of an hour. Already the attack was off to a bad start. What SNLF troops that survived the landing began to melt into the surrounding jungle. The Marines had no choice but to go in after them. The only thing worse than combat on the beach was combat in the jungle. The Japanese troops had no intention of surrendering, and repeated attempts by the Marines to eject them resulted in heavy casualties on both sides. The exhausted troops on both sides began to hunker down and snipe at each other. The only shining point came when two broken Japanese platoons ran down the clear path on the west of the island only to be caught in the open by Support Force Mike of the US Navy, and the light cruiser shelled the bejeebers out of the SNLF troops. Some air support by carrier planes saw the SNLF troops suffer 50% casualties before finally getting away. Speaking of air support, the promised support by said US Navy carrier planes could be described as intermittent at best. The limited support, while typically effective when it arrived, was not sufficient to seriously disrupt Japanese forces hiding in the jungle. While they bombed the tar out of Japanese service troops on top of the island's highest spot, these forces kept their heads down until the planes left the area and then reconstituted into a force that continued to annoy the Marines. B, C, and E companies of the 1st Marine Raider battalion made it on shore and began to push north and east across the island while A and D companies, or what was left of them, were assigned to secure the western portion. With reinforcements on shore, the Marines were beginning to get the upper hand. Japanese resistance was beginning to fade, and while the casualties suffered so far made the operation anything but a victory, at least it could marginally be called a success. That is until Maj Johnson, leading his platoon down the trail on the southern shore of the island, found himself ambushed by a force of SNLF troops hidden in the jungle. Assuming the Japanese were flushed out of the area and trying to get to the seaplane base, Major Johnson found his entire platoon wiped out in a vicious volley of gunfire followed by a fanatical charge by Japanese troops let by Lt (Naval) Arai. While Maj Johnson was able to prevent death or capture to himself until Capt Smithers arrived with reinforcements, the effect of the ambush tempered Marine willingness to close ranks again. A renewed wave of assaults on Japanese positions in the western jungle, while expensive, finally broke the resistance on that end of the island; further east, however, after dispatching Lt Arai's force the Marines found the Japanese taking refuge in a network of caves. While the Marines maneuvered to surround the Japanese defenders (and capture the seaplane base), the Japanese opened up with a torrent of fire that once again tore into the troops under Maj Johnson. Fearful of another assault on strong Japanese positions, the Marines formed fire groups around the Japanese and prepared for a long battle against the entrenched SNLF troops, now supported by the service troops from the seaplane base that survived the short but vicious air attacks. And the Marines still had not reached the eastern end of the island. As the day wore on, the Marines would land more forces, and the invasion force would eventually overwhelm the Japanese defenders. They would die to a man with the exception of troops on the eastern end that swam to Florida Island nearby. Unfortunately for the Marines, the commanders would spend some time writing letters to the families of the deceased troops. While the newsreels showed footage of an island secured from the Japanese, the horrified command staff of the Marines would be forced to reconsider tactics, training, and equipping of their units, and questioned their ability to face the Japanese. The troops would long remember the ferocity of SNLF troops, and dread another confrontation. And perhaps worst of all, the mauled 1st Marines Raider battalion had to be withdrawn from combat, a move that would have dire consequences in the next stage of operations, the invasion of Guadalcanal. Observations: Proof that assault is the way for the Japanese to win. Victory conditions included geographical for both sides, but step loss requirements were the Marines could not win with more than two steps suffered and the Japanese won with seven or more inflicted. 13 turns into a 38 turn game saw the Japanese inflict ten step losses on the Marines (only eight lost for the Japanese), nine during assaults. Played out I would expect two or three more, but probably split between assault and DF. Japanese setup is critical. Fight for the beach. Hard. You will lose a lot of troops, but Japanese troops are expendable. After one turn the Marines had suffered three step losses, and could only get a draw at best. The rest was hiding in jungles and caves making the Marines come after the Japanese. The Japanese do have to watch the aircraft and CL. Don’t get caught in the open. And keep the AA gun a little farther back from the beach so the Marines can’t assault on the first turn. The alternative is to play conservative, yield the beach, and hide. You’ve given up the initiative, and you are gambling on poor Marine performance. With 38 turns, the Marines should be able to expand everywhere. Only the caves will present a challenge, and the Japanese have to inflict the step losses to force a draw or capture the win. The Marines were too impatient on this one. With 38 turns available, take time to get all forces on shore. Move troops within shooting range of the Japanese and use DF until they get beat up, then launch the assault. Expect the caves to be nasty. You don’t need to empty the cave that is a Japanese objective if you move down to the east side of the island and kill service troops to secure the end. |
||||||||||||||
| 0 Comments |
| Challenging Scenario - Not too exciting for the Japanese though | ||||||||||||
|---|---|---|---|---|---|---|---|---|---|---|---|---|
SUMMARY: Japanese Victory by causing 9 American step casualties (over 7 steps). US failed to clear all Japanese two hexes away from 1309 and 2209 and lost over two steps. Japanese Casualties = 19 of 24 steps (80% casualties) 4 of 6 surviving leaders US Casualties = 9 of 70 steps (13% casualties) all leaders survived As my first Guadalcanal Game I did enjoy the challenge of this scenario and its tactical dilemmas. The mass and quality of marine raiders are amazing versus the tenacious SNLF. However the game IS SLOW MOVING due to the terrain. The only real tactical option for the Japanese player is to hunker down in the caves for the entire game and force the US player to dig him out. Not a lot of playable fun, but a tactical approach to winning nonetheless. The Japanese player will have some decision points early on if he wants to defend the two key hills around the cave complex.
By 1715 hours, the entire island was clear accept for three contested hexes = two hexes of the cave complex continued to strongly resist as well as a platoon of Japanese servants in 2108. US Techniques and Observations:
Japanese Techniques and Observations:
|
||||||||||||
| 0 Comments |
| Messy invasion for the Americans | ||||||||||||
|---|---|---|---|---|---|---|---|---|---|---|---|---|
Back to Guadalcanal scenarios after a long rest from them, but that did not help all of the errata and issues with some of these scenarios. I decided to start at the first and immediately remember why these are difficult. There is a bit of errata and was as victory conditions that usually end the game in a draw. But I still continue on, I will list suggested mods at the end that could help the scenario. The Americans have an amphibious invasion of Tulagi. They will have plenty of troops but will have logistical problems getting them into the fight. The Japanese will have the setup and with there hidden setup, they will cause problems for the Americans. Victory conditions will favor a draw as the Japanese just need to kill 3 steps of Marines and the Americans just need to secure three hexes and the game will revolved into the draw. But it is still interesting and can be a good one if you give it some effort. The Japanese setup have most revealed units back by the caves with hidden units to the north, where the landings will occur as well as on the major hill in the middle of the island. The seaplane base personnel will be revealed around the base. One note on the setup, the printed setup hexes are incorrect and have been updated in the errata. I also adjusted for the seaplane troops to be placed one hex from the two town hexes in the southeast of the island, which is historical correct. The Americans move on the island from there landing hexes and have to figure out if there are any troops in the jungle before they move into the island. An American destroyer covers the invasion in the northwest and the light cruiser covers the southeastern edge and hill 280. The other destroyer is on the north side of the island to cover the open hexes leading down the north side of the island as well as the open hexes in the south east by the cricket field. The Americans win the initiative and also get three planes to attack. These will bomb the seaplane troops to the south to try to prevent them from reinforcing the SNLF troops to the north. Meanwhile the RDR units move to control the north west area of the island. But they soon discover hidden units just off the beaches and go right into an assault that takes hours to resolve. Reinforcements move up, but Japanese 37mm AA on hill 280 open up on the landing craft and destroy one with the lose of a Major and a RDR platoon. Immediately, light cruiser fire goes on the hill but the guns are well covered and there is no effect. Now the Americans are in the hole, one more step loss and they will not be able to win. Other reinforcing barges land more RDR and HMG's to form a fighting force to go after the hill, but coordination will be hard through the thick jungle. Single stacks of units advance toward the hill but hidden Japanese open fire and disrupt/demoralize RDR units. The Americans are stuck recovering and not having time to do it due to quick FoW rolls ending turns before all American troops move as well as lengthy assaults. But by 11:00 the American destroy the Japanese holding out just beyond the beaches and HMG fire is on the 37mm on the hill. But the Japanese fire is still good enough to disrupt and demoralize the American leaders, forcing them to stop and recover again. In this time reinforcements get to the beaches and start to move to the north side of the island. They will move up and take the small Chinese works huts on the north side and dash down the road to go after the seaplane base. The base has be evacuated and the Japanese troops are consolidated at the caves and hill 280. American assaults on Hill 280 have to wait as the Japanese fire keeps the Americans back and soon a three kill eliminates any American victory. So not it is up to the Americans to take ground and hold it for a draw. At this point the Americans pull up and get more troops into battle as they will need to have everyone to force the Germans back. For several turns the Americans land and get reinforcements around Hill 280 as well as capture the seaplane base. The Americans now have two of the three Japanese hexes that will force a draw. The third will happen after an assault on hill 280. Several RDR and MAR units push two assaults that will push the Japanese away from the final hex. The Americans are able to destroy them but lose two more steps. At this point, the best that they can achieve is a draw so the game ends are turn 27. The last point I will make on this is some of the changes I believe that will make it better. First the victory conditions need to be a Major/Minor set for each side. The current conditions make victory absolute for each side and the minute that that fails they lose. With a Major/Minor conditions it give a side a change to achieve something. Second, the needs to be more on the American ships, there isn't rules for leaders and the ships as targets. |
||||||||||||
| 0 Comments |
| Sarge! Too many bugs here! | ||||||||||||||
|---|---|---|---|---|---|---|---|---|---|---|---|---|---|---|
We played this, and intend a few more, because we have not had any jungle fighting experience. 4th edition rules were used with little modification. The normal prohibition we have regarding IJN-IJA cooperation was suspended because the seaplane base personnel are actually naval support personnel. The SBD availability we interpreted to be naval air support. With the stage set, we blunder into a new world of green. My setup was flawed in that, in hindsight, I should have put up a beach defense. As such, the easy path to denying the USMC a victory was lost. In all probability, sinking one landing craft almost assures a draw. My AA gun however was placed well back for air defense. The marines came ashore in large numbers. My screening force did manage to kill a couple of steps, but was overwhelmed. They did deny trail use around the mountain. The cave defense was consolidated. Most of the screen was mopped up. A long period of tedium settled in. With loss of a third USMC step, a draw was attained. I had 3 hard nuts in the caves. The desire at this point being to make the final mop up and cave assaults costly enough to give me victory. The service troops put up a good fight, but only kill one more step. The SNLF platoons being where my hope lies. They actually start out rather well, then one platoon becomes demoralized, then fails to recover (even with an applied modifier). That locks the game at a draw. |
||||||||||||||
| 0 Comments |
| Damn Caves! | ||||||||||||
|---|---|---|---|---|---|---|---|---|---|---|---|---|
American Casualties will be presented by (#). The Battle 0800 – Americans land at Tulagi. Worried about hidden defenders they fire blindly into the jungle. Pounding the nearby terrain with all kinds of armament, shore bombards and air attacks. Their aggressiveness triggered a Japanese response who returned fire. 0815 – Japanese open fire on Americans on beach, but the Raiders are held together by great leadership and morale. The Americans follow up their attacks with an advance into the jungle to create a beachhead. The Japanese break under the superior numbers and firepower. The first of the LCVPs begin for shore. 0830 – The American Raiders, somewhat impatient now, assault the second Japanese platoons to great effect! These Japanese suffer catastrophic losses and are completely eliminated attempting to flee. 0845 – Americans continue to assault and are very lucky and very deadly. Only a single Japanese platoon is still covering the beach. 0900-1000 – The last of the beach defenders is eliminated and the Americans begin to slowly sweep the land, concerned about hidden defenders. By 1000 a complete beachhead is established and the marines are coming ashore. As the Americans slowly advance Japanese presence is confirmed. 1015-1100 – Japanese are spotted near the caves. Realising they have been noticed, the Japanese retreat to the caves. It is very hard to stay hidden with so many American troops advancing. The perimeter is widening, there is still a hidden SNLF somewhere! 1115-1130 – USMC Raider is ambushed by a Special Naval Landing Force in the northwest! The Americans suffer their first major casualty (1). The SNLF is quickly eliminated and the island west of the beachhead is adequately secured. Approximately 6 hours remain to clear out the caves. 1145-1200 – Americans begin their advance to the caves. 1215-1300 – Bringing up their HMGs the Americans hit the caves with all they’ve got. But the entrenched defenders are just too hard to hit! Rule Comment: Caves are special Japanese Only entrenchments which offer first fire and -3 column shift vs. direct fire or assaults. They also ignore the normal max. -2 column modifier for direct fire. This makes them EXTREMELY hard to crack, and way too deadly to enter! These particular caves are also in jungle (-1 Direct Fire) and have another possible -1 for hill. So, even firing adjacent, the attacks are limited in their efficiency. Combine this with the jungle which prohibits forming multi-hex firing groups, and you have some incredibly difficult terrain to capture! 1315-1400 – Americans advance against the other caves. A HMG platoons suffers a step loss from compound morale failure! (sigh, this should have been avoided). The Americans should be winning but they are plagued by poor attacks and morale rolls. The Japanese score a lucky direct fire hit (“snake eyes”) and Americans take their third loss. (3) Frustrated, the Americans send a small force around the north of the caves to capture some objectives in the east. They also pull back from the caves to wait for nightfall. AftermathSecuring enough objectives, but taking unacceptable losses, the first day at Tulagi is declared a draw. I did notice a few rule misunderstandings post play. Most notibly the terrain of the first two beach hexes should be clear, not jungle. Which would have had the Japanese set up a bit further back. I beleive the effect of this on the gameplay would have be negligible as the Marines would have fired and advanced through the jungle on the east instead, or had they advanced up the beach would have been shot (as they were). Guadalcanal has a few rule changes/additions that sometimes trick me. Scenario Rating 1/5 - This is a LONG scenario which moves at a snail's pace because of those caves. They frustrated the Americans and they will frustrate you too! Be Warned. There are a number of good Guadalcanal Scenarios, I recommend you skip the first few though. |
||||||||||||
| 0 Comments |