
|
Bloody Rapido Cassino '44 #1 |
||
|---|---|---|
| (Attacker) United States | vs | Germany (Defender) |
| Formations Involved | ||
|---|---|---|
| Germany |  |
104th Panzergrenadier Regiment |
| Germany |  |
15th Panzer Division |
| United States |  |
141st "First Texas" Infantry Regiment |
| United States |  |
155th Engineer Battalion |
| United States |  |
Army |

| Total | |
|---|---|
| Side 1 | 6 |
| Draw | 3 |
| Side 2 | 17 |


| Overall Rating, 24 votes |
|---|
|
3.58
|
| Scenario Rank: 351 of 913 |
| Parent Game | Cassino '44 |
|---|---|
| Historicity | Historical |
| Date | 1944-01-20 |
| Start Time | 20:00 |
| Turn Count | 12 |
| Visibility | Night |
| Counters | 47 |
| Net Morale | 1 |
| Net Initiative | 2 |
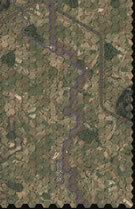
| Maps | 1: CassLL |
| Layout Dimensions | 43 x 28 cm 17 x 11 in |
| Play Bounty | 94 |
| AAR Bounty | 99 |
| Total Plays | 26 |
| Total AARs | 13 |
| Battle Types |
|---|
| River Crossing |
| Conditions |
|---|
| Minefields |
| Off-board Artillery |
| Severe Weather |
| Illumination |
| Scenario Requirements & Playability | |
|---|---|
| Cassino '44 | Base Game |
| Introduction |
|---|
|
The Gustav line protecting the approaches to Rome needed to be breached. The 36th U.S. "Texas" Infantry Division was charged with crossing the Rapido and establishing a beachhead to allow armor to breakthrough into the Liri Valley beyond. Given the lack of American air or armor support, the Texas Guardsmen did not have high hopes of success. |
| Conclusion |
|---|
|
The Americans were harassed by artillery and small arms fire all the way to the banks of the Rapido. German HMG and artillery fire opened up as they attempted to cross the swollen river and took a terrible toll on the men in their flimsy boats. Most of the boats were destroyed. The US troops pushed on but took terrible casualties, and were finally ordered to withdraw to their starting positions. |

|
|
|---|
| Heer |
|---|
|


| Army |
|---|
|


| 5 Errata Items | |
|---|---|

|
The reduced direct fire value of the Heer HMG became 5-5 starting with Fall of France. (plloyd1010
on 2015 Jul 31)
|

|
Strongpoints are single step units and can be eliminated with X results like any other single step unit. (Shad
on 2010 Dec 15)
|
|
|
The standard mix of strongpoints may be downloaded from Avalanche Press: http://www.avalanchepress.com/German_Strongpoints.php This is the standard mix found in Airborne, Airborne-IE, and Edelweiss Expanded. The strongpoint mix in Cassino '44 is different from that of other PG games. (plloyd1010
on 2012 Feb 01)
|
|
|
Strongpoints are affected by the terrain in their hex just like any other unit.
Even though they can't move, they can attack using Assault Combat if an enemy unit moves into their hex.
They may not dig in or benefit from entrenchments.
(rerathbun
on 2014 Apr 21)
|

|
The movement allowance on the counters in Airborne is misprinted. It should be "3." (rerathbun
on 2012 Jan 30)
|
| Pay Attention, DUMBKOPF! | ||||||||||||
|---|---|---|---|---|---|---|---|---|---|---|---|---|
This is a PBEM I played against Genesteeler. Its the first time either one of us played a Cassino scenario and the first time for Randy to play by email. This is going to fun. Turns: 12 (starting at 2000hr) Victory Conditions: American - Kill Germans, Get across the Rapido in good order, Control Road hex's west of the Rapido. Germans - Kill Americans, Maintain control of Road hex's, Keep Americans East of the Rapido. Set-up: Dice roll gives me the Germans, so I set up first. I disperse my 40 minefield markers along the Gustav Line, double-stack in most hex's and setting up the strongpoints and most of my troops within 2 hex's of the Rapido to give covering fire and to take advantage of the +2 sighting range in the Special Rules. I leave 2xINF along with a Leader and the 75mm back aways for a reserve. Randy sets up in a two-pronged attack, intent on hitting the Gustav Line at the far North and the far South, removing his allotted 4 minefield markers, thinking that I slipped up since these two locations will give him safe crossing of the Gustav. I don't think he realizes that it will be a bottle-neck for him in both cases, with nowhere to run with the Rapido at his back, (even though I did misunderstand the river rules and set up a little further away than I normally would have, 3 hexes away from the Gustav Line, which nullified my ability to see him crossing the river at those particular locations). Turns 1-6: Since I am unable to move until I site one of his units, Randy has free activations. FOW is not in effect yet since he can chain activate and move all of his units in 3 activations. He proceeds to move his forces up to the Rapido and begins his crossings unimpeded due to my earlier screw-up. Turn 7: One of Randy's INF units and a Captain passes by a strongpoint, which is occupied and op-fires, obtaining a demoralization on the Captain. Allied OBA gains two disruptions on my reserve force rushing to help defend the southern approaches while I'm able to gain a step-loss on the allies from op-fire. Turn 8: Things are getting more intense. Randy's assault goes badly, disrupting his own Leader and demoralizing one of his INF while only getting a demoralization on one of my Grenadiers. I'm able to seal off the Northern bottleneck and gain a step-loss plus a disruption on one of his HMG's, but only after 3 full strength combat units and 3 Leaders are able to get by. I only have 4 more turns to at least demoralize them to aide in VC's. I send my Captain with +1 modifiers in Combat and Morale to help out in the assault to the South along with the 75mm. His OBA destroys the loaded 75mm and the Captain along with it, but also gives him a step loss and disruption in the assault hex due to friendly fire. My Grenadiers in the assault hex are able to recover to good order and disrupted. Turn 9: Randy is able to get his FLM unit across and I make a huge blunder in response. I take 4 Op-fire chances (2 at the FLM and 2 at the INF he moved into the FLM previous hex), gaining nothing. I was planning on assaulting the hex with 2xGREN and a HMG and Leader to close-up the hole entirely. I would have been assaulting on the 30+ column, which pretty much guarantees an X result. Randy adds insult to my blunder with a huge assault in the South, gaining an X2 and Demoralizing the other GREN. My OBA is able to disrupt his ENG to the North, so no more troops will be crossing there on this or next turn. Randy moves an INF and HMG unit within range of a Strongpoint, which op-fires and gains a step-loss and Demoralization on the INF. Allied OBA retaliates, obtaining a Disruption on the strongpoint, but takes FF which destroys the remaining 1/2 step of INF. My Demoralized GREN attempt recovery, fail and flee the assault hex towards the dug-in units in the adjacent hex.....but they never make it. Randy's free shot gains an X1 and they suffer a compound morale failure on the resulting M2 check, eliminating the remaining step. The pendulum swings back the other way when Randy proceeds to move an INF in front of my Dug-in troops, resulting in an X2 from Op-Fire. Turn 10: Randy tries to get his Disrupted ENG to recover but fails, and sends one of his INF out of the hex to relieve me of my +1 bonus for 3 combat units in a hex. I assault his hex with the FLM and 1/2 step HMG, obtaining a step loss to the FLM, and demoralizing both, but in return getting a step loss on one of my GREN and 2 Demoralizations. Randy moves his disrupted assault force away from my dug-in units and I recover my Strongpoint to good order. A Lone Leader tries to make a dash for safety past my dug-in HMG only to get disrupted and then moved out of the hex when my Leader and GREN move out of their dug-in positions to keep tabs on his disrupted units. The turn ends exactly after 3 activations with a FOW roll. Turn 11: I get two activations for the first time. I bring OBA down on his disrupted units to the South, which gains me another step loss on his demoralized 1/2 strength INF. I then assault the same hex, after narrowly passing Friendly fire, destroying the other 1/2 step of INF. The Lt. fails his Lone Leader check and is captured while the Disrupted Captain retreats in the adjacent hex containing an HMG. Randy fails to recover his ENG and my Strongpoint fails to do damage to the HMG. He does manage to get another INF unit across the Rapido to the South. Unfortunately, FOW makes its roll after exactly 3 activations again. Turn 12: I get 3 activations! I have to go for broke in order to pull any kind of win out of this. I need to obtain several demoralizations. Mortar fire is ineffective. I make a mad dash with my remaining Leader in the south along with his GREN to the adjacent hex containing 3 Allied combat units, coming thru their Op-fire unscathed and ordering the last of my OBA down on them. Two Disruptions is all I get. With that, I have no chance of winning. GAME OVER, MAN! GAME OVER! We proceed to finish out the turn, and I am able to finish off the last step in my assault against the Northern crossings. Allied Major Victory with 32 VP vs. 12 VP. Conclusions: This scenario took a little time to get started due to the special instructions of the German units not being able to move until they see something, but got very bloody and brutal after that. If I hadn't screwed up on my deployment of the Northern and Southern units, this would have been a very different outcome. The map is fantastic and special thanks to Dave Murray for some rules clarifications. I thoroughly enjoyed playing against Randy and look forward to many more scenarios against him. I would rate this scenario 4 out of 5. |
||||||||||||
| 0 Comments |
| Quick & Deadly = Fun | ||||||||||||
|---|---|---|---|---|---|---|---|---|---|---|---|---|
This is a great quick scenario. The night fighting means almost all the direct fire is at adjacent hexes which makes for very deadly fire, especially when combined with Op Fire +1. Americans crossed the Rapido in the far north and south in the first half of the turns, which rocketed by. Then the fighting started and things got messy. Americans lost 6 whole platoons over the next 6 turns, but managed to capture the northern half of the road and also get another 6 platoons across the river. By the end, the Germans closed off the northern crossing and were putting pressure on the southern crossing, but the few platoons which made it behind enemy lines were troublesome. Rating 5/5: Because I love mines, river crossings, special rules (Gustav line) and it was short and quick yet highly engaging. I find many of the smaller scenarios too unbalanced or simple, but this one is loaded with decisions. A perfect small scenario. |
||||||||||||
| 0 Comments |
| Cassino 44' Original Scenario 1 - Bloody Rapido | ||||||||||||
|---|---|---|---|---|---|---|---|---|---|---|---|---|
Cassino 44' Original Scenario 1 - Bloody Rapido Turns: 28 (starting at 2000hr) Victory Conditions: Allies gain VP's for: Build footbridge = 4VP 1-2 hexes from River - 1VP 3-4 hexes from River - 2VP 5-6 hexes from River - 3VP 7+ hexes from River - 4VP On Turn 16: Both sides get reinforcements (the Germans even get a STUG!). (Check these Turns and VP's against what you have in your scenario book, you'll be amazed at the difference. Minefield rules are substantially streamlined, nullifying any thoughts to where to put those 3 factor mines and decoys at) Setup: Germans get to set up first. Strongpoints and HMG nest's are spread out along the Rapido, keeping a watchful eye on entire Gustav Line. A Captain with a battle hardened Sgt (9-2-1) and 4x GREN's make up a quick response team that can be at either end of the battleline within 2 turns. Just to add some additional solo excitement, after pulling the required Strongpoints, I mixed them up and placed them without looking at their attack factors. The Americans are set up in a two-pronged attack formation, with the majority of the force on the extreme southern end of the Rapido, using the road to get to the Gustav Line. A smaller force will hit dead center after the opening attack with the intentions of hitting hard and fast in the hopes of getting most of its forces across quickly and in good order (Like that's really going to happen). ENG units are not necessary to assist other units across the Rapido in this scenario, instead, boat points are to be used, which 4 are available until Allied units take damage on the East side of the Rapido, where 1 step loss or demoralization removes 1 boat point. 2000: Allied units move up to the Gustav Line. A Lt. and 2xINF avoid Op-fire while moving into the Strongpoints line of site. A German Lt. moves closer for a look-see and calls in OBA, gaining a step loss on the INF. -1 boat point. 2015: The American Lt. orders his good order INF and an INF and FLM unit in the adjacent hex into the boats and cross the Rapido, withstanding Op-fire from the Strongpoint but not the German OBA that rains down on them, demoralizing both INF units. Since they are already across the Rapido, no boat points are lost. German Lt. calls for help and the Capt. with his Sgt. and 4xGREN's move towards the crossing. American troops striking further North move into the Gustav Line, taking Op-fire from another Strongpoint and receiving a demoralization, -1 more boat point. Now down to two. 2030: American Lt. and FLM unit fire up the Strongpoint, shrugging off the first fire and disrupting both the Strongpoint and German Lt. Another American Lt. is able to paddle across the Rapido with 2xINF further up the river. Sgt. splits from his Captain, taking 2xGREN to assist in stopping the crossing further north, coming into sight of the American Lt., who calls in OBA, disrupting both of the Sgt's GREN's. 2045: FLM unit gives the strongpoint another dose of liquid fire (with a +1 assault bonus), burning out the remaining troops and the German Lt. Up the Rapido, the Lt. and his INF units assault the Sgt. and his disrupted GREN's, gaining an X1, demoralizing the rest and receiving a +1 tactical bonus for their next assault. Two more INF units get across the Rapido. German Captain leads an assault on the FLM unit, disrupting it. Allied HMG suffers a demoralization from a DF attack from across the river and then losses a step from a mortar attack, effectively losing the last two boat points. ENG to the south begins work on a foot bridge. 2100: American Lt. reassaults the Sgt and his troops, gaining a 2x, while the southern assault nets a 1x to both sides and killing the American Lt. Another German Lt. leads an assault to relieve a strongpoint, obtaining a 3x, killing the American Lt., but suffering a step loss and demoralizing himself and his remaining GREN's in the process. Allies fail their first crossing roll to get another unit across. ENG's building the footbridge become demoralized from an OBA strike but recover to disrupted. Step loss total is now 6 to 6. Initiative for the Allies is reduced for every two steps lost and for every Leader lost. 2115: German Captain brings in HMG to finish off the FLM and INF. ENG recovers to good order, but Major on the scene doesn't like it and orders his Lt. and 3xINF to the North. Step losses now at 8 to 6. 2130: German Captain whittles down the American troops, gaining another step loss while the Major attempts to lead an INF across to aide them but fails. ENG to the North begin making another footbridge. FOW rolled. Step losses at 9 to 6. 2145: German Captain finally assaults the remaining demoralized troops, gaining an X3 and shutting down the southern crossing. American assault to the north kills off the last GREN but misses the Sgt. Allied OBA and a DF attack demoralizes German Captains troops. FOW rolled. Step losses at 13 to 7. 2200: American Lts. DF attack in the North followed by an OBA gains an X1 and a Leader death. Germans return in kind, disrupting or demoralizing half of the Allied troops in the North. Step losses at 13 to 8. 2215: Both German and American OBA gain 2 step losses. Step losses at 15 to 10. FOW rolled. 2230: Northern footbridge completed. American Lt and 2xINF traverse the footbridge to get into the fighting. 2245: More American troops cross the footbridge. Southern footbridge is competed. FOW rolled. 2300: German OBA destroys a step of ENG's to the South while American OBA gains a step loss against an HMG unit. Step losses at 16 to 11. 2315: American Lt. brings in fresh troops to eliminate the German Sgt's HMG, which he is successful. Northern crossing area is free of German troops except for a Mortar unit. Step losses at 16 to 13. 2330: Allied OBA scores a direct hit on the German Mortar unit. American troops begin recovery operations. 2345: Reinforcements arrive for both sides. Disrupted and Demoralized Allied units continue to rally. German reinforcements move towards the Northern crossing, but the Stug wallows in the mud, only moving one hex. 2400: Germans close in on forward Allied positions, receiving a disruption from an Op-fire. Allied reinforcement begin crossing the Rapido. 0015: Allied troops open fire with DF and bombardment attacks, gaining a step loss and 3 demoralizations and a disruption. Step losses at 16 to 15. 0030: Sgt., GREN and Stug assault, gaining a step loss while two hex's away American Lt. assaults, gaining and losing a step. German Captain brings in an HMG to aide in his assault, gaining another step loss. Step losses at 19 to 16. 0045: German Captain continues his assault after most of the demoralized Americans flee the assault hex failing recovery, destroying the remaining step and Lt. German Lt. and GREN join the Sgt's assault, destroying the last two American steps in the assault hex and capturing their Lt. German OBA goes horribly wrong, falling on their own troops instead, suffering a step loss. FOW rolled. Step losses at 22 to 17. 0100: Remaining American assault fails to eliminate the last step of GRENs and the German advance is stalled due to Allied OBA and failed morale recoveries. 0115: American Captain combines for a DF attack, gaining a X2 and eliminating the German Uber Captain while the American assault removes its last step of GREN's. Step losses at 22 to 20. 0130: American Captain combines fire again, eliminating the step of German HMG. German OBA gains a disruption but suffers a demoralization from friendly fire. Step losses at 22 to 21. 0145: German Sgt switches to the American Captain tactics, combining fire and gaining a step loss. Allied OBA responds, destroying a step of German HMG. Step losses at 23 to 22. 0200: German Sgt. now leads an assault with his GREN and Stug, eliminating the American ENG's. German OBA is once again effective, gaining a step loss by compound morale failure. German Captain in the south assaults the unguarded footbridge, destroying it. Step losses at 25 to 22. 0215: German Sgt. again shows what he is made of, striking right in the heart of the Allied defensive line where he can do the most damage since all the American troops in the assault hex are already demoralized. An X2 is gained, but the last demoralized American troops just pass their morale check and hang on for another round. Americans reassault, gaining a demoralization only. FOW rolled. Step losses at 27 to 22. 0230: American troops are able to finish off the HMG and the German Lt. German Sgt. returns the favor by gaining an X3. American Captains troops are proud of the headway they made and still in good order. Until German OBA falls and demoralizes every last one of them. Step losses at 29 to 23. 0245: Most troops, German and American, are out of site of each other except for one step of American INF that got separated, which is eliminated by a combined DF of 2 single step GREN's. American Captains troops make a valiant effort to recover to disrupted, but German OBA again comes in re-demoralizing the INF. Victory Points: Footbridge x 1 = 4 VP's Units 3-4 hexes away from Rapido x 3 = 6 VP's Americans just barely hang on for a Minor Victory. Conclusion: WOW! This scenario plays much better using the Original Rules. A 5+ out of 5. As I mentioned before, the Cassino rules that come in the game box are quite generic compared to the Original Rules submission, and after playing Scenario 1 of Cassino 44 again, I consider those in box rules to be Sub-par. The boat points were a special rule to this particular scenario only. Compared to the boxed rules, which needs ENG's to help cross along with crossing numbers, you would think this is a giveaway and that the Allies would be swarming across. Not true. Losing a boat point for every step loss and/or demoralization that happens on the east side of the Rapido (meaning in the Gustav Line) ensures you need to plan carefully. I saw a better way to use them after I started losing them. I got really pissed when the Germans hit my American HMG unit twice on the same turn destroying my last two boats. But of course on the very next activation as the German, I was saying "Ja! Ja! What you going to do now American Boy with no more boats"? Use of the Boat points just added a sense of urgency to the scenario, unlike the standard ENG and crossing numbers for individual units. Then there is the footbridge that your ENG's can build in this scenario to assist units across. Another urgent matter that needs your attention, especially if you lose all your boat points and your stuck with only one unit getting a chance to cross per turn. All of these simple things added to this scenario exponentially. The Minefield and Mud rules are drastically different. For minefields, its a straight 2 factor for personnel and 1 factor for vehicles. No screwing around with where to put your decoys and 3 factor markers on the Gustav. Instead of adding MP cost to vehicles traveling through mud, you roll a d6 and subtract from that vehicles MP's. Something else that just adds more realism and chance in the game. A FtF opponent will already know how far you can move your tanks using the boxed rules. Now you don't even know. Brilliant! Waterlogged and Flooded areas are a whole different problem. No more just checking silly morale checks moving into these, you may very well lose a step with wallowing around in those type of hex's. Looking forward to replaying Scenarios 3 and 4 where this will become an issue. If you take notice of the Graveyard picture you'll see an odd FLM unit. This what was originally intended for these units. An ENG unit with Flame ability. This unit can still clear minefields and assist other units across the river. They have the same DF attack as their fellow ENG's, but in assault, can then use their Flame ability. Once reduced however, no more flame ability. This works much better in my opinion. I'm not sure why AvP stripped all of this out and replaced these. Maybe to conform better with the 3rd Ed. ruleset better. I believe this was a huge disservice though. Not only to Mr. Dave Murray, but to all PG fans. Cassino '44 really shines that much brighter when used with Dave Murray's original submitted rules, and I would humbly submit that it gives the player a better understanding of the actual battle rather than just another PG scenario. The only optional rule I didn't use in the replay of this scenario was the Force Cohesion. I wanted to make sure I had all of these new rules firmly in my mind (replacing the substandard AvP rules). They easily fit in place as play progressed. Force Cohesion will be used in Scenario 2 and all the remaining scenarios. I'll be putting that scenario book that came in the box on a dark shelf somewhere and will continue to use these amazing originals that Dave Murray provided. I would impress upon all who play Cassino '44 to do the same. You won't be disappointed. |
||||||||||||
| 0 Comments |
| Close, but not enough. |
|---|
|
Setup: The German defenses boasted a proud number of strongpoints, of which none were empty, and two had hidden HMG's inside. The rest of the infantry were spread out across the Rapido, but never more than two hexes away from the Gustav line. The two HMG's that the German's had were positioned on the flanks, while the 75mm gun was setup in with the middle strongpoint. The Americans setup two pinchers on the very edge of the used area, and removed the two minefield counters from both ends, and they were very lucky: on the right, a 3 and a 1, on the left, a 1 and 2. The Americans clustered their forces evenly, but let the right have the FLM unit. Play: The first two turns consisted of the American forces moving up and into the river from the railroad tracks. The ENG's on the right moved up, and survived the OP fire, and the the next turn two INF units were across on turn four. Seeing that the Americans had begun to cross in the North, they responded by moving a HMG unit towards the strongpoint which USA was attacking. In the South, no progress was made throughout the entire battle. The ENG was hit by OP fire, and disrupted, and refused to recover. The next turn the Americans fired at the strongpoint in the North, along with two INF's in the same hex, to stop them. Also, the Americans were able to bring a HMG and the FLM unit across, along with a Capt. 10-1-1, and prepared to assault the German defenses. The south flank's ENG gets demoralized this turn, and is forced to flee, causing the attack to be stopped. The next turn's assault ended badly for the Americans. The Germans first attack role was, of course, a 6, and the Americans returned with a 1. Having lost an entire HMG platoon and another step of FLM, the Americans were shattered and ran towards the river. They continued with the crossing, but the amazing defense of the Germans at the strongpoint made sure that the reinforcements from a nearby strongpoint arrived, and they disrupted the American ENG in the north with mortar fire. Now, on turn 6, both ENG's were disrupted, and it took another five turns for them recover and make it back to the river, while the rest of the American forces were being fired at from units across the river that they could not even see. Result:German Major Victory |
| 0 Comments |
| Bloody for Both Sides | ||||||||||||
|---|---|---|---|---|---|---|---|---|---|---|---|---|
After years of having Cassino sit on my shelf, I finally pulled it out and played a scenario. Some years back I designed a yet-to-be-published scenario on the day after this assault across the Rapido River when the Germans mopped up the forlorn US remnants. I am reading "Cassino Portrait of a battle by Fred Majdalany, and I just finished the chapter on the Rapido assault. So, I pulled out Cassino and noticed the first two scenarios cover this sordid affair and they are not big scenarios. Night assaults, through mines and crossing a river in flimsy boats against angry Germans, sounds like fun. The Germans set up with the Strongpoints and 75mm ATG covering the center and the infantry on both ends, ready to move to the fight. The US chose to assault in two hexes just east of Sant Angelo, hopefully getting across quickly with enough power to deal with the few German units in the area before the rest converge on the fight. Right off the bat the German artillery disrupted on of the US engineers that took most of the game to recover. On the west end of the assault area, the units to cross got disrupted or demoralized by mortar fire. But soon about a company sized element got across and even made it to the road. But the ability to recover and get units across was too sporadic and the US could never build up enough combat power. But at one time about turn 7 or 8, the US was starting to cause enough casualties with their artillery that they might be able to pull off a draw. But the Germans continued to pound them, and the US ended up with only a half infantry platoon, a leader and an HMG platoon across. Both sides took heavy casualties. This was ugly but was a lot of fun and kept some tension for a bit. And it was very historical. |
||||||||||||
| 0 Comments |
| Bloody Rapido | ||||||||||||
|---|---|---|---|---|---|---|---|---|---|---|---|---|
Played this one solitaire, so randomly placed two mines per Gustav line hex. German defenses were spaced evenly along the Rapido with HMG's supporting the strongpoints, and 75mm gun in the center of the line. American plan was to concentrate engineers along southern end of playing area, with HMG's and infantry platoons in center to occupy German interest. First engineer entered southern most mine hex and revealed two decoys! So, the American's had an immediate clear path to the Rapido to cross. At this point, the Americans used one engineer to clear the adjacent hex of mines (two 1 strength mines), and the second engineer to support river crossings in the southern most hex. Given the American superiority in numbers, the Germans wer not able to adjust enough units to the south quickly enough to hold off the crossing. So, the Americans were able to get their entire force across. Casulties were even between the sides, but with the American steps across the river, they won easily on occupation points. Good, quick scenario. American cause aided immensely by first hex entered being two decoy mines. Would most likely have been considerably different if they had to clear mines before crossing. |
||||||||||||
| 0 Comments |
| Cassino ’44 Gateway to Rome, scenario #1: Bloody Rapido | ||||||||||||
|---|---|---|---|---|---|---|---|---|---|---|---|---|
Cassino ’44 Gateway to Rome, scenario #1: Bloody Rapido *This one had a lot of great reviews over on the PG-HQ and I wanted to play on the beautiful Cassino maps again but nothing too large so this is the one. The special rules, night action and the Gustav Line with the Rapido River, peaked my interest. *I set the Germans up spread out to cover all the possible crossing the Americans might choose and will shift my defensive forces once contact is made. Being night with fog, you never know but I have a small defensive force but 40 mine counters, Strongpoints and a river to help. The Americans get to clear out four of the mines before play begins and this will be my attack and crossing point of the Rapido River. The Germans are spaced out just right, so if the Americans do cross, they will end up adjacent to a German unit and will be fired on. *The Americans make their crossing where the mines have been cleared out and where they think the Germans are weakest but this area created a bottle neck and allowed the Germans to shift forces quicker then I thought they could plus one of my Engineers got Disrupted in the crossing stack and had to spend three turns trying to recover. The Strongpoint right in front of the crossing area turned out to be a monster with a 9-4 Direct Fire Value and soon had friends in the form of German Infantry & HMGs. The Americans did manage to get some units across on the Germans right flank of the hole punched through the minefield and they in turn got involve in combat with some of the relocating German defensives. *With only twelve turns the battle was fast paced and both sides lost steps, with the Americans receiving a few more losses then the Germans. Both sides had three ways to attain victory points but in the end the Germans defenses were a little too tough in the area the Americans choose to cross and the Germans won a minor victory on this day. |
||||||||||||
| 0 Comments |
| A River Never Crossed | ||||||||||||
|---|---|---|---|---|---|---|---|---|---|---|---|---|
The US never really got going. The Germans were resilient against US attempts to suppress them with OBA. The US then attempted to pull across the river and reply with direct fire to the Germans firing from across the river. The Germans held up, devastating the US in return. Both US engineer platoons were eliminated, taking with them the hopes of a US crossing. German victory. |
||||||||||||
| 0 Comments |
| Impasable y frustrante Rapido |
|---|
|
En este escenario un batallón americano debe cruzar la línea Gustav y el río Rápido y tomar posiciones en la orilla oeste. Los alemanes tienen dos compañías y cinco puntos fortificados. La batalla tiene lugar de noche, pero los alemanes se benefician de una mejor visibilidad sobre la línea Gustav. Desde el principio es evidente que cruzar el río es una tarea casi imposible para los americanos. Las reglas de cruce de un río grande (major river) creo que no son las apropiadas para este escenario. Pasar a la orilla alemana es una cuestión de mucha suerte, que los americanos no han tenido. Al final de la partida los americanos no consiguen pasar ni una sóla unidad al otro lado del río. Creo que este escenario está roto. Es francamente frustrante y malo. Voy a remodelarlo utilizando unas reglas caseras. |
| 0 Comments |
| Cruzando el Rapido con reglas caseras | ||||||||||||
|---|---|---|---|---|---|---|---|---|---|---|---|---|
Juego este escenario por segunda vez utilizando las siguientes reglas caseras (house rules): 1) El texto sobre el "Rapido River" en la páginas 5-6 del "scenario book" queda redactado de la siguiente manera: "The Rapido is narrow but very flast-flowing. It is therefore treated as a Minor River for personal units. Personal units of all types may move along the edge of the river per the normal rules, but each personal unit that wishes to cross the Rapido river hexside must begin its activation in an hex adjacent to the river. Units that cross the river must immediately stop moving per rule 5.7. The -2 column modifier in Assault applies if units cross the Rapido into an Assault hex. "The Rapido river is treated as a Major River for Mechanized and Motorized units. These units may move along the edge of the river. "The flooded area does not alter or expand where the Rapido is located". 2) Se suprime la regla especial 6 ("Hail Mary, Full of Grace") del escenario 1. Las demás reglas permanecen invariables. De esta manera se consigue, en mi opinión, un escenario mucho más competitivo y divertido. En esta nueva partida los americanos cruzan el río por dos puntos, que previamente habían sido limpiados de minas. Uno es el hex 2329. El otro es el hex 3330 (hex de bosque en la Línea Gustav). En estos puntos tiene lugar una violentísima batalla. Al final los americanos consiguen pasar a la orilla oeste del río y desbordar a los alemanes, que no pueden impedir la penetración de los americanos a la carretera. Al final los americanos consiguen una victoria mayor, con 27 puntos de victoria de diferencia sobre los alemanes. La batalla, sin embargo, ha sido mucho más reñida de lo que las cifras indican. Sólo al final de la partida se produjo el hundimiento de la resistencia alemana. No obstante, creo que mis reglas caseras favorecen ligeramente a los americanos. Creo que los alemanes deben impedir a toda costa el paso del río por el hex 3330, principalmente por medio de la acumulación de minas. Conclusión: creo que el escenario ha mejorado mucho con estas reglas. Yo me he divertido mucho. De esta manera creo que este escenario está al mismo nivel de los demás escenarios de "Cassino 44", que es en mi opinión el mejor juego de la serie. |
||||||||||||
| 0 Comments |
| A tough one for the US | ||||||||||||
|---|---|---|---|---|---|---|---|---|---|---|---|---|
Having just brought Cassino I thought I would play through the scenario's in order. This first one is very hard for the US forces but is a good introduction to the terrain and the special rules. The map is the bast in the system and gives a real feel for the terrain around Monte Cassino. Looking forward to slowly playing through the entire book! |
||||||||||||
| 0 Comments |
| Bloody Rapido, Hardly a chance | ||||||||||||
|---|---|---|---|---|---|---|---|---|---|---|---|---|
The game was played solitaire, so all 40 mines were placed randomly, on average 2 counters per hex, concentrating on likely crossing hexes. Rule interpretation: The Rapido, though a major river, runs along a hexside like a minor one. Therefore it was treated as a hybrid hex-- units need engineers to cross, but do NOT need to stop before entering. So, it takes 2 turns to cross, not three, as the standard rule dictate. I asked this question on CSW, and there seemed to be areement that this interpretation was correct. Strongpoints were treated as intrinsically dug-in. The game: To limit German concentration against the bridgehead, the US decided to cross at 2 points, hexes 3130 and 2929. The game only lasted 12 turns, so the US was very aggressive in forcing a landing. He split his forces more or less equally against both crossing points. The engineer in 3130 did not fare well. He blundered into 3 points of mines and was demoralized by the 1 remainining mine point. Hexe 2929 did better, finding a dummy and only 2 points of mines. The 3130 engineer never recovered from his misfortune. Between direct and artillery fire, he never regained cohesion and for game purposes was useless. This allowed the German player to concentrate against the southern threat. The US player managed to cross a few units, but these never achieved any momentum. Continuous German pressure sealed the landing. With more mine attacks disrupting potential reinforcements, the US units dangled on a string. A successful assault agains an infantry and HMG stack decided the US fate. After 4 turns, the attack was aborted, with the US suffering 6 steps of losses and the Germans only 1. A decisive German victory. Conclusion: An interesting scenario, but one favoring the Germans overwhelmingly (thank the mines and the 2 hex spotting range of units in the Gustav line). This scenario is worthy of a replay if the original, unpublished boat crossing rules are used. In that situation, the US receives 4 boat points and may cross one unit per turn per remaining boat point. Boat points are lost per step lost on the east bank of the Rapido. Will revisit this scenario at some point. |
||||||||||||
| 0 Comments |
| Rapido Revisited | ||||||||||||
|---|---|---|---|---|---|---|---|---|---|---|---|---|
As I was getting American leaders for my next Ivy Division campaign I was side tracked by this scenario. I had read a bit of controversy about this as people said that this is un-winnable as the Americans. Looking at the scenario I thought I should have a go at the scenario to find out if it is really that bad. With the initial German setup, the forty mines is a little daunting for the Americans, but with the SSR of removal of four after setup makes it a little better for the Americans so that at least they can get to the river. The Germans have a small force but in positions that can control all all of the river and the Gustav Line, if positioned properly. Given the SSR to be able to see units in the Gustav Line by the Germans gives them the greatest advantage. They can fire on the Americans without them being able to return it. But I found that I setup most German units near the river. This gives them the added bonus of adjacent fire if the Americans ventured that close as well as being able to fire down the Gustav Line. But this is only good for the opening setup, once the Americans make there choice for the crossing the Germans will flock to that location with all guns to fire on it and particularly the ENG's. German OBA and mortars can also provide the topping to double-demoralize any remaining units. For the Americans they will just have to suck it up and try to cross. For my crossing the Americans received average leaders. There were a couple with morale bonus, which helped, but the low morale made it hard. I decided to keep the attack together and go for one spot, the edge by San Angelo for one crossing and the other about a kilometer up river at the bend. Both spots could be attacked by the Germans from two hexes but not directly. This also provided the ability to move as a group and if one crossing site was destroyed the other was just nearby. So the Americans moved up in the foggy night. The ENG's moved into the Gustav Line river hexes and started to dig in. The Germans reacted with OP fire, OBA and mortars with little effect. They also began shifting the troops defending the northern part of the river south. American infantry positioned behind the ENG's to go as soon as they could. In the next turn German fire gets it first kill on a ENG. Reducing and demoralizing it, it runs for the nearby woods. The other near San Angelo successfully digs in and INF's move in. The Germans hit them with mortars but with no effect. Next turn they two units cross but one is killed by German OP fire from INF's and a machinegun strongpoint. With one over the river the Americans call in OBA disrupting one German INF. Fire from another HMG/INF unit demoralizes the Americans, but they have crossed and have a toe hold on the west side. The Germans look to reduce this quickly. They go for an assault on the American position and destroy the demoralized platoon. With the units flocking to this site the other American reduced ENG recovers and begins to ferry troops across. The Germans shift other reserves to this site to try to stop them. Once again the American units are demoralized and are destroyed in the assault. By now it is turn 10 and the game is in the Germans hands. Failing to cross the Americans pull back to recover. In reading some of the real AAR's for this battle, the one that strikes me the most is what the German commander said. He was not concerned with attack over the river once it began as he knew exactly where to concentrate his counter-attack. He said that he was more concerned before the assault as to where it would come from and if it was supporting the British assault several miles down river. Once it began and he knew the scale he was then free to deploy the rest of his troops to the British attack. He also stated if the Americans had just stayed on the other side and demonstrate possibly attacks he would have had to hold his troops watching the Americans rather than helping to stop the British. I though this a good lesson for the battle. Sometimes it is not the attack you make but the one you threaten to make that can win it for you. |
||||||||||||
| 2 Comments |
Great write-up Alan! Do you see any hope at all for this scenario? Or is just bound to forever be one of those "learn why it failed" PG outings?
Thanks Shad, As for hope for this scenario, as is it is hopeless. I did notice some old AAR's by GeneSteeler, that he got his hands on the original design from Dave Murray. He really like it and though that the VC's gave the Americans more of a chance.