
|
Hill X Alaska's War #4 |
||
|---|---|---|
| (Attacker) United States | vs | Japan (Defender) |
| Formations Involved | ||
|---|---|---|
| Japan |  |
Adak-Attu Occupation Force |
| United States |  |
17th Infantry Regiment |

| Total | |
|---|---|
| Side 1 | 5 |
| Draw | 0 |
| Side 2 | 4 |


| Overall Rating, 9 votes |
|---|
|
2.56
|
| Scenario Rank: 870 of 913 |
| Parent Game | Alaska's War |
|---|---|
| Historicity | Historical |
| Date | 1943-05-12 |
| Start Time | 06:00 |
| Turn Count | 30 |
| Visibility | Day |
| Counters | 33 |
| Net Morale | 1 |
| Net Initiative | 0 |
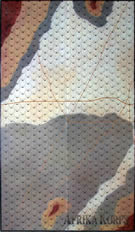
| Maps | 1: AK3 |
| Layout Dimensions | 88 x 58 cm 35 x 23 in |
| Play Bounty | 153 |
| AAR Bounty | 147 |
| Total Plays | 9 |
| Total AARs | 5 |
| Battle Types |
|---|
| Hill Control |
| Conditions |
|---|
| Hidden Units |
| Severe Weather |
| Terrain Mods |
| Scenario Requirements & Playability | |
|---|---|
| Afrika Korps | Maps |
| Alaska's War | Base Game |
| Battle of the Bulge | Counters |
| Guadalcanal | Counters |
| Introduction |
|---|
|
First Battalion, 17th Infantry had as its initial objective a rise known as Hill X that dominated Holtz Bay. The height needed to be secured on the invasion's first day, but the troops became disoriented in the fog. The battalion commander claimed they had taken the objective, but it turned out to be the wrong -- and much lower -- hill. Alerted by the activity, the Japanese rushed to occupy the correct hill and quickly dug in. |
| Conclusion |
|---|
|
The Americans had given the Japanese all the time they needed, and had great difficulties locating the Japanese fighting positions and digging them out one by one. When the battalion finally called off the attack and reported success to division headquarters, the Japanese still held the back slope of the hill and two more days of vicious fighting remained before the hill would actually be secured. |

|
|
|---|
| Imperial Japanese Army |
|---|
|


| Army |
|---|
|


| Americans slaughtered | ||||||||||||||
|---|---|---|---|---|---|---|---|---|---|---|---|---|---|---|
The Battle(visibility = 6 hexes due to heavy fog) American forces march toward the hill. The Japanese are dug-in and hidden. Gunfire breaks out and over the next few hours the Americans are cut totally to pieces. They are unable to get a secure hold anywhere on the hill. At the 20 turn mark, the Americans have still not yet inflicted a single casualty and are down to 4 non-mortar steps. The Japanese accept the American surrender. JAPANESE VICTORY!!! AftermathThis wasn’t even a match. The Americans, without OBA, are forced to advance against the hidden defenders. Once spotted, they can engage in a long range fire fight or try to advance. The difficulty is in the terrain and morale. The Japanese, with their +1 leaders, were at morale 10. This made them extremely hard to break and easy to recover. The Americans are firing uphill against dug-in defenders (2 left column shifts). The Japanese are firing down into the muskeg (1 right column shift). So, any guesses as to who will win the long range fire fight? Perhaps I was impatient, but I chose to charge. I tried getting a few units around the flanks of the hill, but these men were banzai attacked (read +3 column shifts for Japanese INF, leader, better morale) and were subsequently killed really quickly! I just can’t see the Americans having much chance at this one at all. Maybe with some big ass artillery they could have broken a few units then advanced into the hole, but with only two mortars vs. dug-in units, they didn’t have enough bombardment power. The muskeg also made the advance and any flanking attempt ponderously slow! Scenario Rating 2/5 – Not a good scenario. Too brutal against the Americans. At least the previous two scenarios felt like the Americans had a chance of doing some damage… |
||||||||||||||
| 0 Comments |
| Alaska's War Scen 4 Hill X or Lucky to X-scape |
|---|
|
The Axis set up totally on the Arctic Hill mass. The Allies set up opposite on the 03xx hex row. The Allied advance was a little ragged due to miring and long range mortar fire. This was not unexpected. The Allies had an Officer in position to help these stragglers along. Then Axis Hmgs got into the act causing more problems, but by 0800 the Allies were up in good strength and the attack on the hill began. The Allies had both Hmgs under a Capt and a Lt who both had combat modifiers bringing the total firepower to the magic 22 column on the direct fire results table. Also by this time both Allied mortar platoons were within line of sight of the 40 meter heights. The initial Allied assault on the Axis foxhole line on the Axis left was successful. By 0930 the Allies were on the 20 meter level in strength preparing to assault the top of the hill. But the Allies at that moment were not ready to continue with only 3 platoons combat ready and two of them were locked in an assault. By now Allies had suffered two step losses and several demorializations and disruptions. In addition the stragglers had not come up yet. Two full platoons were struggling with the muskeg and could not seem to get going. Although the Allies Hmgs had done some good work up to that point their strength was needed in the upcoming assaults so the Allies attempted to move them up to the 20 meter level also. The Axis had suffered too and they were not about to just sit there and let the Allies reduce their positions one by one. In this spirit the Axis reenforced the ongoing assault with two fresh platoons one an Hmg. It came out, after all modification, as the 24 column on the assault table. Both sides lost a step on the first exchange. Then on the next turn the Axis reenforced the assault with a full newly recovered Inf platoon. The Allies could only muster a 9 column with three steps in the hex. This time the Axis were on the 30 column and rolled a 6 3 step losses and it was a minor miracle that the two allied leaders in the hex survived.(One of them was our own Lt. Obannon) The Allies played several more disasterous turns and then retired after loosing 16 steps to 5. I didn't even bother counting up the points. A once promising advance dissolved in the face of high Axis morale and the inherent Axis assault bonus.(Some may claim that the extra turns were played to make sure a safe escape for a certain campainging Lt.) Unless some facts emerge in the future, the answer to that question is lost to history. |
| 0 Comments |
| Alaska’s War, scenario #4: Hill X | ||||||||||||
|---|---|---|---|---|---|---|---|---|---|---|---|---|
This one wasn’t too bad, as the hill area to fight over is pretty limited and it’s pretty straight forward, head for the hill and fight it out. After taking causalities on both sides I was worried about winning as the Americans but then I realized the Americans get two points for each controlled Arctic Hill where the Japanese only get one point for each controlled Arctic Hill hex. This kind of ended historically as the Japanese had control of back side of the slope the Americans had the front side but to my surprise the American had a Major Victory by points! |
||||||||||||
| 0 Comments |
| "X" marks the spot - for American catastrophe | ||||||||||||
|---|---|---|---|---|---|---|---|---|---|---|---|---|
BLUF: Results similar to the other two US losses. A straight forward scenario. Major Japanese Victory: ( 31 VP to 6 US VPs). Japanese stayed dug in with a deliberate defense of the high ground, the US conducted a frontal assault across difficult terrain of the Muskeg; getting cut to pieces at the base of the hill. Japanese die rolls were amazing, and the US just couldn't muster the momentum necessary to mass Recommendation: Not a lot of tactical options, but the US must know how to push their forces and firepower. It is not gonna be easy for them. Enjoyable and I'd play it again because, though improbable due to the terrain and dug-in advantages of the defender, I believe the US can win. But not this time. Casualties: Japan: 6 steps (1.5 INF PLT and 1.5 HMG PLT) no leaders (40% casualties) US: 14 steps ( 2 Companies = 5.5 x INF PLTs, and 1.5 x HMG)no leaders (58% casualties) Plan: Japan - All units began dug-in and Centered on their 10-0-1 Maj in 1032, there was a successive integrated defense of the hill. Primary defensive belt was 0935 - 9-0-0LT w/ INF PLT, 0936 - 9-1-1 CPT with HMG and INF PLT, 0931 -9-0-0 LT with HMG and INF PLT. The reserve force was the MAJ, with 2x INF, and a LT and INF in 1031. In support in 1130 was the 81mm MTR. Japanese withheld fire until the US was 3 hexes out. US. The US had an excellent leader draw and assembled in two echelons. The Mortar batter dug in at start in 0329,0330 with an 8-1-1- SGT and 2 x 81mm providing direct lay fires against the first row of Japanese defenders all game. The first line was 6 x INF PLTs, followed by the supporting fires echelon behind it with 1 x HMG w. an INF PLT in tow separate hexes, and a reserve PLT. All leaders were integrated to support morale checks and mass direct fires. I decided I needed to begin my assault no later than Turn 15 if I was to have any hope of clearing the majority of the hill. Execution: 0600-0800 (turns 1-9) Humping through the Muskeg and initial contact: The US advance met some resistance from the muskeg and it took some time for one HMG to catch up. As the front of the US line advanced to within three hexes of 0931, Massed Japanese opportunity fire caused the first step loss due to multiple demoralization. The US returned fire with a 4 x PLTs providing a 24 fire power group and the mortars on 0931. At 0830 this caused a step loss on a Jap INF PLT and it fled to the backside of the hill where it recovered and dug-in its secondary positions. The US Mortars took out a an HMG step too. 0815-0915 (turns 10-14) Potshots and battlelines: The US side mad slow progress, moving forward only one hex to try and spend some turns suppressing the Japanese line with mortars and HMGs before conducting the frontal assault. American rolls were abysmal with no effects. The Japanese on the other hand were successfully suppressing the Yanks and took out a HMG step with opportunity fire. By Turn 15, I was sufficiently recovered to try and advance on the main battle line. That's when catastrophe struck. 0930-1000 (turns 15-17) Massacre: The Japanese one the initiative and started to break up the American advance with mortar fire and recovering disrupted units in time to get in adjacent shots with a +3 column shift and, again, amazing rolls of double 1s, 12s, 11s, 3s. The US was able to bring 2 x INF PLTs and A Leader into Assault on 0932. But the Japanese sufficienty obliterated most of it. The end result was 6 US step losses, and th rest demoralized with demoralized leaders and a drop in initiative. 1015-1030 (turns 18-19) Counter attack: The Japanese won multiple activations and sent an INF PLT to reinforce 0932, and the additional assaults and fires as caused 6 x US step losses. At this point the American commander began withdrawing forces back to the line of departure. 1045-1330 (turns 20-30) Fighting Withdrawal: The US slowly slogged their way back across the Muskeg to get out of enemy direct fire range. It was slow going with mostly 100% disrupted/demoralized American forces moving back. The only thing that saved them was excellent US massed mortar fire that had enough successful die rolls to take out 4 x Japanese steps and suppress their forward line... too bad they couldn't do it at the beginning of the attack. SUMMARY - The US had sufficient firepower and excellent leaders. The Japanese had excellent defensive terrain, stronger morale and fair quality leaders. The truthful difference in this one was luck. It seems to me probability smiled on Japanese, who were able to take better advantage of the column shifts provided by the Muskeg. The US on the other hand, could not get the rolls needed to overcome the hill and dug-in column shifts reducing their firepower. |
||||||||||||
| 0 Comments |
| X Marks the Spot | ||||||||||||
|---|---|---|---|---|---|---|---|---|---|---|---|---|
On May 12, 1943, troops from the 7th Infantry Division were tasked with taking Hill X from the Japanese Adak-Attu Occupation Force. Most of the US units advanced through the fog south toward the well-entrenched Japanese positions, with a small contingent attempting to move east for a flanking option. Slowed by trudging through the muskeg, the primary group wasn’t fired upon until 0645 hours. The US began to assault the ridge at 0800 hours, and by 0930 they had taken the east end of the 40-meter hilltop. Major Ibata was killed in the skirmish, and Captain Kobayama took command. Several exchanges of fire took place along with hand-to-hand fighting over the next 90 minutes, and the Americans finally controlled the hilltop at 1230 hours. The Japanese warriors mustered and formed two groups that attempted separate banzai charges; however, both were repelled by 1315 hours with all Japanese troops eliminated. This scenario attempts to capture the taking of a critical hill in the Aleutian campaign. The objectives include 40-m hex control and step loss. In the historical briefing, it is noted that the American troops were disoriented due to the heavy fog and captured the wrong ridge first before proceeding to the actual Hill X. This is not really reflected in the scenario, although they need to trudge their way across muskeg, they are not really disoriented. This is probably due to the fact that the scenario was written during the period of 3rd edition rules, and it would seem more historically correct if the US were required to either capture an alternate ridge, e.g. hex 0933, prior to ascending the 40-meter hill or use the disorientation rules of the 4th edition for at least the first 10 turns or so. The final outcome of this scenario was a major victory for the Americans with 23 VP’s to 4 for the Japanese, which is not reflective of the difficulty of the real action. The skewing of the outcome can be attributed in part to the weakness of the Japanese leaders that were randomly drawn (there was only one leader that was 1-0 with all the others 0-0) and the preponderance of US initiative, which they held for 21 of the 30 turns. |
||||||||||||
| 0 Comments |