
|
Massacre Valley Alaska's War #3 |
||
|---|---|---|
| (Attacker) United States | vs | Japan (Defender) |
| Formations Involved | ||
|---|---|---|
| Japan |  |
303rd Independent Infantry Battalion |
| United States |  |
17th Infantry Regiment |

| Total | |
|---|---|
| Side 1 | 3 |
| Draw | 0 |
| Side 2 | 6 |


| Overall Rating, 9 votes |
|---|
|
2.89
|
| Scenario Rank: 776 of 913 |
| Parent Game | Alaska's War |
|---|---|
| Historicity | Historical |
| Date | 1943-05-12 |
| Start Time | 06:00 |
| Turn Count | 24 |
| Visibility | Day |
| Counters | 30 |
| Net Morale | 1 |
| Net Initiative | 0 |
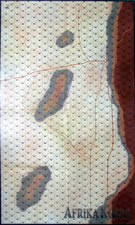
| Maps | 1: AK2 |
| Layout Dimensions | 88 x 58 cm 35 x 23 in |
| Play Bounty | 151 |
| AAR Bounty | 147 |
| Total Plays | 9 |
| Total AARs | 5 |
| Battle Types |
|---|
| Exit the Battle Area |
| Conditions |
|---|
| Hidden Units |
| Off-board Artillery |
| Severe Weather |
| Terrain Mods |
| Scenario Requirements & Playability | |
|---|---|
| Afrika Korps | Maps |
| Alaska's War | Base Game |
| Battle of the Bulge | Counters |
| Guadalcanal | Counters |
| Introduction |
|---|
|
When the 2nd Battalion resumed its advance, it found it was much farther from its objective -- Sarana Pass -- than anyone had believed the night before. As the troops pushed forward to make up for lost time, they came under heavy Japanese fire from both flanks as well as their front. Regimental commander Col. Edward P. Earle went forward to maintain the battalion's advance through personal example. |
| Conclusion |
|---|
|
With their colonel walking point, the American battalion began to make some progress. Things fell apart when he was killed by a burst of machinegun fire, and the day ended with the pass still in Japanese hands. The Americans had taken significant casualties but so far had not deeply penetrated the Japanese defenses. |

|
|
|---|
| Imperial Japanese Army |
|---|
|


| Army |
|---|
|


| Massacre Valley Lives up to its Name | ||||||||||||
|---|---|---|---|---|---|---|---|---|---|---|---|---|
Two tracks diverged on an arctic Muskeg And I, I didn’t choose the lesser one And that has made all the difference… SUMMARY: Major Japanese Victory. Massacre Valley lived up to its name. It is a low counter, and generally fast moving scenario with the US Player moving against the clock to penetrate the Japanese defenses and move off board. JAPAN VPs: 29 vs. 14 US VPs Japanese Casualties: 14 of 15 steps (94% casualties), 2 of 4 leaders (50% casualties) US Casualties: 7 of 23 steps (31% casualties), 2 of 6 leaders (COL and MAJ – 33% casualties) PLUS Steps & leaders remaining on board: ALL - 16 of 23 steps and 4 of 6 leaders. SITUATION: Key Terrain – trails that allow for unimpeded movement of Americans through the Muskeg and Arctic Hills. Hexes 1406, 1212, 2110, 2010, 2031, and 1632 are choke points where the Japanese player can bring to bear his hidden units to ambush US forces to optimize column shifts and disrupt/block US movement. US Courses of Action: The US generally has three courses of action. Advance up the western route, advance up the central route, or advance on the eastern route, which again merges to the central route to get off-board. Any other course of action takes him into restricted terrain and risks losing cohesion. For his organization, the US player can either advance as a single “flying column” or split forces. The pace of his heavy weapons may dictate the rate of march. Also, splitting forces is only advisable between the central and western routes, where they can be mutually supportive of each other, and perhaps one force can bypass or envelop Japanese blocking positions at the end of the map. Splitting forces any other way just serves to desynchronize the plan and allow the Japanese for the potential of local superiority. Japanese Courses of Action: The general Japanese courses of action are: 1) defend forward with all forces at or forward of the east-west track. The benefits are in stopping the US cold early on and making it that much harder for them to recover. However, the risks outweigh that benefit if the US can successfully defeat or bypass the forward defense they will be able to make an end run with little chance for he Japanese to stop them. 2) Defend the final ridge en masse. The benefit is to have all Japanese units and local counterattacking force dug in on the key terrain the US player must almost certainly pass through to get off board. The risk is that the US player will likely be able to arrive with a fully cohesive force, and, if playing with strategic movement, the US player will have sufficient game turns to reduce the Japanese strongpoint. 3) Defense in depth. This approach is for the Japanese player to distribute his forces so that US forces are always under observation and unable to use strategic movement, while he uses hidden forces to ambush and disrupt US forces forward in a disruption zone, so they may not have the cohesion to tackle the main defensive positions on the ridge at the exit points. The risk is that the US will be able to overwhelm or bypass forward defenses if he discovers them. Japanese Plan: COA 3 – Defense in depth; DELAY, DELAY, DELAY 1. Prevent Ally from using strategic movement by keeping him under constant surveillance 2. Use hidden movement to surprise/ambush 3. Engage Early and Often by establishing a disruption zone between the southern hill and the northernmost ridge. 4. Dig in a strong point at the end of the trail. This will be the main effort 5. Setup: a. Hill 1 (hex 1406) 1xINF PLT and leader – task: defend in order to delay/disrupt US advance b. Hill 2 (hex 1212) 1 x INF PLT and leader – task: disrupt in order to delay and disrupt; screen in order to maintain visual contact for OBA c. Ridge (hex 2110) 1 x INF PLT and CPT – defend key crossroads in order to delay US advance. d. Exit points (hexes 2031) 2 x HMGs, (hex 1931) 1 x 81mm mortar with leader (-1 morale modifier), and (hex 1832) 2 x INF. Task: Defend in order to prevent US penetration. US Plan: COA – Central trail with a single “flying column”. Try to stay together so as to not be broken up by fog of war rolls and to maintain a fast tempo. Execution: 0600-0645. The US column advances from the south up the initial track. The lead platoon gets within 4 hexes of the hidden Jap position and luckily spots it. This allows the US player to call for OBA and suppress and luckily disrupt the Jap platoon. The following turns the lead American platoons assault and defeat the dug-in Japanese platoon with no loses. 2 Jap steps and leader eliminated. A good start for the US. 0700-0800. The US column proceeds to turn west and the lead platoon is pinned by Jap platoon in hex 2110. When the US decided to send the COL up with a platoon to mass fires and leaders, a historical event happens. Jap opportunity fire causes a step loss on US platoon and kills the US COL as they move up bypass. This causes decapitation and stalls the advance. 0800-0915. The US is able to suppress the Japs enough advance and bypass up the western track. US forces from the earlier assault rejoin the column, but it must leave behind a demoralized PLT that failed to rally. It does eventually rally, digs in, and establishes a blocking position to prevent Japs from hex 1212 from pursuing. OBA caused 1 x step loss on the Japs as they move from hex 1212 in an attempt to pursue the column. The remaining Jap INF Platoon from 2110 are able to pursue the US column as the US mortars start to lag behind. At 0845, the Japanese position in 2031 is able to spot the approaching US column and harasses them with OBA and mortars. The US is able to observe the mortars and use counter fire to successfully destroy the Jap 81mm mortar at 0900. 0930-1000: The US column advances to vicinity hex 2031 and the lead platoon fails to uncover the hidden Japanese HMG nest straddling the track. They open fire. In a rash move, the US attempts to assault since they are in a close ambush. The result with Japanese fit fire is that the US loses. 5 US steps, while US HMGs move into the arctic hills to flank the Jap position. 1015: The Japanese maneuver their reserves with 2 x Jap INF platoons getting adjacent to the US HMGs. A US INF platoon is sent to link up with the lagging mortars that are about to be overrun by pursuing Jap platoons in the rear. The US Infantry platoon arrives in time to defeat the Japanese assault from the rear. Japs lose 3 steps. 1030-1115: Over nearly the next hour, a firefight and assaults ensue back and forth over the US HMGs and the Japanese HMG position. The US is not having any luck rallying fleeing units, but the Japs lose both of their Infantry platoons, and 1x HMG takes a step loss and flees north along the track. 4 JAP step losses. Any chance of the US player getting all his units off the board is gone. His last attempt will be to break the Japanese HMG position to hopefully get 1/3 of his units off the board, as too many have not rallied. 1130-1145: Massive direct fire and OBA on the remaining Japanese HMG causes 2 step losses. The Jap HMG that fled rallies and is able to still block the exit track. By this time the US unable to exploit further and get off the map, although it has all but massacred the entire Japanese contingent. US Observations: 1. Decide who/how much you are willing to leave on the board early on. Suffering demoralizations early on can be devastating to maintaining tempo. Decide how many times you will keep a leader or the force from moving forward while waiting to recover disrupted and demoralized units. 2. Protect your units from Decapitation. The loss of the Colonel will halt your advance for basically two turns. 3. Fix discovered Jap units with arty and direct fire, but keep your units moving and bypassing while they are suppressed. 4. Your mortars and HMGs will determine your rate of march. The mortars might be a sacrificial lamb early on. You can only fire them 4 times in the game if you expect to have any chance of getting them off the north edge. 5. Try to keep you HMGs in the second rank of your column with your best fire support leader, it might make for a slower march, but having 20+ fire value that can combine with troops in contact should decimate a Japanese position prior to a US assault. 6. Do not rush to failure. When a Japanese HMG ambush is sprung, if might prove better to let the arty and direct fire reduce the position before sending in the assault to be decimated by first fire. This will have to be a call made considering how vulnerable the unit in the ambush hex is. 7. Remember the plan. I advise the central trail, as it is the best piece of terrain for keeping the relatively short range Japs at a distance. However, I ended up going down the western trail once my forces made contact and were pinned. Japanese Observation: 1. Dig-in and force the US player to have to attack you. The first fire advantages, being on a higher elevation, and being Japanese (non-HMG) will maximize column shifts in assault. 2. Maximize HMGs in one location to create a true strong point that can range all 4 hexes of a US advance across open terrain or Muskeg. Consider having a Jap infantry Platoon or two that can relieve an HMG once they get locked in close combat in order to move the HMG to a alternate position at the end of the trail and to gain a +1 shift modifier for the Jap infantry in the assault. 3. Use indirect fire to harass the US advance, but use it as your last actions of a turn. Normally, OBA is worth using up in the first three actions before Fog of War rolls, but Jap OBA is so weak, only a very lucky strike will cause results. Use it when all your important actions are complete. 4. The Japanese mortar should consider being placed where it can benefit from direct observation of the US march so as to get the +1 column shift. The mortar will be susceptible to US Arty counter fire. Make sure they are dug-in and you might want t consider moving them into a Muskeg hex to gain the -1 bombardment modifier along with a -1 for being dug-in. It will offset the +1 for being mortars. 5. I placed a platoon on the eastern hill to disrupt any US eastern route COA, but that platoon was misspent. Maybe only because the US player went west. But from the eastern hill, it is very difficult for any Japanese forces to be able to rejoin the fight if bypassed. 6. Japanese leaders. My leaders were not stellar, with only a single LT that had a morale modifier. I risked my set up with only one leader in each defensive point. I might have wanted to consider one less defensive point to have an additional leader at the main effort. Balance Considerations: Favor balance toward US: Do not play with Fog of War Favor Balance toward Japanese: Do not play with Strategic Movement rule Overall – a scenario I would play again, and found more enjoyable and tense than I thought I would. |
||||||||||||
| 0 Comments |
| Japanese ambush, harass and assault to the last man | ||||||||||||||
|---|---|---|---|---|---|---|---|---|---|---|---|---|---|---|
May 12, 1943 – Americans have just landed on Attu. After the previous days fighting (and lack of success), they attempt to quickly cross through Massacre Valley. But the Japanese are hiding and waiting… The Battle(visibility = 8 hexes due to heavy fog) Americans enter in the south, they travel along the track along the muskeg unaware of the Japanese hiding in the hills ahead. The Americans are efficiently cut down by close range Japanese fire. The Japanese then close in for an assault on the tracks. Another American platoon is vapourised by the Japanese HMG. Americans fight back and they trade casualties. Just past the one hour mark and already 8 American steps have been lost! Americans go around the Japanese while leaving a company behind to finish them off. It takes another 45 minutes and another full platoon of casualties, but eventually the Japanese HMG in the south is overcome by the second hour mark. But the fight versus Japanese INF continues. Meanwhile the lead American forces meet more resistance in the west. Japanese send in some reinforces to assault the Americans and two platoons are demoralized. Japanese attacks and assaults are relentless and the American body count continues to soar! It takes until the three hour mark for the south Japanese ambush force to be defeated. The Americans try to race northward along the track. The last of the Japanese ambushers make a stand on the track in the arctic hills. Japanese win initiative and at the 4 hour mark they banzai attack the Americans eliminating two half platoons instantly! The Americans continue to push northward, but they can’t get by the Japanese infantry in the hills. The American Colonel takes a mortar platoon across the muskeg to the eastern track and exits to the north. The remaining American forces try to push through the Japanese infantry but they are soundly and repeatedly beaten. By the end, no infantry make it past. JAPANESE VICTORY!!! AftermathAmerican VPs: 8 casualties inflicted 1 mortar platoons exited the map 9 VPs Japanese VPs: 7 full platoons and 1 half platoons eliminated Rest of the Americans (except the mortars and Colonel) still on the map. 27 VPs JAPANESE VICTORY!!! (it was such a sound defeat, I had to say that again!) This battle was “similar” to Scenario #2, but it was a bit more “spread out”. Despite the slight increase of time available and ability to use the tracks, time pressure was at a premium. Japanese focus to delay and harass the Americans was very successful. A fun battle which didn’t take long to play through. I don’t feel that my Americans had a “great” chance but my Japanese opponent, Passionate_Always played a shrewd, and sometimes risky game, which obviously paid off with a very solid victory. Scenario Rating 3/5 – Good scenario with hidden units. Can play in single evening. Worth playing. |
||||||||||||||
| 0 Comments |
| Alaska’s War, scenario #3: Massacre Valley | ||||||||||||
|---|---|---|---|---|---|---|---|---|---|---|---|---|
Alaska’s War, scenario #3: Massacre Valley *I had almost forgotten one of my favorite scenario supplements; Alaska’s War. I just love the subject, the large spaces to maneuver on and the low units count but interesting terrains types. I had only played Yamasaki’s Attach & Kiska Evacuation scenarios and had a very enjoyable time playing both, so now into my third scenario from Alaska’s War; Massacre Valley. In fact, I plan on completing all the scenarios from this supplement this year. *The Americans must enter south and exit north and eliminate Japanese that get in their way, the Japanese get victory points from either not allowing them to exit for any reason including step reduction of both units and leaders or just not getting off the board. It’s a long distance & bad terrain, that doesn’t pay to get off the path into Muskeg which can disrupt or demoralize you after time. The Japanese are hidden along the most likely paths the Americans must take to exit, all the way with ambushes setup. Both sides have a little off-board artillery but the Japanese side must have a pop-gun! The Arctic Hills are pretty much configured as the Map indicates but I put the markers on anyway. No Cold Weather Rule on this scenario. The combat modifiers must not be forgotten on the Muskeg terrain, as it can be key! *So far the Americans have entered from the south and ran into their first ambush with the bad results of losing 1 step of infantry already but they have disrupted a Japanese unit and leader in return. I am not sure that status will last long with a 9/8 morale factor however. The Japanese do not have very many units, so will only attack at the right moments and have setup all along the Americans route with one large group toward the north end to really put a plug in the planned exit point of the Americans. The Americans must stay together to use their higher fire-power must not take too long, as there are only 24 turns to cross the long end of the map with terrible terrain conditions. Three turns are now past, lets see what happens in the next 21 turns? *The battle progresses and things get too hot and slow on the main trail for the Americans, so I make the decision to take the flanking trail in hopes of avoiding the middle point ambush I know is waiting for me, even though it will take longer. The gamble didn’t pay-off, as where the off shot trail converges back to the main trail again, the Japanese were able to activate two turns in a row, to beat the Americans to point where they would again have to fight their way out of another ambush. Some of the units avoided this and pushed forward to the last ambush point where the third group of Japanese awaited them. I see why they called this scenario Massacre Valley! *The Japanese have lost 3 steps while the Americans have lost 4 steps. The Americans have now run out of time, only exiting 5 steps of Infantry and two leaders. The Japanese get a total of 21 points for any reason a unit step or leader does not exit. The American received 9 point total vs. the Japanese 21 points, for a clear Japanese victory. *My gamble of trying the end around move clearly costs the Americans the game on this scenario. It might have been a closer match just to move straight ahead and take on everything but I am not sure, as the first leg of this battle I tried this and units really got tangled up. Either way, the American 81mm & HMG units are too slow for anything but direct movement. I enjoyed this scenario a lot, the big open spaces with lot of movement for both defender & attacker, not to mention most scenarios from this supplement have 30 counters or less. |
||||||||||||
| 0 Comments |
| A Sprint past the Massacre | ||||||||||||
|---|---|---|---|---|---|---|---|---|---|---|---|---|
After the previous night’s fighting on Gilbert Ridge, the morning of May 12, 1943, brought some warmth to the units of the 7th Infantry Division, but found them far from their goal of Sarana Pass. Heading out at 0600, they marched north along the track through the valley, but were slowed by fire from Japanese troops of the 303rd Independent Infantry Battalion around 0645. Two platoons had headed east, while the remainder of the US force took the western track. The eastern group retreated west to join the others, followed closely by two platoons of Japanese infantry. Japanese units were spotted on the west ridge at 0645 hours, but by 0800 two US platoons were past them and headed north out of the valley toward the pass. Fierce fighting raged in the valley, but three other US platoons managed to pass north by 0930. A major engagement continued on the north central road between combined arms platoons of both sides until 1145 hours, but by that time seven US platoons had made it through the valley to the pass. The primary objective of this scenario is American unit exit off the north side of the map with eliminated units also adding to the VP total. The Japanese had dug in on the west ridge and central hill to cover both track options for northward travel, but in retrospect, digging in between the two adjacent western tracks would seem a better position for at least one combined HMG/INF group. Because all the Japanese officers were 0-0 with a single 0-1 exception, combined fire from adjacent hexes wasn’t possible, which limited their ability to slow the US surge north. In the end, the US had eliminated 9 Japanese steps while exiting 14 more for a total of 23 VP’s to the Japanese total of two US steps on board and 7 eliminated for a total of nine VP’s, a US victory |
||||||||||||
| 0 Comments |
| Alaska's War Scen 3, Massacre Valley or I got blisters on my feet just moving the pieces |
|---|
|
This Muskeg and Arctic hill terrain is TOUGH. Hats off to the 7th Infantry Division and their Japanese opponents. The conditions are making me miserable. I find myself wishing I were playing a Jungle scenario instead. Imagine the 7th had been trained to fight in the desert. They had spent an extended period of time training in the Mohave desert before being shipped to the Alaska. What a suprise. The Axis set up on the hills at extreme northern end of the board, dug in. The Allies enter from the South edge on the western trail. It took the Allies until 1015 to run into opportuntity fire from a Japanese position. I made an error in the long approach forgetting the "free" hex rewarded to those units that move their entire move on the track or road. It could have save several turns. I decided not to bother. It was a very long approach and I wanted to finish sometime before Easter! The Axis foxhole line followed the hill line right down to the trail exits on the low ground. The Allies decided to attack the southern most axis position on the arctic hill and attempt to get more units up there to assist cleaning out the Axis positions one at a time. As with the last scenario the Allies assaulted the Axis position and eliminated a step. The Axis instantly counterattacked. The Axis abandoned their nearest foxholes and reenforced the ongoing assault. This went back and forth and turned into a protracted series of assault and counter assault with both sides suffeing step losses and demorializations and disruptions and recoverys. The Allies did manage to get a number of units off the board but at 1245 a previously demoralized axis inf platoon and a Lt. recovered and occupied road hex 2035 blocking the Allied exit route. In the end the Allies were only able to get 10 steps and 2 leaders off the north edge. Axis victory. The Allies finished with 24 points and the Axis 18. The allies fell short of the 2 to 1 victory point ratio needed for victory. The approach march was too long and unnessary. I understand the the axis could have set up anywhere but they would have been easily out flanked or by passed just about any where they set up. There just were not enough Axis units to cover all possible routes. Only at the extreme north edge did defensive terrain meet up with the most obvious Allied route of advance. So why oh why make the Allies march so far and so long? My Lt. Obannon survives still and finished with 2 net points to add to the one he already had. This brings him to 3 leadership points saved. He was under fire 3 times and in assault 3 times. He failed one morale check and passed two others. He was credited with destroying two enemy steps. |
| 0 Comments |