
 TBRa002

|
Across the Dubysa Raseiniai #3 |
||
|---|---|---|
| (Attacker) Soviet Union | vs | Germany (Defender) |
| Formations Involved | ||
|---|---|---|
| Germany |  |
6th Panzer Division |
| Soviet Union |  |
2nd Tank Division |

|


| Overall Rating, 3 votes |
|---|
|
3
|
| Scenario Rank: --- of 1093 |
| Parent Game | Raseiniai |
|---|---|
| Historicity | Historical |
| Date | 1941-06-24 |
| Start Time | 10:00 |
| Turn Count | 20 |
| Visibility | Day |
| Counters | 93 |
| Net Morale | 1 |
| Net Initiative | 0 |
| Maps | 2: 3, 4 |
| Layout Dimensions | 56 x 43 cm 22 x 17 in |
| Play Bounty | 175 |
| AAR Bounty | 157 |
| Total Plays | 2 |
| Total AARs | 3 |
| Battle Types |
|---|
| Inflict Enemy Casualties |
| Road Control |
| Conditions |
|---|
| Off-board Artillery |
| Reinforcements |
| Terrain Mods |
| Scenario Requirements & Playability | |
|---|---|
| Fall of France 1 | Counters |
| Fire in the Steppe | Maps + Counters |
| Raseiniai | Base Game |
| Introduction |
|---|
|
Having chewed up the first lines of Battle Group Seckendorff, the Soviet tankers reached the Dubysa River. On the opposite bank, Seckendorff’s 114th Motorized Infantry Regiment tried to arrange a defensive line to stop them. Most of the battle group’s anti-tank guns had already been squashed under Soviet tank treads, but Seckendorff’s combined arms team did include both infantry guns and full-sized artillery. |
| Conclusion |
|---|
|
Some of the Soviet tanks forced their way over the river, and proceeded to shoot up German artillery and stampede their infantry. The Germans claimed to have stopped some of them by deploying howitzers firing over open sights, but many more of the tanks stopped themselves by throwing tracks, suffering mechanical breakdown or running out of fuel. Battle Group Seckendorff had suffered a second defeat in a matter of hours, and the Soviets weren’t finished yet. |
| Additional Notes |
|---|
|
Functionally, all Pz38t's used from Fire in the Steppe are Pz38a(t)'s, according to the GSR. Fall of France counters are to fill out the Pz35(t) counter requirement. |

|
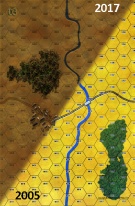
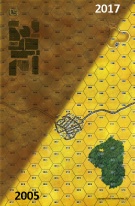
|
|---|
| AFV Rules Pertaining to this Scenario's Order of Battle |
|---|
|
| Heer |
|---|
|


| Army (RKKA) |
|---|
|


| 5 Errata Items | |
|---|---|

|
Two 105mms (ID#s 1204, 1205) have "16-31" fire values in black (direct fire), when they should be in white (indirect fire). (Shad
on 2010 Dec 15)
|

|
The reduced direct fire value of the Heer HMG became 5-5 starting with Fall of France. (plloyd1010
on 2015 Jul 31)
|

|
The morale and combat modifiers of German Sergeant #1614 should be "0", not "8". (Shad
on 2010 Dec 15)
|

|
The reduced direct fire value in Kursk: Burning Tigers is 4-4. (plloyd1010
on 2015 Jul 31)
|

|
Kommissars never get morale or combat modifiers. Ignore misprints. (Shad
on 2010 Dec 15)
|
| #3 Across the Dubysa | ||||||||||||
|---|---|---|---|---|---|---|---|---|---|---|---|---|
Panzer Panic did not have that big of an effect on the German infantry or artillery batteries, it did disrupt a couple of platoons but did not have any demoralizations. Now that cannot be said for the German Panzer reinforcements who come on the board on turn 12, over 50% of the platoons became demoralized with another 25% disrupted. This broke up the German counterattack as they had the Soviet armor in a venerable position for potential crossfire bonuses, but in the end the PzIIs and Pz35ts were no match for the Soviet heavy tanks who quickly and methodically dispatched them. The Soviets cleared the first town, but their meager infantry forces took a beating, losing over 50% and did not give them enough strength to make a good assault on the second town to clear the E-W road. |
||||||||||||
| 0 Comments |
| Held the town, but lost some Arty | ||||||||||||||
|---|---|---|---|---|---|---|---|---|---|---|---|---|---|---|
Once the Arty was lost it was a defeat for the Germans. Otherwise it was a good fight. (Note - this one is good for attempting to defeat the German defensive tactics. Stronger player should be the German.) |
||||||||||||||
| 0 Comments |

| Clear the Road and Eliminate the Hitlerite Artillery! | ||||||||||||||
|---|---|---|---|---|---|---|---|---|---|---|---|---|---|---|
This was a 4-session play-through with the determined & wily, Grognard Gunny led defending elements of German of the 6th Panzer Division in this battle in relatively open terrain on 2 maps. I again led attacking elements of the Soviet 2nd Tank Division. The Germans drew an excellent batch of leaders, while the Russian leaders were middling at best. To secure a major victory, the Soviets must: 1) eliminate more German than Soviet steps (artillery & tanks count double) and German truck units lost also count in this odd scenario, 2) no good order German unit occupies a hex of the east-west road, and 3) at least 3 German artillery units have been eliminated. Once again, this will be hard nut for the combined arms Russian force to crack, with the possibility of an entire German armored battalion arriving as reinforcements from the south sometime after 1100 (game turn 5). We used the FOW, consolidation, excess initiative, strategic movement and extended assault optional rules. We also used these 2 house rules: 1) Road Movement for Mechanized & Foot Units - All FOOT & MECHANIZED units may move on roads at the rate of 1/2 of a Movement Point (MP) per road hex, just like MOTORIZED units, and 2) Standardized Movement for Mechanized Units — All mechanized units may move through clear hexes at a movement cost of only 1 movement point (MP) per hex, instead of 1 1/2. Add one to this cost if moving up, across, or down slopes hexes. Our fast-paced & bloody initial session (game turns 1-3) featured the Russians moving west on the road, on to the Map, seizing the bridge hex & moving adjacent to the town – into heavy opfire and accurately-placed, OBA. On the 2nd game turn, the Germans lost their first AT gun (75mm IG) and the Soviets lost their first infantry step. The third turn became lethal for the Wehrmacht with 7 step losses to a combination of overruns of loaded trucks by the speedy Russian BT-7 light tanks, and also in urban close assaults. By session’s end, German initiative had been reduced 2 levels thanks to these heavy casualties, which also included a leader. The second session (game turns 4-5) featured the entry of the reinforcing German tank contingent in what was otherwise a grim & bloody session for the defending Jerries, who lost 6 more steps – including both mortar platoons – as well as a pair of junior leaders. The Axis initiative level fell again as the Landsers began withdrawing from the 5-hex town on Map 03. Our fast-paced, third session (game turns 6-7) featured multiple captures of German trucks, some infantry and a leader in the north woods on Map 03. Another leader was captured in the open southwest of the 5-hex town. The victory point tall was now 14 for the advancing Soviets and 2 for the German defenders. The Bolsheviks secured at the town and the bulk of their armor began moving southwest across the open plain. The fourth session (game turns 8-10) featured the continued Soviet advance with the loss of another 4 steps, that included a third artillery unit. By mutual agreement the German side conceded a minor Soviet victory at the start of the 10th game turn. There were 6 FOW-shortened game turns of 10 played. This is a relatively-balanced, but very gamey and flawed, one that was fun to play with a cunning and gracious opponent. The victory conditions need a rewrite. As published I give it a generous 3, and note that the Soviet side is a harder pull, and should be played by the more experienced gamer. It is recommended for both SOLO and SHARED play, though the victory conditions need a rewrite. |
||||||||||||||
| 0 Comments |