
 Sap2038

|
Rice Demons Saipan 2 #39 |
||
|---|---|---|
| (Attacker) Japan | vs | United States (Defender) |
| Formations Involved | ||
|---|---|---|
| United States |  |
105th Infantry Regiment |
| United States |  |
106th Infantry Regiment |
| United States |  |
773rd Amphibian Tractor Battalion |

|


| Overall Rating, 0 votes |
|---|
|
0
|
| Scenario Rank: --- of 1093 |
| Parent Game | Saipan 2 |
|---|---|
| Historicity | Historical |
| Date | 1944-07-07 |
| Start Time | 04:00 |
| Turn Count | 40 |
| Visibility | Day |
| Counters | 98 |
| Net Morale | 0 |
| Net Initiative | 1 |
| Maps | 4: 80, 81, 82, 83 |
| Layout Dimensions | 86 x 56 cm 34 x 22 in |
| Play Bounty | 200 |
| AAR Bounty | 168 |
| Total Plays | 1 |
| Total AARs | 1 |
| Duplicates | Saip039 |
| Battle Types |
|---|
| Inflict Enemy Casualties |
| Conditions |
|---|
| Minefields |
| Off-board Artillery |
| Reinforcements |
| Illumination |
| Scenario Requirements & Playability | |
|---|---|
| Saipan 2 | Base Game |
| Introduction |
|---|
|
Before committing ritual suicide, the three senior commanders of Saipan’s defenders issued a final order for their men to attack the Americans in one massive charge: We will search for the rice demons and advance to attack them, killing at least ten people per person, and then all of us will die in honor. I expect all of our troops to fight bravely, and I will die in honor with all of you, praying for the long life of the Emperor and the prosperity of the Imperial nation. More than 4,000 Japanese – soldiers, sailors, and civilian men and women – took part in the three-pronged mass suicide attack. |
| Conclusion |
|---|
|
The brunt of the attack fell on two battalions of the Army’s 105th Infantry Regiment, which suffered 406 men killed and 512 wounded. Lt. Col. William J. O’Brien of the 1st Battalion led his men from the front, a pistol in each hand as he fought the oncoming Japanese at point-blank range. Hit repeatedly, he shrugged off the medics who tried to drag him away and bellowed defiance to his men. His bullets gone, he threw the empty weapons at his attackers, climbed onto a jeep, and proceeded to mow down dozens of Japanese with its .50-caliber machine gun until he was dragged down to be stabbed repeatedly by swords, bayonets, and bamboo spears. Tanks soon arrived to stem the attack, while the 27th Infantry Division’s artillery poured 2,666 rounds into the attacking mob in less than an hour of firing. Burial teams would later count 4,311 Japanese corpses. |

|
|
|---|
| AFV Rules Pertaining to this Scenario's Order of Battle |
|---|
|
| Imperial Japanese Army |
|---|
|


| Imperial Japanese Navy |
|---|
|


| Army |
|---|
|


| Marine Corps |
|---|
|


| 1 Errata Item | |
|---|---|

|
LVT 4 is a one step open-topped APC. Any scenarios where units and leaders start loaded on LVT 4's and enter the board via ocean hexes do not activate in the regular manner. While at sea, all LVT 4's activate like AFV's with leaders, and move toward beach hexes. While moving toward the beach hexes they don't need to use all MPs or move in a straight line. Once they are on the beach, they must follow standard activation rules for both land and water hexes. LVT 4's that are destroyed at sea do not trigger leader decapitation. (Shad
on 2013 May 06)
|
| Saipan 2nd Edition, scenario #39: Rice Demons | ||||||||||||
|---|---|---|---|---|---|---|---|---|---|---|---|---|
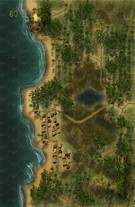
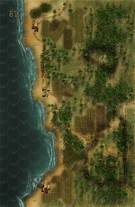
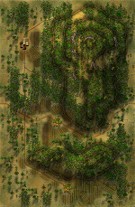
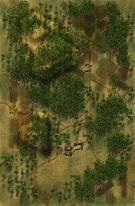
Saipan 2nd Edition, scenario #39: Rice Demons This is a brutal 40 turn scenario with all branches of both sides involved, the Japanese Army & SNLF and the American Army & Marines. The first ten turns of a 40 scenario are in the dark, the Americans do have the ability to shoot Illumination/Star-shells but with the optional rules of 10% of Artillery strength points and with some dudes at the wrong time. The Japanese also have a Morale of 8/8, so the Initiative never goes down. The Japanese must use the darkness to close with the Americans and have three objectives, eliminate 20 American steps with tanks, artillery & LVTs counting double, eliminate all three Marine artillery units and lose, yes lose ten Japanese leaders so show the Banzai attack spirit. The American setup mostly on or around the 40-meter hill on map 83, in hindsight the larger hill on map 81 would have been better, as it would have taken the Japanese longer to get there. The Marine artillery setups up on the 40-meter hills, while the Army setup a perimeter around them but weak in some areas as they have a lot of area to protect and there is an old Japanese minefield between them and is friendly to no one, as the Japanese no longer had knowledge of it. The Japanese enter in three areas, to try and not bunch up too much and actually have a step of Type 95 SNLF tanks that groups with the Infantry for better effect. The Battle is one of the most brutal to fight out and the Japanese that make it in past the American artillery assault and assault as their causalities do not matter. By about three quarter through the scenario, the Japanese had already achieved 2 out of three victory objectives and the Americans had pulled back to regroup and the Japanese also regrouped for another banzai attack. The Americans Reinforcements didn’t arrive until turn 35 in time to straighten out the lines, eliminate the only Japanese armor with a Sherman Platoon, as that thing seemed to survive with the Infantry and leaders a ton of assaults. The downside of the reinforcements, is they actually eliminated the 10th Japanese Leader, giving the Japanese their third victory objective and a major victory. This scenario could playout differently depending on the American setup, the Japanese entry, the dice rolls in some critical moments and a thousand other things. 40 turns of a lot of assaults make this one a longer gameplay but I enjoyed it, off and on over 4 days/nights of gameplay. |
||||||||||||
| 0 Comments |