
 Sap2018

|
Gas Alarm Saipan 2 #19 |
||
|---|---|---|
| (Defender) Japan | vs | United States (Attacker) |
| Formations Involved | ||
|---|---|---|
| Japan |  |
43rd 'Honor' Infantry Division |
| United States |  |
23rd Marine Regiment |
| United States |  |
24th Marine Regiment |

|


| Overall Rating, 0 votes |
|---|
|
0
|
| Scenario Rank: --- of 1093 |
| Parent Game | Saipan 2 |
|---|---|
| Historicity | Historical |
| Date | 1944-06-18 |
| Start Time | 10:00 |
| Turn Count | 20 |
| Visibility | Day |
| Counters | 59 |
| Net Morale | 0 |
| Net Initiative | 1 |
| Maps | 1: 83 |
| Layout Dimensions | 43 x 28 cm 17 x 11 in |
| Play Bounty | 168 |
| AAR Bounty | 168 |
| Total Plays | 1 |
| Total AARs | 1 |
| Duplicates | Saip016 |
| Battle Types |
|---|
| Hill Control |
| Inflict Enemy Casualties |
| Cave Control |
| Conditions |
|---|
| Caves |
| Reinforcements |
| Scenario Requirements & Playability | |
|---|---|
| Saipan 2 | Base Game |
| Introduction |
|---|
|
With 4th Marine Division preparing for a general attack to sweep across the island to its east coast, the strongly-fortified Japanese positions along a ridge line north-east of Mount Fina Susu first had to be cleared. By this point the Japanese command on the island had lost any semblance of control of their units; the infantry and support elements would have to fight and die where they stood. Even if 31st Army had wished to pull back, they had no idea of their units’ positions and lacked effective means of contacting them. |
| Conclusion |
|---|
|
The 23rd Marine Regiment had avoided sacking 1st Battalion’s commander by assigning his rifle and mortar elements to Lt. Col. John J. Cosgrove of the 3rd Battalion, sending them back into action when the attack of the 3/24th Marines stalled in the face of heavy Japanese machine-gun and mortar fire. A Marine shell touched off a Japanese stockpile of explosives, sending forth a cloud of poison gas. At least, this is the Marine Corps official history’s explanation. |
| Additional Notes |
|---|
|
The USMC HMG's called for in the scenario book should actually WPN's. |

|
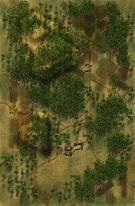
|
|---|
| AFV Rules Pertaining to this Scenario's Order of Battle |
|---|
|
| Imperial Japanese Army |
|---|
|


| Marine Corps |
|---|
|


| 1 Errata Item | |
|---|---|

|
The 8-3 Marine Infantry counter appears in most of the Saipan 1944 and Marianas 1944 scenarios, replacing the 10-3 DF valued Marine counters for those scenarios and is currently published in the most recent Saipan printing. (JayTownsend
on 2015 Dec 26)
|
| Saipan 2nd Edition, scenario #19: Gas Alarm | ||||||||||||
|---|---|---|---|---|---|---|---|---|---|---|---|---|
Saipan 2nd Edition, scenario #19: Gas Alarm In this one, two battlegroups of Marines try to clear the Japanese out of hill covered caves and the second group of Marines comes in as reinforcements and the Japanese have setoff and ammo dump with gas in it on hex 0905, in a perfect bottleneck area forcing the Marines into more rugged terrain. The early group of Marines take their lumps and even lose their FLM unit, which made the reinforcement arrival paramount. To get the best assault results against Japanese dug-in and cave embedded units, the Marines started using three units per assault with leaders. After a bitter struggle the Marines achieved all their goals towards the end of the scenario but couldn’t have done it without their reinforcements and losing the FLM Engineer unit made it that much more difficult. |
||||||||||||
| 0 Comments |