
 Sap2010

|
Tank Battle on Saipan Saipan 2 #11 |
||
|---|---|---|
| (Attacker) Japan | vs | United States (Defender) |
| Formations Involved | ||
|---|---|---|
| Japan |  |
136th Infantry Regiment |
| Japan |  |
1st Yokosuka Special Naval Landing Force |
| Japan |  |
9th Tank Regiment |
| United States |  |
2nd Marine Division |

|


| Overall Rating, 0 votes |
|---|
|
0
|
| Scenario Rank: --- of 1093 |
| Parent Game | Saipan 2 |
|---|---|
| Historicity | Historical |
| Date | 1944-06-16 |
| Start Time | 03:00 |
| Turn Count | 28 |
| Visibility | Day & Night |
| Counters | 155 |
| Net Morale | 0 |
| Net Initiative | 0 |
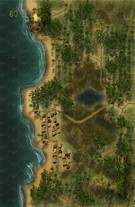
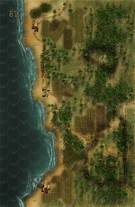
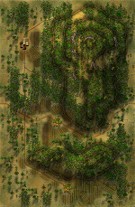
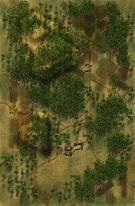
| Maps | 4: 80, 81, 82, 83 |
| Layout Dimensions | 86 x 56 cm 34 x 22 in |
| Play Bounty | 211 |
| AAR Bounty | 168 |
| Total Plays | 1 |
| Total AARs | 1 |
| Duplicates | Saip010 |
| Battle Types |
|---|
| Inflict Enemy Casualties |
| Urban Assault |
| Beach Control |
| Conditions |
|---|
| Off-board Artillery |
| Illumination |
| Scenario Requirements & Playability | |
|---|---|
| Saipan 2 | Base Game |
| Introduction |
|---|
|
Lt. Gen. Yoshitsugu Saito of the Japanese 43rd Infantry Division knew that his men could no longer hope to throw the invading 2nd Marine Division into the sea. The counter-attack he planned would have to proceed in stages. First, he would deploy the full strength of the 9th Tank Regiment and its new Shinhoto Chi-Ha medium tanks, along with SNLF forces to reinforce his own troops. The attack would take place at night, out of view of the deadly American airplanes and take full advantage of what the Japanese considered their own superior night-combat training. |
| Conclusion |
|---|
|
Dawn found two dozen burning Japanese tanks littering the battlefield, and 300 Japanese infantry lying dead around them; well-plotted Japanese artillery fire inflicted heavy damage on the two howitzer battalions of the 10th Marines. Saito had been unable to bring the tank regiment into position in time to hit the Americans during the first night, needing the darkness to bring them into position when the battleships and aircraft could not spot the move. But that necessary delay also allowed the Marines to bring up their own tanks and self-propelled guns. |

|
|
|---|
| AFV Rules Pertaining to this Scenario's Order of Battle |
|---|
|
| Imperial Japanese Army |
|---|
|


| Imperial Japanese Navy |
|---|
|


| Marine Corps |
|---|
|


| 1 Errata Item | |
|---|---|

|
The 8-3 Marine Infantry counter appears in most of the Saipan 1944 and Marianas 1944 scenarios, replacing the 10-3 DF valued Marine counters for those scenarios and is currently published in the most recent Saipan printing. (JayTownsend
on 2015 Dec 26)
|
| Saipan 2nd Edition, scenario #11: Tank Battle on Saipan | ||||||||||||
|---|---|---|---|---|---|---|---|---|---|---|---|---|
Saipan 2nd Edition, scenario #11: Tank Battle on Saipan The name and victory conditions changed on the 2nd Edition from the 1st Edition of this game and probably for the better. The Americans setup first and the Japanese can now gage their setup and avenue of advance. The Americans have a lot of territory to defend, and the first 14 turns are in the dark/night, and I roll on the dice, and visibility was only one hex. The Japanese setup with four different areas they would advance and keep the Marines spread-out. The Japanese still have a large amount of off-board artillery to their advantage, but the biggest one is their 1 column modifier for assaults. The Japanese push forward in four different areas and don’t keep their armor in one area but two and when they knew the locations of the American armor and anti-tank guns, they would try and lead with their Infantry. The Japanese use the cover of darkness to assault combat as much as possible and this with their artillery and pretty good dice rolls for change and to my surprise, gave them a major victory compared to a major loss in the first edition. They achieved all three victory objectives, even in causality advantage and in a big way, Americans 66 steps and 13 leaders lost to the Japanese 43 steps and 6 leaders lost, which almost never happens in my Pacific scenario games plays thus far. My Americans were too passive and reactive in this one, instead of being proactive and stayed in their dug-outs hoping for the best and when they did leave their dug-in areas to react, they lost their fire-first advantage for being dug-in. I think they should have setup differently, not defending the whole map/beach area and conceited letting the Japanese have some beach area and just defended the hex 0610 radio station hex and they probably would have won that objective and the casualty advantage as well, at least getting a minor victory. This is a larger scenario in both maps, 4 and units at 28 turns but a lot go on in those 28 turns. I now know how to better play the Americans next time I play this scenario, just as I learned from the first edition not to waste my Japanese armor leading the attack but lead with infantry and assault that American armor as much as possible. Also, the Japanese don’t have as many Shinhoto 47mm tanks as they do in the Japanese Armor supplement, so I had to keep that in mind after playing a bunch of scenarios from it. Either way a fun game play! |
||||||||||||
| 0 Comments |