
 Sap2009

|
Koshaho Saipan 2 #10 |
||
|---|---|---|
| (Defender) Japan | vs | United States (Attacker) |
| Formations Involved | ||
|---|---|---|
| Japan |  |
47th Independent Mixed Brigade |
| United States |  |
25th Marine Regiment |

|


| Overall Rating, 0 votes |
|---|
|
0
|
| Scenario Rank: --- of 1094 |
| Parent Game | Saipan 2 |
|---|---|
| Historicity | Historical |
| Date | 1944-06-16 |
| Start Time | 15:00 |
| Turn Count | 18 |
| Visibility | Day |
| Counters | 43 |
| Net Morale | 0 |
| Net Initiative | 0 |
| Maps | 1: 83 |
| Layout Dimensions | 43 x 28 cm 17 x 11 in |
| Play Bounty | 163 |
| AAR Bounty | 168 |
| Total Plays | 1 |
| Total AARs | 1 |
| Duplicates | Saip009 |
| Battle Types |
|---|
| Hill Control |
| Inflict Enemy Casualties |
| Entrenchment Control |
| Conditions |
|---|
| Entrenchments |
| Off-board Artillery |
| Scenario Requirements & Playability | |
|---|---|
| Saipan 2 | Base Game |
| Introduction |
|---|
|
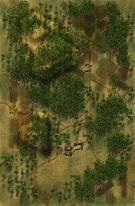
The Fourth Marine Division had the capture of Aslito Airfield as its first major objective, but to get there, they had to get past the high ground the Marines named O-1 Ridge. Most of the ridge had already been secured, but one segment remained in Japanese hands thanks to four well-served anti-aircraft guns dug in on its reverse slope. Two rifle companies from 1/25 plus Sherman tanks would join the 2/25 Battalion in their frontal assault. |
| Conclusion |
|---|
|
Despite repeated attempts and their very active tank support, the Marines could not dislodge the enemy. the anti-aircraft guns laid down grazing fire along the crest of the ridge, while well-directed machine-gun fire did enormous damage to the attackers. The Marines had clawed to within a half-mile of the Aslito airfield when they finally dug in for the night. |

|
|
|---|
| AFV Rules Pertaining to this Scenario's Order of Battle |
|---|
|
| Imperial Japanese Army |
|---|
|


| Marine Corps |
|---|
|


| 1 Errata Item | |
|---|---|

|
The 8-3 Marine Infantry counter appears in most of the Saipan 1944 and Marianas 1944 scenarios, replacing the 10-3 DF valued Marine counters for those scenarios and is currently published in the most recent Saipan printing. (JayTownsend
on 2015 Dec 26)
|
| Saipan 2nd Edition, scenario #10: Koshaho | ||||||||||||
|---|---|---|---|---|---|---|---|---|---|---|---|---|
Saipan 2nd Edition, scenario #10: Koshaho Koshaho, or called Dying on O-1 Ridge in the first version, does not go down in Marine history as a great victory but a total defeat and the Marines will have to regroup. This was a large task, with not enough forces to tackle Jungle, entrenchments, heavy Japanese AA guns, not to mention hills, Japanese Infantry and off map artillery. In my most recent play, the Americans achieved none of their victory objectives, losing four times the casualties, only controlling 2 40-meter hill hexes and zero entrenchments, however one was contested as one of the few highlights for the Marines and a major victory for the Japanese. In hindsight, the Marines should have left the one northern hill hex with one entrenchment alone and concentrated on the southern mass but I don’t think those few units in the north would have made that big of a difference but it would be fun to try someday. |
||||||||||||
| 0 Comments |