
 Saip040

|
Red Beach Saipan 2 #1 |
||
|---|---|---|
| (Defender) Japan | vs | United States (Attacker) |
| Formations Involved | ||
|---|---|---|
| Japan |  |
136th Infantry Regiment |
| United States |  |
6th Marine Regiment |

|


| Overall Rating, 0 votes |
|---|
|
0
|
| Scenario Rank: --- of 1093 |
| Parent Game | Saipan 2 |
|---|---|
| Historicity | Historical |
| Date | 1944-06-15 |
| Start Time | 08:45 |
| Turn Count | 20 |
| Visibility | Day |
| Counters | 139 |
| Net Morale | 0 |
| Net Initiative | 1 |
| Maps | 2: 80, 81 |
| Layout Dimensions | 86 x 28 cm 34 x 11 in |
| Play Bounty | 194 |
| AAR Bounty | 168 |
| Total Plays | 1 |
| Total AARs | 1 |
| Duplicates | Saip001 |
| Battle Types |
|---|
| Amphibious Landing |
| Inflict Enemy Casualties |
| Urban Assault |
| Beach Control |
| Conditions |
|---|
| Entrenchments |
| Minefields |
| Off-board Artillery |
| Scenario Requirements & Playability | |
|---|---|
| Saipan 2 | Base Game |
| Introduction |
|---|
|
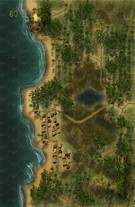
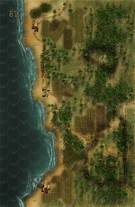
The opening invasion of Saipan targeted the southwestern coast of the island. The beaches here had minimal coral reefs offshore and a gentle’ sandy slope leading up out of the water. The 2nd Marine Regiment would form the left, northern flank of the landings, and place one battalion each on Red Beach 1 and Red Beach 2, each 600 yards wide. The second wave would come ashore on the third site, Red Beach 3. |
| Conclusion |
|---|
|
A previously-undetected current moved the Marines north of their intended landing beaches, where the Japanese defenses had suffered less damage from the pre-invasion bombardment. “I fear,” Time magazine’s Robert Sherrod wrote in his notebook, “all this smoke and noise does not mean many (Japanese) killed.” Heavy Japanese fire and dense terrain stopped the Marine advance about 100 yards from the water’s edge, leaving the beach littered with the burning wreckage of their LVT tractors. The Marines slowly pressed into the jungle on foot. |

|
|
|---|
| AFV Rules Pertaining to this Scenario's Order of Battle |
|---|
|
| Imperial Japanese Army |
|---|
|


| Marine Corps |
|---|
|


| Navy |
|---|
|

| 1 Errata Item | |
|---|---|

|
The 8-3 Marine Infantry counter appears in most of the Saipan 1944 and Marianas 1944 scenarios, replacing the 10-3 DF valued Marine counters for those scenarios and is currently published in the most recent Saipan printing. (JayTownsend
on 2015 Dec 26)
|
| Saipan 1944 2nd Edition, scenario #1: Red Beach | ||||||||||||
|---|---|---|---|---|---|---|---|---|---|---|---|---|
Saipan 1944 2nd Edition, scenario #1: Red Beach There is enough difference that I’ll call this a 2nd Edition, In this scenario 4 more turns were added and needed and the victory conditions changed a bit and it is like that throughout the scenario book and more. Red Beach was my favorite scenario to date and still is. It inspired me throughout the design of my first full boxed game. Amphibious landings with Marines in the Pacific was just so needed at this scale and this series and so many cool units added into Saipan that it really hit the mark for me. In my first play through of this edition a Red Beach I almost restarted as I had heavy losses to my LVT A-1s & LVT A-4s on turn one and then on turn two I lost three loaded LVTs with Infantry units and Leaders but I remembered from playing this before, that the Marines take their lumps early but can recover once they get a toehold on land. So I carried on in this very bloody conflict. Scenario special rule #4 accounts for the American earlier per-landing bombardment but the Japanese have a huge off map artillery group that more than makes up for it. The Marines sweated trying to achieve their three victory objectives throughout the game making for many tense actions. The Japanese have enough units with anti-tank factors that cause the Marines a number of problems but once they get some good fire-group together they start to slowly conquer territory at a cost. The Marines can’t all land in the same area or they will bunch up too much and create juicy targets for the Japanese. As the game progress to the end, the Marines were just barely able to control an area four hexes deep and 28 hexes long as well as 7 town hexes. It took me several casualty counting’s to figure who came out on top, as the Japanese lost 45 steps and 8 leader and the Marines lost 44 steps and 5 leaders, about as close as you can get but giving the Marines a major victory with all three objectives. The Marines had some luck and great dice rolls in the second half of the game or they could have easily lost this one, in a bad way. Great fun and still my favorite scenario. |
||||||||||||
| 3 Comments |
This one can playout so many different ways, its just fun!
This one can playout so many different ways, its just fun!
This one can playout so many different ways, its just fun!