
 SAWa001

|
Down in Jubaland South Africa's War #2 |
||
|---|---|---|
| (Defender) Italy | vs |
Britain
(Attacker)
South Africa (Attacker) |
| Formations Involved | ||
|---|---|---|
| Italy |  |
3º Gruppo Dubat |
| Italy |  |
91ª Brigata Coloniale |
| Italy |  |
91º Battaglione Coloniale |
| South Africa |  |
1st Infantry Brigade |

|


| Overall Rating, 4 votes |
|---|
|
3
|
| Scenario Rank: --- of 1093 |
| Parent Game | South Africa's War |
|---|---|
| Historicity | Historical |
| Date | 1941-02-17 |
| Start Time | 10:00 |
| Turn Count | 28 |
| Visibility | Day |
| Counters | 93 |
| Net Morale | 1 |
| Net Initiative | 1 |
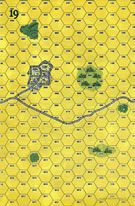
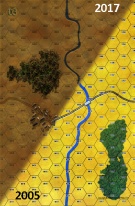
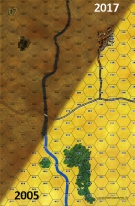
| Maps | 4: 19, 3, 7, 8 |
| Layout Dimensions | 86 x 56 cm 34 x 22 in |
| Play Bounty | 157 |
| AAR Bounty | 168 |
| Total Plays | 4 |
| Total AARs | 1 |
| Battle Types |
|---|
| River Crossing |
| Conditions |
|---|
| Off-board Artillery |
| Terrain Mods |
| Joint Forces Battle |
| Scenario Requirements & Playability | |
|---|---|
| Desert Rats | Maps |
| Eastern Front | Maps |
| Road to Berlin | Maps |
| South Africa's War | Base Game |
| Introduction |
|---|
|
The Juba River, flowing through southeastern Somaliland, represented a formidable defensive barrier and the Italian command believed it had to hold the line to keep the Allied advance away from the key port of Mogadishu. The Italian-officered Somali battalions assigned to the river line had a generous allotment of artillery by East African standards, but their numbers were far too few to hold a static position against a motorized enemy. |
| Conclusion |
|---|
|
The Italian defenders arrived just as the South Africans were crossing the river in inflatable boats, and opened up heavy machine-gun fire on them. Despite several spirited assaults — the Somali troops proved not only willing but eager to engage in close combat — they could not force them back across, and within a few hours the South Africans had expanded their bridgehead and begun work on a bridge to bring their vehicles across. The road to Mogadishu lay open. |

|

|
|---|
| AFV Rules Pertaining to this Scenario's Order of Battle |
|---|
|
| Army |
|---|
|
| Regio Corpo di Truppe Coloniali |
|---|
|


| Regio Esercito |
|---|
|


| Army |
|---|
|


| 1 Errata Item | |
|---|---|

|
Ignore the direct fire values. (Shad
on 2010 Dec 15)
|
| Bridgehead practice | ||||||||||||
|---|---|---|---|---|---|---|---|---|---|---|---|---|
This scenario turned out to be more than it appeared at first glance. The Italians, coming on the battle area in the opposite corner of the map from the South Africans, had to leave their MG units to catch up with the rest of the units, which left the Italians short a couple of units to engage to bridgehead. The bridgehead itself, got established OK, but it was a tough fight to get everyone across (and out of the way) considering the fact that the Italians was trying to contain the bridgehead. Fortunately, for the South Africans, the effort was not successful. (Note - This was an interesting scenario and I recommend it for on-line play.) |
||||||||||||
| 0 Comments |