
 RtDk018

|
Boulogne Must be Held Road to Dunkirk #19 |
||
|---|---|---|
| (Attacker) Germany | vs | Britain (Defender) |
| Formations Involved |
|---|

|


| Overall Rating, 6 votes |
|---|
|
2.83
|
| Scenario Rank: 960 of 1093 |
| Parent Game | Road to Dunkirk |
|---|---|
| Historicity | Historical |
| Date | 1940-05-23 |
| Start Time | 07:30 |
| Turn Count | 16 |
| Visibility | Day |
| Counters | 49 |
| Net Morale | 1 |
| Net Initiative | 3 |
| Maps | 1: 123 |
| Layout Dimensions | 43 x 28 cm 17 x 11 in |
| Play Bounty | 139 |
| AAR Bounty | 163 |
| Total Plays | 5 |
| Total AARs | 2 |
| Battle Types |
|---|
| Inflict Enemy Casualties |
| Road Control |
| Urban Assault |
| Conditions |
|---|
| Off-board Artillery |
| Reinforcements |
| Smoke |
| Scenario Requirements & Playability | |
|---|---|
| Road to Dunkirk | Base Game |
| Introduction |
|---|
|
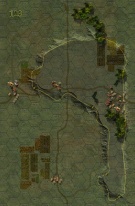
The 20th Guards Brigade was training at Camberley on the morning of May the 21st when orders were received from the War Office to proceed immediately to Dover for service overseas. Less than twenty-four hours later it arrived at Boulogne and began to disembark. Boulogne lies at the mouth of the river Liane, which winds its way to the sea through a valley in the surrounding hills. The Welsh Guards covered the part of the town north-east of the river, holding the western slopes of the Mont Lambert ridge and the high ground through St Martin. The troops were extended over a six-mile perimeter and inevitably thin on the ground. |
| Conclusion |
|---|
|
At daybreak on the 23rd the German attack resumed. British anti-tank guns destroyed or drove off the German tanks after heavy fighting. Further waves of tanks and infantry supported by artillery and mortar fire inflicted considerable casualties on the British infantry and anti-tank gunners, and the Guards gave ground. By the end of a long morning's fighting it was clear that the original perimeter could not be held, and the battalions were drawn back to the outskirts of the town. The 20th Guards Brigade would remain and fight. |

|
|
|---|
| AFV Rules Pertaining to this Scenario's Order of Battle |
|---|
|
| Army |
|---|
|


| Heer |
|---|
|


| 4 Errata Items | |
|---|---|

|
Two British infantry have their full strengths printed on the back. They should both be "2-3" when reduced. (Shad
on 2010 Dec 15)
|

|
Ignore the direct fire values. (Shad
on 2010 Dec 15)
|

|
The reduced direct fire value of the Heer HMG became 5-5 starting with Fall of France. (plloyd1010
on 2015 Jul 31)
|

|
All SPW 251s have an armor value of 0. (Shad
on 2010 Dec 15)
|
| Road To Dunkirk, scenario #19: Boulogne Must be Held | ||||||||||||
|---|---|---|---|---|---|---|---|---|---|---|---|---|
Road To Dunkirk, scenario #19: Boulogne Must be Held After playing all the 9 April 1940 scenarios, I had the Road To Dunkirk game and game components still out and decided to play a scenario from there as well. It looked interesting on paper but fighting British units with a morale of 9/8 that are lodged in town hexes or dug-in is a real grind with only 16 turns to get them out, even with artillery and reinforcements. There were many assaults and the Germans were able to get some combine armor/infantry assaults in but could not clear the road of dug-in British units or clear all the town hexes. The German to my surprise did get more kill points on the British, with the British losing 12 steps and two leaders to the German loses of 9 steps and one leader but achieving only one out three victory objectives gave the British a minor victory. Kind of a frustrating scenario for the attacker, fighting that 9/8 morale. |
||||||||||||
| 0 Comments |
| Crapulent & Unbalanced -- but Enticing to Play . . . | ||||||||||||||
|---|---|---|---|---|---|---|---|---|---|---|---|---|---|---|
Once again, this battle was more penance for past sins, as I drew the side with no armor in a shortish, bloody & brutish fight. Both sides drew middling leaders. Once His Majesty's force is firmly planted, there is relatively little for the British side to do. Both combat and morale recovery rolls were nearly always successful for the Tommies. Rarely so for the scrambling invaders. As others - more articulate than I - have reported, this historically accurate, conflict simulation is virtually impossible to win as the attacking German side, since the defending Brits have a morale value of 9/8 and better places to fight from! I fact, the Jerries must throw an extended number of near-perfect die rolls to dislodge the Brits from the town hexes and dug-in positions along the road. My worthy, and learned, opponent did the best job possible with the combined arms Wehrmacht force, and did better in terms of step losses than I did. However, the senior leader decapitation that he suffered during game turn 11 undid his early gains, and eventually proved the decisive moment of our play-through. |
||||||||||||||
| 1 Comment |

Concur with the T-Rex on all points. This scenario is better suited to solitaire play, as it is an immensely frustrating go, in shared play.
We started playing this dog in January and it took us 5 online sessions to complete! Unexpectedly, playing with the defense favoring FOW optional rule turned out to be a mistake as we only had 6 turns that were not shortened in this, up close, knife fight.