|
"Maybe Comrade Marshal Doesn't Understand..." Power of the East #2 |
||
|---|---|---|
| (Defender) Japan | vs | Soviet Union (Attacker) |
| Formations Involved | ||
|---|---|---|
| Japan |  |
19th Infantry "Tiger" Division |
| Soviet Union |  |
118th Rifle Regiment |
| Soviet Union |  |
119th Rifle Regiment |
| Soviet Union |  |
120th Rifle Regiment |

|
| Overall Rating, 5 votes |
|---|
|
2.8
|
| Scenario Rank: 850 of 961 |
| Parent Game | Power of the East |
|---|---|
| Historicity | Historical |
| Date | 1938-08-02 |
| Start Time | 07:00 |
| Turn Count | 18 |
| Visibility | Day |
| Counters | 145 |
| Net Morale | 1 |
| Net Initiative | 0 |
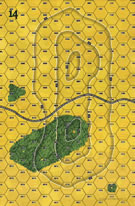
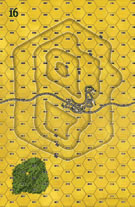
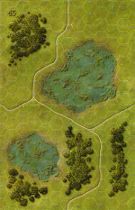
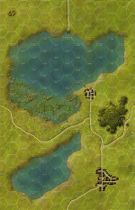
| Maps | 4: 14, 16, 45, 49 |
| Layout Dimensions | 86 x 56 cm 34 x 22 in |
| Play Bounty | 188 |
| AAR Bounty | 155 |
| Total Plays | 3 |
| Total AARs | 3 |
| Battle Types |
|---|
| Ambush |
| Hill Control |
| Inflict Enemy Casualties |
| Rural Assault |
| Scenario Requirements & Playability | |
|---|---|
| Eastern Front | Counters |
| Guadalcanal | Counters |
| Power of the East | Base Game |
| Road to Berlin | Maps |
| Introduction |
|---|
|
With the heights now in enemy hands, the Soviets mulled their only two options: either back down under the force of arms and accept the Japanese fait accompli, or counterattack and restore the status quo. The Chief of the Soviet Far East Military District, Marshal Vasily Blücher, a former hero of the Russian Civil War, hesitated to react. He doubted the viability of the Soviet claims on the border territory, and the bad weather prohibited any air strikes to assist his troops. "Maybe Comrade Marshal just doesn't understand the situation" opined Josef Stalin, when he heard of Blücher's hesitation. This phrase expressed by the Great Leader often equaled a death sentence for the target general. Nevertheless, Blücher ordered an attack under the pressure from the Soviet high command. It did not save him from fatal consequences for uttering his doubts concerning the operation. |
| Conclusion |
|---|
|
The precipitous and ill-organized Soviet attack on the heights ended in a bloody defeat without having achieved any objectives. Commanders failed to position their troops at their starting positions by the planned kickoff time for the offensive, and the artillery commander completely omitted pre-fight reconnaissance and fire planning for the heavy artillery due to time pressure. Heavy rains over the next few days prevented any fighting, so the Soviets spent the time reconsidering their course of action. |
| Additional Notes |
|---|
|
Maps 45 and 49 come from the non-series game Infantry Attacks: August 1914. |
| AFV Rules Pertaining to this Scenario's Order of Battle |
|---|
|
| 1 Errata Item | |
|---|---|

|
The reduced direct fire value in Kursk: Burning Tigers is 4-4. (plloyd1010
on 2015 Jul 31)
|
| Hills are for Heros | ||||||||||||||
|---|---|---|---|---|---|---|---|---|---|---|---|---|---|---|
... but doesn't end as well as the Combat! episode.Firstly, if you are the Soviet player, you will not win. The scenario falls completely flat in regards to play balance. That said, I'm a history nut and I got a good historical feel from it. The game opens with a long march to assault hills on board 14 & 16. The attack is poorly supported. It will be close-in attack against an enemy who specializes in assault combat. Indeed an march of doom. I began marching up between the lakes, planning to attack about turn 8 or 9. My southern column was harassed by Japanese artillery all the way. Fortunately, only being 12 points the effect was small, though some disruption did occur. The troops arrived before the hills pretty much on time. The northern column split around the trees of board 49. As the wings deployed, the follow-on troops occupied the woods to form a secondary fire base. The weight of the attack went to the northern flank. The southern column moved up and deployed in the center of the plain. I attacked in a largely linear formation. This mostly due to a lack of time. The first advance spread the Japanese forces out, but otherwise failed to get a lodgement on the hill. Follow on troops were able to get close and largely pin the Japanese line. The northern forces enveloped the Japanese line via the southern wing. The north part of the northern column had some success in the firefight. Eventually I assaulted the corner of the hill. The assault surprising lasted 3 turns, mostly due to the tenacity of a reduced squad which kept recovering. The southern column partly gained the hill with its south wing. After multiple direct fire attacks, an assault opportunity presented itself. A failed moral check by the accompanying leader prevent the execution. The north wing was driven back a second time. It had regrouped and would have tried again, but for the end of the game. The final body count was 19 steps against the Soviets, the Japanese had lost 2. Comrade marshal did understand the situation. |
||||||||||||||
| 0 Comments |
| Push the Japanese Invaders Back Across the Border, Comrades -- NOT! | ||||||||||||||
|---|---|---|---|---|---|---|---|---|---|---|---|---|---|---|
This was a 4-session play through with the doughty & hard-fighting Grognard Gunny leading dug-in & concealed, defending elements of the Japanese 19th Infantry Division. I led the poorly-coordinated & trained, attacking elements of the Soviet 118th, 119th & 120th Rifle regiments. All fighting was just west of Lake Khasan. Both sides drew middling sets of leaders, with the Japanese being slightly better in quality. In this unusual scenario, we used the FOW, consolidation, hidden units (Japanese only), excess initiative and strategic movement. optional rules. I also suggest that we use only a single house rule: Standardized Movement for Mechanized Units — All mechanized units may move through clear hexes at a movement cost of only 1 movement point (MP) per hex, instead of 1 1/2. Add one to this cost if moving up, across, or down slopes hexes. Our first session (game turns 1-4) featured a slow and severely constricted Soviet approach march in two columns, both north & south of the margins of Lake Khasan. Surprisingly, no casualties were sustained, and only a few dug-in Japanese positions became visible at the beginning of the 4th game turn. In the second session (game turns 5-6) the slow & bottle-necked, Soviet advance continued to stumble forward and into contact with dug-in Japanese units. A series of ambushes ensued as the Emperor’s hidden soldiers began ambushing the hapless Russian probes. The Japanese drew first blood and eliminated 3 Soviet steps on the lower slopes of the large hill mass on Map 16. The Soviets began the 3-game turns of air support to combine with their very limited OBA on at the start of game turn 6. Our third session (game turns 7-8) the slow & clumsy Soviet advance continued with both flank columns, changing course and pushing toward the border hexes in the center, and away from the punishing fire of the dug-in, Japanese defenders atop the northernmost & the southernmost hills. So far, the Emperor’s troops have not lost a single step! The Soviets are down by 6 probing steps – mostly due to deadly Japanese opfire – and will likely lose many more, now that they have run out of supporting OBA and air support. The last contingent of Russian reinforcements is now 5 game turns late! During the fourth session (game turns 9-12) the deliberate Soviet attack in the north was brought to a crawl by heavy Japanese opfire, and the Russian attempt to flank that hill was driven back with heavy casualties. In the south, the Emperor’s men were also successful in holding of the Soviet human wave. By mutual agreement, the Soviets conceded the game at the end of the 12th game turn, when it was clear that the Japanese were going to win a major victory. There were 6 FOW-shortened game turns of the 12 played. Here’s yet another gamey, hard-to-setup, unbalanced, but interesting to play, scenario. This was a difficult-to-manage, 18-turn, shoot ‘em up, featuring Japanese morale superiority and terrain advantages that virtually guarantees that it quickly turns into a hard-fought victory for the Sons of Nippon. It includes several rule strictures that result in a slow, very bloody, infantry slugfest. Perhaps it is a historically accurate, conflict simulation, but it was one to endure, rather than enjoy. I give this one a generous 3, thanks to the fun resulting from shared play with a resolute & gracious opponent. This one is another example of a scenario with an “all or nothing” set of victory conditions, this time for the nearly-hapless Bolsheviks. It is a very challenging pull for the low-morale, attacking Soviet infantry, so the more experienced player should lead the Russian attackers. A scenario rewrite with less restrictive & conflicting rules and better victory conditions would help to balance this scenario. IMHO, as published, this one may be played in SHARED mode as an instructional scenario, but it is best suited for use in SOLO mode. |
||||||||||||||
| 0 Comments |
| An easy encounter! | ||||||||||||||
|---|---|---|---|---|---|---|---|---|---|---|---|---|---|---|
Since the Japanese army was completely hidden and the Russians were bottled up into two approaches to contact, in was easy for the Japanese to keep the Russan strength from being brought to bear against the much weaker Japanese forces. To compound matters even worse, my opponent assumed that the Japanese Commander had set up, at least, some forces in the middle of the map. This was not true, the middle was left completely garrison less and that area drew off a large portion of the Russian force which expended itself into nothing. It could have gone the other way if there had been a direct attack against both the North Japanese and the South Japanese forces simultaneously, early enough in the game. While the North attack was beaten back, the South Japanese forces were completely missed. The game was called with 6 turns to go by my opponent. (Note - This game was very interesting in that the defenders were hidden. That fact, in and of itself, made the difference. I suggested that any defenders be hidden, if the opposition comes in from off board, AND you trust your opponent, from now on.) |
||||||||||||||
| 1 Comment |

 PotE001


