
 PaL2010

|
Misinterpreted Intentions Panzer Lehr 2 #11 |
||
|---|---|---|
| (Attacker) Germany | vs | United States (Defender) |
| Formations Involved | ||
|---|---|---|
| Germany |  |
130th 'Lehr' Panzer Division |
| Germany |  |
5th Fallschirmjäger Regiment |
| United States |  |
3rd "Spearhead" Armored Division |
| United States |  |
47th Infantry Regiment |
| United States |  |
899th Tank Destroyer Battalion |

|


| Overall Rating, 1 vote |
|---|
|
4
|
| Scenario Rank: --- of 1093 |
| Parent Game | Panzer Lehr 2 |
|---|---|
| Historicity | Historical |
| Date | 1944-07-11 |
| Start Time | 04:45 |
| Turn Count | 18 |
| Visibility | Day & Night |
| Counters | 114 |
| Net Morale | 0 |
| Net Initiative | 2 |
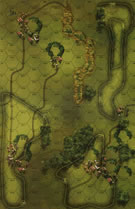
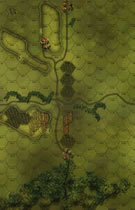
| Maps | 2: 26, 33 |
| Layout Dimensions | 56 x 43 cm 22 x 17 in |
| Play Bounty | 183 |
| AAR Bounty | 168 |
| Total Plays | 1 |
| Total AARs | 1 |
| Duplicates | PaLe011 |
| Battle Types |
|---|
| Delaying Action |
| Exit the Battle Area |
| Inflict Enemy Casualties |
| Urban Assault |
| Conditions |
|---|
| Hidden Units |
| Off-board Artillery |
| Reinforcements |
| Severe Weather |
| Smoke |
| Illumination |
| Scenario Requirements & Playability | |
|---|---|
| Battle of the Bulge | Counters |
| Elsenborn Ridge | Counters |
| Fall of France 1 | Maps |
| Panzer Lehr 2 | Base Game |
| Introduction |
|---|
|
Over the previous few days the Americans had consolidated their defenses protecting St. Lo. Intelligence determined that SS Reich was stretched too thin to properly respond to the American pressure, and that a retreat was imminent. Therefore, when increased enemy activity was noted opposite the 9th Infantry Division, the U.S. First Army Headquarters concluded the Germans were pulling out. |
| Conclusion |
|---|
|
Long after American artillery units far to the rear reported German intrusions, First Army Headquarters still refused to believe that the Germans were not pulling out. Not until a battalion headquarters was overrun did they start to take the matter seriously. Luckily, the front-line soldiers recognized the gravity of the situation and responded accordingly. Despite little outside help the American line units soon stabilized the situation, and by noon Panzer Lehr had shot their bolt. |

|
|
|---|
| AFV Rules Pertaining to this Scenario's Order of Battle |
|---|
|
| 130th 'Lehr' Panzer Division |
|---|
|


| Luftwaffe |
|---|
|


| Army |
|---|
|


| 6 Errata Items | |
|---|---|

|
Leaders for the Panzer Lehr Division appear in the second release. Players with the first release should use the ILS for selection and substitute regular Heers leaders, if not using the Heers leaders originally specified. (plloyd1010
on 2016 Jul 13)
|

|
Leaders for the Panzer Lehr Division appear in the second release. Players with the first release should use the ILS for selection and substitute regular Heers leaders, if not using the Heers leaders originally specified. (plloyd1010
on 2016 Jul 13)
|

|
Leaders for the Panzer Lehr Division appear in the second release. Players with the first release should use the ILS for selection and substitute regular Heers leaders, if not using the Heers leaders originally specified. (plloyd1010
on 2016 Jul 13)
|

|
Leaders for the Panzer Lehr Division appear in the second release. Players with the first release should use the ILS for selection and substitute regular Heers leaders, if not using the Heers leaders originally specified. (plloyd1010
on 2016 Jul 13)
|

|
Reduce strength direct fire value be came 5-5 in Army at Dawn. (plloyd1010
on 2015 Jul 31)
|

|
The M18 has a special rule in Battle of the Bulge but it applies globally: "A two-step M18 unit can fire one anti-tank shot and move half its movement allowance (retain fractions) in a single impulse. The order in which it does these two actions is the player's choice." (Shad
on 2010 Dec 15)
|
| Panzer Lehr 2 #11 - Misinterpreted Intentions |
|---|
|
This scenario, like many in this booklet, calls for hidden units, made playable like we always have when presented with this situation. The Lehr force drew the western advance, cleared out the first town on their way to the second when a hidden 57mm opened fire taking out a platoon of Grenadiers still in their 251s, while a hidden M18 platoon took out 2 PzIVF2 platoons before scooting behind the crest of a hill. The rest of the Grenadiers dismounted and began their assault on the town with the help of OBA, mortars and fire support from two companies from the panzer regiment. The fighting was heavy, but the Germans cleared the town. On the right flank the two companies of Fallschirmjager advanced towards their objective only to be repulsed by the Americans, it did not help that their fire support (Stummel) was taken out by the retreating M18. As the Panthers and PzIVHs moved north they ran into the American reinforcements that were two turns late, it did not matter as the Panthers dominated the Sherman’s, Stuarts and Hellcats. Germans had the edge in steps, towns and managed to get three platoons of panzers off the north map edge. |
| 0 Comments |