Panzer Grenadier Battles on October 24th:
Afrika 1944 #22 - PAKfront Leyte '44 #12 - Flying Wedge
Fronte Russo #9 - Potemkin Village Leyte '44 #13 - Failure at Buri Airfield
Red & White #28 - Bastion
Errors? Omissions? Report them!
Lupao Again
Pacific Armor #14
(Defender) Japan vs United States (Attacker)
Formations Involved
Japan 2nd 'Geki' Tank Division
United States 35th Infantry Regiment
Display
Balance:


Overall balance chart for PACA014
Total
Side 1 0
Draw 0
Side 2 1
Overall Rating, 0 votes
5
4
3
2
1
0
Scenario Rank: --- of 1094
Parent Game Pacific Armor
Historicity Historical
Date 1945-02-03
Start Time 08:00
Turn Count 22
Visibility Day
Counters 123
Net Morale 0
Net Initiative 0
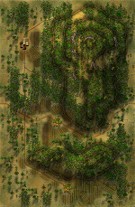
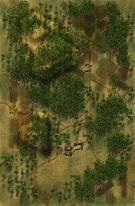
Maps 2: 82, 83
Layout Dimensions 56 x 43 cm
22 x 17 in
Play Bounty 190
AAR Bounty 168
Total Plays 1
Total AARs 1
Battle Types
Inflict Enemy Casualties
Road Control
Urban Assault
Conditions
Entrenchments
Off-board Artillery
Randomly-drawn Aircraft
Terrain Mods
Scenario Requirements & Playability
Elsenborn Revised Counters
Leyte '44 Counters
Pacific Armor Base Game
Saipan 1944 Maps + Counters
Introduction

The American advance up into the mountains couldn't go forward without Highway 8 fully secured, and that meant that Lupao had to fall. Twenty-Fifth Infantry Division brought up more artillery ( both towed and self-propelled), more tanks and more infantry. Once again, they would go straight at the Japanese. The Japanese, for their part, had picked up a few reinforcements and had no intention of retreating.

Conclusion

this time, the Americans pressed their attack into Lupao itself, engaging the dug-in Japanese tanks with rockets and grenades, and fighting the Japanese infantry house-to-house on the southern outskirts of the town. The Japanese held on and finally ejected the Americans from their foothold. While the rest of the American division slipped past Lupao on secondary roads, the 35th Infantry stuck around to try again.

Additional Notes

The Japanese player will need a Sergeant, additional ENG, Shin, Ho-Ki and 47 mm AT from Pacific Armor. The American player will need a Sergeant, additional INF, HMG, ENG, 81mm,4.2 in mortar, M4 Sherman, M5 Stuart truck, M7 from Leyte '44 and Elsenborn Ridge.


Display Relevant AFV Rules

AFV Rules Pertaining to this Scenario's Order of Battle
  • Vulnerable to results on the Assault Combat Chart (7.25, 7.63, ACC), and may be attacked by Anti-Tank fire (11.2, DFT). Anti-Tank fire only affects the individual unit fired upon (7.62, 11.0).
  • AFV's are activated by tank leaders (3.2, 3.3, 5.42, 6.8). They may also be activated as part of an initial activating stack, but if activated in this way would need a tank leader in order to carry out combat movement.
  • AFV's do not block Direct Fire (10.1).
  • Full-strength AFV's with "armor efficiency" may make two anti-tank (AT) fire attacks per turn (either in their action segment or during opportunity fire) if they have AT fire values of 0 or more (11.2).
  • Each unit with an AT fire value of 2 or more may fire at targets at a distance of between 100% and 150% of its printed AT range. It does so at half its AT fire value. (11.3)
  • Efficient and non-efficient AFV's may conduct two opportunity fires per turn if using direct fire (7.44, 7.64). Units with both Direct and AT Fire values may use either type of fire in the same turn as their opportunity fire, but not both (7.22, 13.0). Units which can take opportunity fire twice per turn do not have to target the same unit both times (13.0).
  • Demoralized AFV's are not required to flee from units that do not have AT fire values (14.3).
  • Place a Wreck marker when an AFV is eliminated in a bridge or town hex (16.3).
  • AFV's do not benefit from Entrenchments (16.42).
  • AFV's may Dig In (16.2).
  • Open-top AFV's: Immune to M, M1 and M2 results on Direct and Bombardment Fire Tables, but DO take step losses from X and #X results (7.25, 7.41, 7.61, BT, DFT). If a "2X" or "3X" result is rolled, at least one of the step losses must be taken by an open-top AFV if present.
  • Closed-top AFV's: Immune to M, M1 and M2 results on Direct and Bombardment Fire Tables. Do not take step losses from Direct or Bombardment Fire. If X or #X result on Fire Table, make M morale check instead (7.25, 7.41, 7.61, BT, DFT).
  • Closed-top AFV's: Provide the +1 modifier on the Assault Table when combined with infantry. (Modifier only applies to Germans in all scenarios; Soviet Guards in scenarios taking place after 1942; Polish, US and Commonwealth in scenarios taking place after 1943.) (ACC)
  • Tank: all are closed-top and provide the +1 Assault bonus, when applicable
  • Self-Propelled Artillery: do not provide the +1 Assault bonus, even if closed-top (SB)
  • Armored Transports: These are not combat units and are therefore not APC's, and they can transport all types of transportable units (5.6) so they are not Prime Movers. They suffer the same vulnerabilities in combat as open-top AFV's (7.61). All are mechanized. (SB)

Display Order of Battle

Japan Order of Battle
Imperial Japanese Army
  • Motorized
United States Order of Battle
Army
  • Motorized

Display AARs (1)

Pacific Armor, scenario #14: Lupao Again
Author JayTownsend
Method Solo
Victor United States
Play Date 2026-05-25
Language English
Scenario PACA014

Pacific Armor, scenario #14: Lupao Again

This scenario I really enjoyed as the American player, as they finally have enough forces to try and achieve their victory conditions, unlike the previous scenario #13. In this scenario, they have more off map artillery, more airstrikes, more Infantry and a lot more armor, with M4 Sherman tanks, M5 Stuart Tanks and self-propelled M7 SP armor. The Japanese have a pretty good defense with a nice mix of armor, infantry and support weapons and four entrenchment counters as well.

The Americans rolled forward and encircling the Japanese defenses, the Japanese make an unwise counterattack at one point and lose four step of the Shinhoto tanks. Those Sherman tanks are a beast but the Stuart tanks are almost as vulnerable as the Japanese armor. The two M7 units sit back grouped together and help pound the Japanese defenses with their air-support, off map artillery & on map mortar units. The Americans this time are not so desperate and make good assaults and try to get ENG or FLM units into the mix whenever possible.

It was painful for the Japanese side to watch their defenses crumble but so satisfying doing this on the American side, finally having the right forces to do it with, and it kind of felt like a European battle, without the Tiger tanks of course. The Americans achieved all three of their victory objectives for a Major Victory but not without losses. I thinks the Japanese had 67 steps of casualties and 9 leaders lost, while the American lost 24 steps and 3 leaders. The Air-support and off map artillery really helped in this one. Fun stuff!

Side notes:

Shermans and Stuarts and accompanying M7 Priests were tasked with finding and destroying the enemy armor with their superior guns and armor. The Japanese made this tank battle last for over three weeks instead of a single one-day battle by hiding their tanks behind and under camouflaged and protected fortifications, either digging the tanks into the ground or creating a series of semi-enclosed fortifications for them to move around and reposition during the battles. Some of these tanks were used to patrol and engage the enemy especially at night. From San Manuel to Muñoz the tanks dueled with each other leading to the deaths of hundreds of American soldiers and thousands of Japanese soldiers as well as the loss of dozens of American tanks and around 200 Japanese tanks.

Conclusion: The battle was savage with GIs playing cat and mouse with Japanese defenders of Lupao. Bazooka and grenades took their toll on the dug-in tanks but snipers and machine guns took a toll on the GIs. The Japanese also lunched ferocious counter-attacks and in the rubble scores of Infantryman became casualties.

0 Comments
You must be a registered member and logged-in to post a comment.
Errors? Omissions? Report them!
Page generated in 1.825 seconds.