Panzer Grenadier Battles on October 24th:
Afrika 1944 #22 - PAKfront Leyte '44 #12 - Flying Wedge
Fronte Russo #9 - Potemkin Village Leyte '44 #13 - Failure at Buri Airfield
Red & White #28 - Bastion
Errors? Omissions? Report them!
Morning in San Manuel
Pacific Armor #6
(Defender) Japan vs United States (Attacker)
Formations Involved
Japan Shigemi Detachment
United States 161st 'First Washington' Infantry Regiment
Display
Balance:


Overall balance chart for PACA006
Total
Side 1 1
Draw 0
Side 2 0
Overall Rating, 0 votes
5
4
3
2
1
0
Scenario Rank: --- of 1093
Parent Game Pacific Armor
Historicity Historical
Date 1945-01-27
Start Time 10:00
Turn Count 32
Visibility Day
Counters 120
Net Morale 0
Net Initiative 0
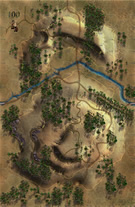
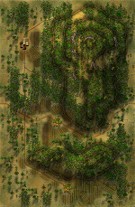
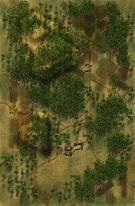
Maps 3: 100, 82, 83
Layout Dimensions 84 x 43 cm
33 x 17 in
Play Bounty 197
AAR Bounty 168
Total Plays 1
Total AARs 1
Battle Types
Inflict Enemy Casualties
Urban Assault
Entrenchment Control
Conditions
Entrenchments
Off-board Artillery
Terrain Mods
Scenario Requirements & Playability
Leyte '44 Counters
Marianas 1944 Maps
Pacific Armor Base Game
Saipan 1944 Maps + Counters
Introduction

After two days of very slow, very incremental advances, the 161st Infantry Regiment brought all three of its battalions into line, backed by two full battalions of 105mm howitzers. At mid-morning they went forward in a mass assault, backed by tanks, heavy mortars and accompanied by engineers, and with the pulverizing effect of massed artillery. Surely the Japanese could not withstand this much force.

Conclusion

Behind a curtain of artillery fire, the American infantry slowly ground forward, with Japanese tanks continuing to make the advance difficult from their well-camouflaged revetments. By nightfall, the Americans held the northern half of San Manuel but still had not ejected all of the defenders from the town. But the Japanese had lost so heavily that another day of combat would likely see them destroyed.

Additional Notes

The Japanese player will need additional 47mm, Shin, trucks, Ho-Ha, a General and the Ho-Ni from Pacific Armor. The American player will need a Sherman, M7 and additional infantry from Leyte '44, and the 4.2 inch mortar and the 37mm from Pacific Armor.


Display Relevant AFV Rules

AFV Rules Pertaining to this Scenario's Order of Battle
  • Vulnerable to results on the Assault Combat Chart (7.25, 7.63, ACC), and may be attacked by Anti-Tank fire (11.2, DFT). Anti-Tank fire only affects the individual unit fired upon (7.62, 11.0).
  • AFV's are activated by tank leaders (3.2, 3.3, 5.42, 6.8). They may also be activated as part of an initial activating stack, but if activated in this way would need a tank leader in order to carry out combat movement.
  • AFV's do not block Direct Fire (10.1).
  • Full-strength AFV's with "armor efficiency" may make two anti-tank (AT) fire attacks per turn (either in their action segment or during opportunity fire) if they have AT fire values of 0 or more (11.2).
  • Each unit with an AT fire value of 2 or more may fire at targets at a distance of between 100% and 150% of its printed AT range. It does so at half its AT fire value. (11.3)
  • Efficient and non-efficient AFV's may conduct two opportunity fires per turn if using direct fire (7.44, 7.64). Units with both Direct and AT Fire values may use either type of fire in the same turn as their opportunity fire, but not both (7.22, 13.0). Units which can take opportunity fire twice per turn do not have to target the same unit both times (13.0).
  • Demoralized AFV's are not required to flee from units that do not have AT fire values (14.3).
  • Place a Wreck marker when an AFV is eliminated in a bridge or town hex (16.3).
  • AFV's do not benefit from Entrenchments (16.42).
  • AFV's may Dig In (16.2).
  • Open-top AFV's: Immune to M, M1 and M2 results on Direct and Bombardment Fire Tables, but DO take step losses from X and #X results (7.25, 7.41, 7.61, BT, DFT). If a "2X" or "3X" result is rolled, at least one of the step losses must be taken by an open-top AFV if present.
  • Closed-top AFV's: Immune to M, M1 and M2 results on Direct and Bombardment Fire Tables. Do not take step losses from Direct or Bombardment Fire. If X or #X result on Fire Table, make M morale check instead (7.25, 7.41, 7.61, BT, DFT).
  • Closed-top AFV's: Provide the +1 modifier on the Assault Table when combined with infantry. (Modifier only applies to Germans in all scenarios; Soviet Guards in scenarios taking place after 1942; Polish, US and Commonwealth in scenarios taking place after 1943.) (ACC)
  • Tank: all are closed-top and provide the +1 Assault bonus, when applicable
  • Tank Destroyer: do not provide the +1 Assault bonus, even if closed-top (SB)
  • Self-Propelled Artillery: do not provide the +1 Assault bonus, even if closed-top (SB)
  • APC – Armored Personnel Carrier: These are Combat Units, but stack like Transports. They can transport personnel units or towed units. They are not counted as combat units for the +1 stacking modifier on the Direct Fire and Bombardment Tables (4.4). They may be activated by regular leaders and tank leaders (1.2, 3.34, 4.3, 5.43). They do not provide the +1 Assault bonus (ACC).

Display Order of Battle

Japan Order of Battle
Imperial Japanese Army
  • Motorized
United States Order of Battle
Army
  • Mechanized
  • Motorized
  • Towed

Display AARs (1)

Pacific Armor, scenario #6: Morning in San Manuel
Author JayTownsend
Method Solo
Victor Japan
Play Date 2026-05-09
Language English
Scenario PACA006

Pacific Armor, scenario #6: Morning in San Manuel

This scenario played out differently than I thought it would. In the previous San Manuel scenario the Japanese defended in three major areas in this scenario the Japanese only have the town hexes on the eastern side of the maps to defend as the town hexes on the western side already fall into the American’s perimeter, from the previous days of fighting. So now the Japanese can concentrate on defending in only two areas that are almost close enough to support each other. The Ignore 60 & 80 meter elevations should say map 82 not map 83.

The Americans have two combat groups, as the 2nd Battalion is on map 100 while the 1st & 3rd Battalions start on the western side on maps 83 & 82. The Americans believe their forces are strong enough with off board artillery support to attack both town area simultaneously but didn’t count on such strong dug-in and entrenched Japanese forces. I thought this battle would be more about the armor but it turned into more about the Infantry and heavy support weapons. Sure, both sides lost some armor and the Americans got too involved in assault combat too early and didn’t wear the Japanese down enough.

The American only controlled two entrenchment counters and weakly contested two others when I decided they had enough and would have to regroup for another day of fighting, like historically. They were on the edge of the town hexes but controlled none, they to my surprise had lost 27 steps and 4 leaders to the Japanese loses of only 15 steps and 3 leaders. Many of the American Infantry were disputed, demoralized or half step units, my FLM Engineer unit was gone and my normal Engineer unit was a half-step demoralized unit, both critical in assaults. I maybe could have regrouped and maybe conquered two more entrenchments but the Americans still would have lost this scenario.

In hindsight, the Americans made two major mistakes, attacking two Japanese groups at the same time instead of concentrating with force one group at a time. The other mistake was pulling adjacent to town embedded, entrenched & dug-in Japanese units before wearing them down enough to close with them. Impatience doesn’t pay off in these type of scenarios. The Japanese on the other hand rolled well on the dice, protected their armor well, setup in prime defensive locations and had some good luck in assaults.

A fun scenario, that when I played it again, I will do better as the Americans. At this point in the actual battle, Japanese Brigadier General Shigemi was killed in battle leading an armor counterattack. Kind of neat to have and actually Japanese General counter in this scenario.

0 Comments
You must be a registered member and logged-in to post a comment.
Errors? Omissions? Report them!
Page generated in 3.207 seconds.