
 Lib2008

|
Glidermen at Escoville Liberation 1944, 2nd Ed #9 |
||
|---|---|---|
| (Defender) Germany | vs | Britain (Attacker) |
| Formations Involved | ||
|---|---|---|
| Britain |  |
6th Airlanding Brigade |
| Germany |  |
21st Panzer Reconnaissance Battalion |

|


| Overall Rating, 1 vote |
|---|
|
3
|
| Scenario Rank: --- of 1094 |
| Parent Game | Liberation 1944, 2nd Ed |
|---|---|
| Historicity | Historical |
| Date | 1944-06-07 |
| Start Time | 09:00 |
| Turn Count | 12 |
| Visibility | Day |
| Counters | 48 |
| Net Morale | 0 |
| Net Initiative | 1 |
| Maps | 1: 58 |
| Layout Dimensions | 43 x 28 cm 17 x 11 in |
| Play Bounty | 162 |
| AAR Bounty | 168 |
| Total Plays | 1 |
| Total AARs | 1 |
| Duplicates | LIBE009 |
| Battle Types |
|---|
| Inflict Enemy Casualties |
| Road Control |
| Urban Assault |
| Conditions |
|---|
| Off-board Artillery |
| Randomly-drawn Aircraft |
| Terrain Mods |
| Scenario Requirements & Playability | |
|---|---|
| Liberation 1944, 2nd Ed | Base Game |
| Introduction |
|---|
|
On D-Day the 2nd Ox and Bucks, part of the 6th Airlanding Brigade, landed in their Horsa gliders as the second lift of airborne troops. They promptly secured the Caen Canal and Orne River bridges in a daring coup de main with few casualties. A day later their objective, the town of Escoville, lay ahead guarded by the thinly-spread 21st Panzer Division. The big Hamilcar cargo gliders had landed armored support to spearhead the attack. |
| Conclusion |
|---|
|
The British fought their way into Escoville, despite a lack of anti-tank guns forcing them to rely on their toy-like PIAT anti-tank mortars. Two companies became cut off in Escoville, but a spirited counter-attack led by Major “Flaps” Edmunds restored contact. The battalion lost 80 men and seven officers; their commander, Lt. Col. Michael Roberts, had been badly injured when his glider crashed and had to be evacuated as well when he could no longer walk. |

|
|
|---|
| AFV Rules Pertaining to this Scenario's Order of Battle |
|---|
|
| Army |
|---|
|


| Heer |
|---|
|


| 4 Errata Items | |
|---|---|

|
The reduced direct fire value of the Heer HMG became 5-5 starting with Fall of France. (plloyd1010
on 2015 Jul 31)
|

|
The morale and combat modifiers of German Sergeant #1614 should be "0", not "8". (Shad
on 2010 Dec 15)
|

|
The SK 7/2 appearing in 1940: Fall of France is actually a SK 6/2, but misprinted by APL. Hence it should be unarmored in that game. The SK 7/2, which appears in other games is correctly printed with an armor of 0. (plloyd1010
on 2022 Apr 28)
|

|
All SPW 251s have an armor value of 0. (Shad
on 2010 Dec 15)
|
| Glidermen at Escoville | ||||||||||||||
|---|---|---|---|---|---|---|---|---|---|---|---|---|---|---|
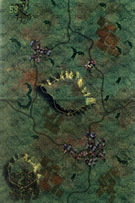
On D-Day +1, the 2nd Ox and Bucks, part of the 6th Airlanding Brigade, is ordered to take control of Escoville, a French town that is guarded by the thinly spread 21st Panzer Division of General Feuchtinger. The Brits have 3 objectives: first they have to seize control of Escoville, then they have to make sure that the north-south road is secure and thirdly, they have to dish out more damage than they receive. As an optional rule we decided to let the German player set up 3 units hidden, he decides to leave the 3 AT capable AFV units off board. The English set up on the northside of the battlefield and are amazed by the quietness of the scenery, not a German in sight. The eerie silence is suddenly broken when the SPW251/2 mobile mortar platoon opens fire from upon the central hill. The mortars fail miserably and with their cover blown, they are immediately despatched by a couple of infantry platoons. First blood to the allies. Meanwhile, the Ox and Bucks tread carefully along both roads, Major Edmunds taking the west one, closely followed by his Lt Col Roberts, who has been badly injured when his glider crashed some 30 hours ago. On the other road there is sudden commotion when, by sheer luck, the Sk7 platoon is discovered hidden. Those open topped AFVs dash northwards, zooming past the astounded infantry, to take on the 2 platoons of Tetrarchs that cautiously lurk at the back of the English column. These British light tanks make short work of the Sk7s, leaving only burning hulks in their wake. The German CO, a veteran Captain, who is located in Escoville, together with all his infantry and their APCs, curses his luck. Those tetrarchs are the only AT capable units in the British battleforce and their demise is critical if he wants to keep his SPWs alive. As such, when the platoon of SK234/1 are discovered, they are ordered to retreat to Escoville to bolster the small defense force there. Soon, the English come within range of the SPW machine guns,and those pesky APCs wreak havoc in their lines. The English CO has no other option than ordering the light tanks forward to whittle down the resistance. The German CO immediately responds by calling the still hidden SK234/3 Puma platoon straight into town to face head-on the dreaded Tetrarchs. The English know this is the pivotal point of the battle, they target the deadly Pumas with their 2 pounder guns but they sadly miss. The return fire of the 75mm Puma guns is nothing to be sneezed at, they smash all but 3 of the light tanks to smithereens. Luckily the survivors keep their morale and they skedaddle out of harms way towards the southside of the town. During this AFV kerfuffle, the English infantry has managed to surround Escoville, allthough at great cost. German opportunity fire is still making a lot of casualties. Since the German troops are fighting in clusters, they are leaving certain parts of town unoccupied. This gives the English free access into town, that is, if they manage to survive the opportunity fire. Twice, the English are able to occupy parts of Escoville, but the attacks are not coordinated. The first platoons to enter the town are swiftly thrown back out, the second wave, lead by Major ‘Flaps’ Edmunds has the power to stay but incoming fire keeps disrupting his troops. When the Brits are unable to stay in contact with the southern part of the attack, the Puma platoon is ordered to leave the town, and from behind the bocage, it is finally able to silence the last of the Tetrarchs. The loss of their AT capability is a big blow for the English. Time is running out, casualty ratings are already way to high, and to top it all, their supply line is now breached by the Pumas. The Brits have no other option than to accept defeat. At the traditional debrief, we both agreed that this is a hard scenario for the British player to win. Not enough manpower, OBA and time. A string of extremely bad morale rolls didn’t help either. It was also our first time using the optional hidden rules. We are still debating if this rule is a keeper or not. In this game it added not a lot. This game also concludes our first battle game, victory goes to the Germans, making the third battle void. Our next battle is also going to be the 21st Panzer, this time at the end of the war. Lets see if Hans von Luck is still lucky then. |
||||||||||||||
| 0 Comments |