
 DrnT042

|
Camel Riders Dragon Rampant #1 |
||
|---|---|---|
|
(Defender)
Germany
(Defender) Italy |
vs | New Zealand (Attacker) |
| Formations Involved | ||
|---|---|---|
| Italy |  |
Raggruppamento Sahariano |
| New Zealand |  |
1st New Zealand Army Tank Brigade |
| New Zealand |  |
2nd New Zealand Division |

|


| Overall Rating, 0 votes |
|---|
|
0
|
| Scenario Rank: --- of 1093 |
| Parent Game | Dragon Rampant |
|---|---|
| Historicity | Alt-History |
| Date | 1943-03-01 |
| Start Time | 22:00 |
| Turn Count | 24 |
| Visibility | Night |
| Counters | 86 |
| Net Morale | 0 |
| Net Initiative | 1 |
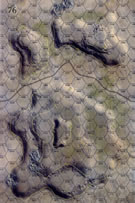
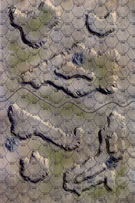
| Maps | 2: 76, 77 |
| Layout Dimensions | 56 x 43 cm 22 x 17 in |
| Play Bounty | 180 |
| AAR Bounty | 168 |
| Total Plays | 1 |
| Total AARs | 1 |
| Battle Types |
|---|
| Hill Control |
| Inflict Enemy Casualties |
| Road Control |
| Conditions |
|---|
| Off-board Artillery |
| Smoke |
| Illumination |
| Joint Forces Battle |
| Scenario Requirements & Playability | |
|---|---|
| An Army at Dawn | Maps + Counters |
| Dragon Rampant | Counters |
| Introduction |
|---|
|
The 2nd New Zealand Division went into action in southern Tunisia already badly depleted, with one of its three brigades completely out of action and the others at reduced strength. When the Kiwis went forward against the well-prepared Italian defenses along an old Roman Wall in the Tebaga Gap, they did so without the armor support promised by the British. But with their own tanks ... |
| Conclusion |
|---|
|
This is a modified version of Scenario Four (Roman Wall) from NEW ZEALAND DIVISION, with a tougher Italian opponent on the one side and tank support on the other. This is why Freyberg wanted tanks, so his infantry wouldn't be fighting alone when the promised assistance did not arrive. But that wouldn't have stopped higher-level commanders from detaching the tank brigade to fight elsewhere (as they did with the New Zealand Divisional Cavalry and its handful of light tanks). |

|
|
|---|
| AFV Rules Pertaining to this Scenario's Order of Battle |
|---|
|
| Heer |
|---|
|

| Regio Esercito |
|---|
|


| New Zealand Army |
|---|
|


| Hide and seek | ||||||||||||
|---|---|---|---|---|---|---|---|---|---|---|---|---|
The Italians attempted to defend the heights and placed their AT guns in areas where the tanks of the New Zealanders were rendered relatively ineffective. Which did nothing to stop the infantry from overpowering the Italian positions. Toward the middle of the game (night) it was a matter of either abandoning the AT position to the New Zealanders or having them dying along with the guns. (This scenario might have been a bit different IF the Italians had some transport, which they did not.) Once the guns were gone, the tanks ran amok. (Note - A good scenario for on-line play.) |
||||||||||||
| 0 Comments |