
 ChOp005


|


| Overall Rating, 4 votes |
|---|
|
3.25
|
| Scenario Rank: --- of 1094 |
| Parent Game | Changsha |
|---|---|
| Historicity | Historical |
| Date | 1942-01-06 |
| Start Time | 05:00 |
| Turn Count | 28 |
| Visibility | Day & Night |
| Counters | 111 |
| Net Morale | 1 |
| Net Initiative | 0 |
| Maps | 3: 115, 94, 95 |
| Layout Dimensions | 84 x 43 cm 33 x 17 in |
| Play Bounty | 189 |
| AAR Bounty | 163 |
| Total Plays | 3 |
| Total AARs | 2 |
| Battle Types |
|---|
| Exit the Battle Area |
| Inflict Enemy Casualties |
| Meeting Engagement |
| Conditions |
|---|
| Off-board Artillery |
| Terrain Mods |
| Scenario Requirements & Playability | |
|---|---|
| Changsha | Base Game |
| Counter Attack | Maps |
| Pusan Perimeter | Maps |
| Introduction |
|---|
|
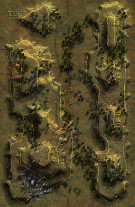
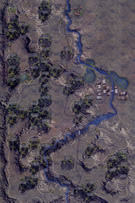
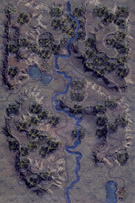
The aggressive Japanese advance on Changsha had left the 11th Army with a vulnerable rear flank, and the armies of the Chinese IX War Zone soon filtered in behind the Japanese. The weak Japanese flank guards fought to keep the retreat route open as the conquerors of Changsha hurriedly abandoned their prize and marched back to the north. |
| Conclusion |
|---|
|
The Chinese kept up their attacks through the morning, but could not get past the Japanese blocking force to interrupt the enemy’s line of retreat. The Japanese had advanced without really paying much attention to the Chinese divisions left behind them, and Pi Yueh’s IX War Zone now directed them to block their escape. The Japanese Eleventh Army remained in grave danger. |

|
|
|---|
| Republic of China Army |
|---|
|


| Imperial Japanese Army |
|---|
|


| Japanese fighting retreat | ||||||||||||
|---|---|---|---|---|---|---|---|---|---|---|---|---|
While it seems as though the Chinese have plenty of troops to get the job done, all the Japanese have to do is to keep the Chinese off balance and stay away from close in fighting. The Chinese got their eighteen units off the board, but did not have enough left on board to overrun the Japanese lines. The Japanese have but to dodge the Chinese attacks after that and they win out by default. (Note - This is another one where the advantage is strongly on the Japanese side, if it is played by opponents, the weaker player should be the Japanese player.) |
||||||||||||
| 0 Comments |
| Another Bloody Near-Draw | ||||||||||||||
|---|---|---|---|---|---|---|---|---|---|---|---|---|---|---|
Again, a punishing and overlong scenario with the cunning and fun-to-play; Treadasaurus as the Chinese player in a movement to contact fight -- but him playing without any AFVs as his penance for squeezing out a minor victory over my glorious but inept Japanese Legions in a 5-session shot. We both drew wretched sets of leaders in this early morning slug out of a rather gamey battle. I lost my senior leader on the 6th turn -- in fact the Japanese lost 6 Lieutenants and 2 captains. We played with the FOW, consolidation, smoke and excess initiative rules. This scenario should have a re-written set of victory conditions for this Verdun-or-The Somme-like fight, as it was too easy for my estimable opponent too get his large Chinese force off the east edge of the battle map by the end while also ALMOST inflicting enough casualties to give the Chinese a second victory objective. This should be a 20-22 turn scenario max. I give this one a generous rating of 2, and recommend shortening it and doing a victory condition rewrite. I did learn some things from my erstwhile opponent about recovering from multiple leader losses, softening up enemy positions with adjacent-hex fire fights, before attempting assaults -- and sequencing attacks with proper reserves at hand. It is a good introduction for solo play IMHO. |
||||||||||||||
| 0 Comments |
