
 BrAx001

|
Approaching Storm Scenario 2: Observation Post Chiperceni Broken Axis #2 |
||
|---|---|---|
| (Defender) Germany | vs | Soviet Union (Attacker) |
| Formations Involved | ||
|---|---|---|
| Germany |  |
13th Panzer Division |
| Soviet Union |  |
18th Tank Corps |
| Soviet Union |  |
5th Guards Airborne Division |

|


| Overall Rating, 5 votes |
|---|
|
3.6
|
| Scenario Rank: 393 of 1093 |
| Parent Game | Broken Axis |
|---|---|
| Historicity | Historical |
| Date | 1944-04-05 |
| Start Time | 09:30 |
| Turn Count | 28 |
| Visibility | Day |
| Counters | 102 |
| Net Morale | 0 |
| Net Initiative | 1 |
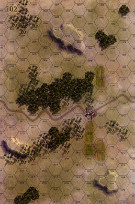
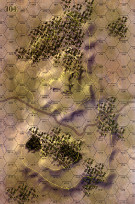
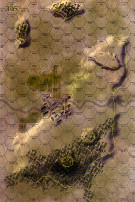
| Maps | 3: 102, 104, 105 |
| Layout Dimensions | 84 x 43 cm 33 x 17 in |
| Play Bounty | 164 |
| AAR Bounty | 163 |
| Total Plays | 4 |
| Total AARs | 2 |
| Battle Types |
|---|
| Delaying Action |
| Exit the Battle Area |
| Inflict Enemy Casualties |
| Road Control |
| Urban Assault |
| Conditions |
|---|
| Off-board Artillery |
| Reinforcements |
| Severe Weather |
| Smoke |
| Scenario Requirements & Playability | |
|---|---|
| Broken Axis | Base Game |
| Introduction |
|---|
|
Following the end of World War I, the Allied Powers assigned the Russian province of Bessarabia to Romania while the Soviets struggled with their internal problems. Once the Soviets put their house in order, they turned their attention to bringing the province back into the fold. The Romanian desire to keep the province led to constant skirmishing along the border, many times threatening to break out into open warfare. The Molotov-Ribbentrop Pact surprised and infuriated the Romanians by giving Bessarabia back to the Soviets. Romania eagerly joined in the invasion of the Soviet Union 21 months later to reclaim the lost province. Now, as the momentum swung against them, the provincial capital of Chișinău became the primary target of the Soviets. From their launching areas, the Soviets headed south down the west bank of the Dniester River. To insure their lines of communication and an adequate flow of supplies for the drive, the Soviets planned to secure the village of Orhei first. The Germans anticipated this move and sent a detachment to Chiperceni some 16 kilometers north to give warning of the attack. |
| Conclusion |
|---|
|
The small German force in Chiperceni fell back under heavy attack, and the Soviet advance continued until a determined German counterattack stopped the Soviets short of Orhei. The next day the 41st Guards Rifle Division joined the attack at first light and the combined force proved too much for the defenders, capturing Orhei. |

|
|
|---|
| AFV Rules Pertaining to this Scenario's Order of Battle |
|---|
|
| Heer |
|---|
|


| Army (RKKA) |
|---|
|


| Guards |
|---|
|


| 3 Errata Items | |
|---|---|

|
The reduced direct fire value of the Heer HMG became 5-5 starting with Fall of France. (plloyd1010
on 2015 Jul 31)
|

|
The morale and combat modifiers of German Sergeant #1614 should be "0", not "8". (Shad
on 2010 Dec 15)
|

|
All SPW 251s have an armor value of 0. (Shad
on 2010 Dec 15)
|
| Not bad for a lost cause | ||||||||||||
|---|---|---|---|---|---|---|---|---|---|---|---|---|
Despite being somewhat rusty, the Germans put up a good fight. It was but a matter of time, however. In particular was the fight for the Northern town which went until the 20th turn. Once that went... the Germans didn't have a chance. It was a good fight, and well worth the "4" I gave it. Since the Russians had to keep the road clear (for points), the battle went pretty much "up the middle". Interesting to note how the Panther tank unit kind of kept the Russian tanks at bay. |
||||||||||||
| 0 Comments |
| Hold in Place & Halt the Russian Wave! | ||||||||||||||
|---|---|---|---|---|---|---|---|---|---|---|---|---|---|---|
This was an extended 8-session play-through with the bold & redoubtable, lgbalsiger, leading attacking elements of the Soviet 5th Guards Airborne Division and the 18th Tank Corps, in a mixed terrain, 28-game turn monster scenario. I led defending elements of the dug-in, German 13th Panzer Division in this, lengthy, 3-map slugfest. Both sides drew decent sets of leaders, the Germans being marginally better. We used the FOW, consolidation, smoke/illum and excess initiative optional rules. We also used these FIVE house rules: 1) Road Movement for Mechanized & Foot Units — All FOOT & MECHANIZED units may move on roads at the rate of 1/2 Movement Point (MP) per road hex, just like MOTORIZED units, 2) Standardized Movement for Mechanized Units — All mechanized units may move through clear hexes at a movement cost of only 1 movement point (MP) per hex, instead of 1 1/2. Add one to this cost if moving up, across, or down slopes hexes, 3) Towed Anti-Tank (AT) Hidden Emplacement — Unless prohibited by special scenario rules, ALL dug-in, entrenched, or town-occupying, towed AT gun units always begin scenarios in HIDDEN mode if allowed to dig-in per scenario special rules (please see Optional Rules for Hidden Units; Plotting Position; Revealing; and No Hidden Units Specified on Page 37). For example: dug-in, PaK 38 (50mm); Soviet 45mm, or British 2-pdr and/or 6-pdr towed AT gun platoons would all qualify under this house rule, 4) German Assault Gun Activation — German Army, turretless STGs, Jagdpanzer and self-propelled artillery units were typically crewed by artillerymen. Like halftracks, these units may be activated by ALL leaders, as well as Tank Leaders, unless prohibited by scenario rules, and 5) Voluntary Unit Reduction — Players may voluntarily reduce 2-step personnel units to 1-step (halved) units if they have at least one leader of MAJOR or higher rank among their side’s assigned force. To do so, the unit to be halved must begin the player’s activation phase in the same hex or in an adjacent hex to a CAPTAIN or higher rank. The full-strength unit to be halved must be in good order and this action costs all the reduced unit’s movement points. Remove the full-strength unit and replace it with 2 reduced strength units. Mark both — and the leader — as activated. This rule set provided improved playability, tactical flexibility & simplicity during our high-mobility, play-through. The Soviets began approaching the forward German positions in our fast-paced, first session (game turns 1-3) by means of a 3-pronged, broad front advance. Wehrmacht artillery proved more effective than normal, as did their OPFIRE. In short order, the Russians had lost the 8 steps required for a decrease in their initiative level, as well as the loss of a leader. Long-range – very lucky – AT shots eliminated a pair of Soviet SU-76 SPAT platoons, and a BM-13 rocket artillery unit on the German right flank, as the inexorable, Soviet wave moved south. Our exciting, second session (game turns 4-8) featured the continued Soviet advance in 3 large clusters – east, west and center – with the two wings making the most forward progress. Soviet artillery concentrations eliminated the key German AT position on the 40-meter hilltop at Hex 105-1005, while a charging Russian column commenced an aggressive assault with bayonets & grenades on the German right flank AT gun position on the 20-meter slope at Hex 105-0702. This session featured relatively inaccurate Wehrmacht artillery support, but some fine OPFIRES that slowed the central Bolshevik push. During the stimulating & mud-splattered, third session (game turns 9-11) the charging Soviets drew in decisive range around the German garrison in the 6-hex town on Map 105, and initiated a pair of close assaults on the contested, township’s north margins. Elsewhere, the Russian western (right) flank column continued moving south, and the eastern (left) flank column consolidated around another close assault on the stubborn German AT gun emplacement. Wehrmacht reinforcements showed up on schedule on game turn 9, and began their long, road march from south map edge. In our busy, fourth session (game turns 12-15) the Soviet left & right flank columns lurched forward, as the last two German AT guns were eliminated in heavy fighting. Lengthy game turns materially benefited the surging Russians allowing multiple, emergency morale recoveries across the battle map. A bold SU-85 unit was destroyed on the east map margin when engaged by the single Wehrmacht Panther tank platoon. Step losses this session were: 5 for the Russian side, and 2 steps and a leader for the defending Germans. The intense, fifth session (game turns 16-17) included fierce close-range, combat in the contested 6-hex town, and on the German’s left flank, where the Russian advance collapsed in a series of costly firefights. Five German steps were eliminated, and 3 more for the scrambling Soviets. Amazingly, 2 Soviet Majors and a Lieutenant deserted this session, bringing Bolshevik leader losses total to an unprecedented 6! Our muddy, sixth session (game turns 18-19) was marked by stalemate and consolidation of existing positions, with minimal casualties of only 2 more steps for the Soviet horde, and an additional one lost by the Germans. Russian strategy changed and 2 HMG units and a pair of half-strength Guards platoons wisely drew off from the contested north margins of the 6-hex town, leaving only rearguard detachments in the two remaining close assault hexes. The ill-fated Russian right flank advance pulled back, chastened, into the shelter of light woods, while the stolid left flank column emerged from their hill top position & lurched menacingly south along the east map margin. The updated victory point tally was now 33-8, still in favor of the Wehrmacht defenders. The very costly, seventh session (game turns 20-23) consisted of additional consolidation & many morale recovery efforts for both sides, as well as the renewed advance of the long-delayed, Soviet left flank column along the east margin of the battle map. Russian casualties were heavy, including the loss of the remaining T-34c unit among the 9 steps lost this session. The Reds reshuffled their forces besieging the 6-hex town, and were reduced to contesting just a single town hex (105-0609). Our hard-hitting. eighth session (game turns 20-27) included the loss of an additional 5 Soviet steps & 2 leaders, as well as another German step, in heavy fighting. The Reds made no further progress in any the three areas of the map where their forces were engaged, and my honorable opponent conceded the fight at the start of game turn 27, when it was apparent that no possibility remained for a Russian win or draw. The final victory point tally was now 46-9, in favor of the defending Wehrmacht force. There were 10 FOW-shortened game turns of 27 played. This conflict simulation was fun to play, unbalanced & gamey. It could use a rewrite, especially for the Soviet victory conditions. Also, the Russians have no Kommissar units in the setup, which seems very odd for an April 1944 battle. As published, the Soviets may simply ooze south across the mud-strewn, battle map – bypassing town hexes & German strongholds – to win by exiting units across the south edge. However, it is suitable for both SOLO and SHARED play, with the twin caveats that the more experienced player should lead the defending German side, and that the Soviets should be required to exit undemoralized, full-strength, steps off the south edge for their victory condition. I give it a 3 in shared, online play with a daring and gracious opponent. |
||||||||||||||
| 0 Comments |
