
 BR01006

|
Up the Gumtree Road Big Red One #47 |
||
|---|---|---|
| (Defender) Germany | vs | United States (Attacker) |
| Formations Involved | ||
|---|---|---|
| Germany |  |
10th Panzer Division |
| Germany |  |
Kampfgruppe Riemann |
| United States |  |
18th "Vanguards" Infantry Regiment |
| United States |  |
1st "Big Red One" Infantry Division |

|


| Overall Rating, 4 votes |
|---|
|
4
|
| Scenario Rank: --- of 1093 |
| Parent Game | Big Red One |
|---|---|
| Historicity | Historical |
| Date | 1943-03-29 |
| Start Time | 08:30 |
| Turn Count | 24 |
| Visibility | Day |
| Counters | 113 |
| Net Morale | 0 |
| Net Initiative | 2 |
| Maps | 3: 76, 78, 79 |
| Layout Dimensions | 84 x 43 cm 33 x 17 in |
| Play Bounty | 184 |
| AAR Bounty | 157 |
| Total Plays | 3 |
| Total AARs | 3 |
| Battle Types |
|---|
| Exit the Battle Area |
| Hill Control |
| Inflict Enemy Casualties |
| Conditions |
|---|
| Off-board Artillery |
| Reinforcements |
| Scenario Requirements & Playability | |
|---|---|
| An Army at Dawn | Maps + Counters |
| Big Red One | Base Game |
| Introduction |
|---|
|
Scenario Forty-Seven The Germans had gathered a combined arms force from 10th Panzer Division and held it in reserve around Djebel ed Mcheltat. While the Americans made their main effort to clear Djebel ed Mcheltat in order to send Task force Benson along the Gabes-el Guettar road with the intention of securing Gabes, the presence of a strong German force on what would become the Americans' open left flank once they secured the heights presented a serious tactical problem. Even though the main American effort would be to the south of Djebel el Mcheltat, Patton felt it imperative to pin the German armor around Djebel Hamdai in place to prevent them from interfering in the operation. |
| Conclusion |
|---|
|
The American met little resistance until reaching the Germans main line of resistance around Djebel Hamdai. Inconclusive fighting for the hilltop finally petered out into an exhausted stalemate. As the American mission had been to pin Battle Group Riemann in place, this was an acceptable outcome. Part of the American force now shifted back to the south to help the hard-pressed Americans to push forward onto Djebel el Mcheltat. |

|
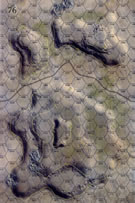
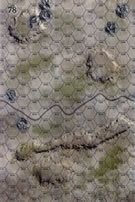
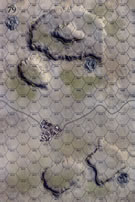
|
|---|
| AFV Rules Pertaining to this Scenario's Order of Battle |
|---|
|
| Heer |
|---|
|


| Army |
|---|
|


| 2 Errata Items | |
|---|---|

|
The reduced direct fire value of the Heer HMG became 5-5 starting with Fall of France. (plloyd1010
on 2015 Jul 31)
|

|
The morale and combat modifiers of German Sergeant #1614 should be "0", not "8". (Shad
on 2010 Dec 15)
|
| Hold Djebel Hamdai at all Costs! | ||||||||||||||
|---|---|---|---|---|---|---|---|---|---|---|---|---|---|---|
Big Red One 47: Up The Gum Tree Road Hold Djebel Hamdai at all Costs! This was a very fun, 8-session play through with the resolute & stimulating Col. Sonichu leading attacking elements of the 18th Infantry Regiment of the Big Red One in the wilds of Tunisia. I led defending elements of the German 10th Panzer Division. Both sides drew decent leaders. We played using the FOW, consolidation, smoke/illum, hidden units, tank riders, excess initiative, strategic movement and extended assault, optional rules, as well as these 3 house rules: 1) Road Movement for Mechanized & Foot Units - All FOOT & MECHANIZED units may move on roads at the rate of 1/2 a Movement Point (MP) per road hex, just like MOTORIZED units, 2) Standardized Movement for Mechanized Units — All mechanized units may move through clear hexes at a movement cost of only 1 movement point (MP) per hex, instead of 1 1/2. Add one to this cost if moving up, across, or down slopes hexes, and 3) Dug In Units are Automatically in Limiting Terrain in Desert Games – Unless prohibited by special scenario rules, ALL units that are dug-in on slope hexes are considered to be in limiting terrain and are spotted if enemy units approach to within 3 hexes, or 4 hexes for reconnaissance units – unless they are marked with a spotted marker, see 8.22. Our exciting, first session (game turns 1-2) featured a rapid, and near-flawless, American movement contact in three – strong left, weak center and strong right flank – columns. Trigger-happy German AT guns attempted long range shots that consistently failed. They were promptly silenced, and in one case destroyed, by accurate American artillery concentrations. Advanced Afrika Korps elements began precipitously withdrawing from their positions in the central on Map 78. The step loss count was 1 for the Germans as the GIs drew first blood. The high mobility & stimulating, second session (game turns 3-4) consisted of the continued – virtually flawless – American movement to contact, which morphed into a 3-pronged approach, as the Germans conducted a tactical withdrawal east to the lower slopes of the Djebel Hamdai. Accurate armor-piercing shots from an advancing company of probing, US M-10 tank destroyers accounted for the loss of a Pz-II light tank, as well as a SK233 armored car platoon. This tactical success resulted in the crucial loss of a level of initiative by the Wehrmacht, made somewhat less painful by the elimination of a probing T-30 GMC on the German left flank. Total step losses were now: 3 for the Americans, and 7 for the Jerries, and the victory point tally increased to 7 for the surging GIs and 3 for the defending, 10th Panzer Division. A stultifying, FOUR combat 7-die rolls were thrown by the Afrika Korps this session! Our dynamic, third session (game turns 5-7) featured the ongoing American movement to contact, which maintained its 3-pronged approach. In the south the Jerries managed to engage &. eliminate the deadly T-28 with their reinforcing panzers. The center, the GIs eliminated one pocket of dig-in Landsers and began the siege of another in the next hex. Lucky Germans AT gunners in the north scored a hit on one of the two, probing M-10 platoons. Wehrmacht OBA also destroyed a pair of US 81mm Mortars in the north, that were supporting the central US approach. In the center, quick-digging GIs established base of fire positions on east face of a 20-meter hill, to support their eventual assault on Djebel Hamdai. The updated step loss tally was now even at 9 apiece, with the US force dropping a level of initiative to three. The costly, fourth session (game turns 8-10) was frustrating & bloody for both sides with 5 steps and 3 leaders lost for the embattled, Afrika Korps, and 4 steps lost for the Big Red One. This happened in a series of long-range fire exchanges, a ferocious close assault, and a mixed bag of artillery strikes as the inexorable American advance to the east continued. At the midpoint of this one, the German initiative was at zero, while the Americans ended the session at 2. During our surprising, fifth session (game turns 11-13) the steady & relentless left & right flank American approaches hit several speed bumps in their march to victory. The first was the successful extrication of a pair of German tank units from a pending combined-arms, close assault on the 40-meter hill mass southwest of Djebel Hamdai. The second, was a remarkably successful 10th Panzer counter attack & close assault that resulted in a pair of step losses to the American M-10 tank destroyer company that had been probing the lower slopes of the northwest margin of Djebel Hamdai. The third was a couple of accurate Wehrmacht artillery strikes that eliminated 3 steps of GIs, coupled with a string of unsuccessful American morale recovery attempts on the ridges southwest of the Djebel. The US initiative plunged another level this session and an unprecedented, 5 attempts to lay OBA smoke screens to cover advancing US forces failed. The sixth session (game turns 14-17) featured another 6 American step losses and a pair of German infantry steps lost. The last of the US M-10 units was eliminated this session, and six American infantry platoons poured off the south edge of Map 76 after feigning a strong right flank approach to the djebel. The game was now teetering on the edge of becoming an unexpected draw, if the remaining Wehrmacht units can manage to minimize their losses for another 6 game turns, while also holding the summit of Djebel Hamdai. Our costly & fast-paced, seventh session (game turns 18-20 ) included 6 more American steps lost, as well as 2 German steps, in very heavy fighting as the Big Red One pushed a well-screened, left flank attack on to the northwestern margins of Djebel Hamdai. The GIs also shifted the balance of their troops to the north, while simultaneously exiting enough infantrymen to complete one of their three victory conditions, when a total of 8 units exited the south edge of Map 76. This battle is now a draw, each side having a victory condition in the bag. The extremely costly, eighth & final session (game turns 21-24) featured more heavy fighting with both sides rapidly running out of infantry units. Steps losses this session were very high thanks to some splendid OBA strikes, multiple close assaults and adjacent hex firefights on Djebel Hamdai and the 20-meter hill just west of the Djebel. The GIs pushed hard to establish a lodgment on the 40-meter contour of the Djebel, while the Landsers did their best to hold on in-place. In time, the American left flank attack ran out of steam, and the Jerries were able to reinforce that endangered salient just enough to hang on. German armor performed exceptionally well in their counter attack on the 20-meter hill, driving off all but an artillery forward observer. In the end, the Afrika Korps finished with a minor victory after fierce fighting that cost the two sides’ a combined total of six leaders! There were 13 FOW-shortened turns of the 24 played. This was a slightly gamey & unbalanced, but inspiring, and fun-to-play scenario, with many decision points and the opportunity for free-wheeling maneuver by the American player. The special scenario rule requiring that only certain elements of both sides to setup or enter both 40 and 60-meter contour lines on Djebel Hamdai, proved to be a serious handicap for both sides, but especially for the Jerries, and limited the ability of the Big Red One to push the Germans off the summit. I still give this one a 5, and recommend it for both SHARED and SOLO play, with the caution that the more experienced player should lead the harder-to-play, 10th Panzer team. |
||||||||||||||
| 0 Comments |

| Take & Hold Djebel Hamdai, Boys! | ||||||||||||||
|---|---|---|---|---|---|---|---|---|---|---|---|---|---|---|
This was an entertaining, 8-session play through with the undaunted & opportunistic Col. Sonichu leading defending elements of the German 10th Panzer Division, in this 3-map battle. I led attacking elements of the 18th Infantry Regiment of the Big Red One in the wilds of mountainous Tunisia. Both sides drew decent leaders. We used the FOW, consolidation, smoke/illum, excess initiative, hidden units (Germans only) extended assault and strategic movement optional rules. We also used these FIVE house rules: 1) Road Movement for Mechanized & Foot Units — All FOOT & MECHANIZED units may move on roads at the rate of 1/2 of a Movement Point (MP) per road hex, just like MOTORIZED units, and 2) Standardized Movement for Mechanized Units — All mechanized units may move through clear hexes at a movement cost of only 1 movement point (MP) per hex, instead of 1 1/2. Add one to this cost if moving up, across, or down slopes hexes, 3) Dug In Units are Automatically in Limiting Terrain in Desert Games — Unless prohibited by special scenario rules, ALL units that are dug-in ON SLOPE HEXES are considered to be in limiting terrain and are spotted if enemy units approach to within 3 hexes, or 4 hexes for reconnaissance units – unless they are marked with a spotted marker, see 8.22, 4) Armored Fighting Vehicle (AFV) Consolidation — Unless prohibited by special scenario rules, reduced 2-step units like tanks, and other AFV units of the same type, nationality, and morale condition may be combined to form a single, full-strength unit. Both reduced units must start their activation in the same hex and be activated by an adjacent – or same-hex – good order, Tank Leader. This action costs both units all their movement points. Remove one of the units, flip the other to its full-strength side and mark it activated, and 5) Voluntary Unit Reduction — Players may voluntarily reduce 2-step personnel units to 1-step (halved) units if they have at least one leader of Major or higher rank among their side’s assigned force. To do so, the unit to be halved must begin the player’s activation phase in the same hex or in an adjacent hex to a Captain or higher rank. The full-strength unit to be halved must be in good order and this action costs all the reduced unit’s movement points. Remove the full-strength unit and replace it with 2 reduced strength units. Mark both — and the leader — as activated. Our surprising, first session (game turns 1-2) featured a rapid, American movement contact in a single, large thrust along the southern half of the battle map, where they were immediately taken under fire by dug in Wehrmacht defenders atop the east margin of the long east—west ridge on Map 78. An American infantry step was lost in the first turn. Unexpectedly, the two sides found themselves in decisive range at once, leading to furious, adjacent hex firefights and a redeployment of other German units off the ridge, where a [air of platoon were eliminated in their trucks accurate American artillery concentrations. The stimulating second session (game turns 3-5) featured the entry of German reinforcements on the west edge of the map board and the continued American movement to contact across the southern half of the battle map. The Germans began a tactical withdrawal, as their reinforcements moved onto the slopes of the 40-meter hill on the south margin of Map 76. Accurate long range, armor-piercing fire from an advancing company of probing, US M-10 tank destroyers accounted for the loss of a Pz-II light tank platoon. This tactical success resulted in the crucial reduction of initiative for the Wehrmacht, that was offset by some splendid artillery strikes that eliminated a pair of GI steps. Total step losses were now: 3 for the Americans, and 13 for the Jerries – plus 2 leaders. Our action-packed, third session (game turns 6-7) continued the ongoing American movement to contact under accurate enemy OBA and mortar fire across the south half of the battle map. A substantial German tactical movement to reinforce their left (south) flank began, while simultaneously, a handful of US units began moving northeast across the northern half of the map. A German SK233 armored car platoon was eliminated in the narrow pass at Hex 76-1306 by long-range AT fire by the American M-10 TD company, as well as a section of another armored car unit on the road at Hex 76-1208. The Jerries commenced digging-in a combined arms force on the southernmost 40-meter hill on Map 76. The step loss tally was now: 5 for the Americans, and 17 for the defending elements of 10th Panzer. The oft-delayed, fourth session (game turns 8-10) featured the bulk of American units veering to the southeast as the German continued digging in on the southernmost 40-meter hill on Map 76. A company of plucky GIs managed to establish a tenuous foothold on the western, 20-meter slope of Djebel Hamdai, while another pair of infantry units moved off the south edge of Map 76. Remarkably, no casualties were inflicted be either side in this high mobility session. Elsewhere, the slow American approach continued to the in the center and a diversionary close assault was initiated on the southern hill mass. Our high mobility, but frustrating, fifth session (game turns 11-12) included the collapse of a pair of American firefight/close assault ops on both the big Diebel, and the southern 40-meter hill mass. On the latter, 3 steps of German armor were also eliminated by unexpectedly accurate, long-range, M-10 AT covering fire. Three more units of half strength GIs scampered off the south edge of Map 26, as the US lost an officer, and two levels of initiative. In the center, the GIs launched another close assault of a dug-in IG emplacement on the 20-meter slope. Also in the center, quick-digging GIs established a base of fire position on east face of the east-west, 20-meter ridge, to support an eventual assault on Djebel Hamdai The updated, step loss tally was now: 17 for the Americans, and 26 for the defending elements of 10th Panzer. At the midpoint of this battle, German initiative was at zero, while the Americans ended the session at 2. The wild, sixth session (game turns 13-14) included the convergence of the US advance into a broader, central front with both northern & southern approaches. In the south, a successful close assault and a turning movement on the southern map margin, edged the German lines back to the east on this 40-meter hill mass. This allowed a further pair of half-strength, US infantry units to exit the south edge of Map 76, bringing the total exited to eight, fulfilling one of the 3 US victory conditions. Step losses were now: 18 for the Americans, and 31 for the 10th Panzer, resulting in the reduction of the American initiative level to one. Axis casualties were still substantially more than those inflicted on the US side, increasing the likelihood of this additional US objective being satisfied by the end of the scenario. Further north, a second GI close assault on the 40-meter contour line pinned the 75mm IG unit, and allowed placement of a new GI observation post. Heavy and accurate US OBA, and adjacent hex fire fights eliminated a pair of German AT gun platoons and an Anti-aircraft unit on Djebel Hamdai. The valley west of the Djebel was now clear of German units, and the stage set for the beginning of the second act – the infantry-heavy, siege of the upper reaches of the Djebel. Our seventh session (game turns 15-17) featured high intensity fighting on the 20 and 40-meter contours of Djebel Hamdai, as well as around the hilltop of the southern hill mass. It was a costly session with 5 more American steps and a pair of officers lost, while the Germans subtracted another 4 steps, plus a leader. Most of the casualties occurred in adjacent-hex firefights and close assaults, as the Americans gained a tenuous foothold on the summit of Djebel Hamdai. Crucially, 10th Panzer lost 2 full companies of Landser infantry in the course of this brawl, as both sides were new running out of infantry platoons. The eighth session (game turns 18-20) included more intense fighting on the 40 and 60-meter contour hexes of Djebel Hamdai and the southern hill mass, The Big Red One pushed a well-supported, central attack on to the southwestern margins of djebel’s summit, which resulted in the liberation of all five, 60-meter countour hexes, after a series of ferocious close assaults. Surprisingly, another pair of junior American Lieutenants were lost by defection, bringing US leader losses to 4, compared to 5 lost Afrika Korps leaders! My resolute & gracious opponent conceded the scenario at the start of game turn 20, when it was clear that there was no possibility of preventing an American major victory. The final step loss tally was: 39 German, and 13 for the rugged GIs. There were 13 FOW-shortened turns of the 20 played. We had played this exciting scenario before. This time, we switched sides in this slightly gamey, somewhat unbalanced, but fun-to-play scenario, with many decision points and considerable maneuver for both sides. The historically correct, scenario rule requiring that only certain elements of both sides to setup or enter both 40 and 60-meter contour lines on Djebel Hamdai, again proved a serious handicap for both sides, but especially for the German defenders. Once again, I give this one a 5, and recommend it for both SHARED and SOLO play, with the caution that the more experienced player should lead the 10th Panzer’s Battle Group Riemann. |
||||||||||||||
| 0 Comments |
| Really messed up this one! | ||||||||||||||
|---|---|---|---|---|---|---|---|---|---|---|---|---|---|---|
The American Commander made two really serious mistakes on this scenario, which, when all was considered, made the whole thing a bad deal. First, the tanks moved to the North in the effort to take the hill and an objective. Except: That the hill terrain was too rough for the tanks to surmount, which wasted a considerable number of turns to reposition correctly. Then, as the Americans tried to move units off the South edge of the board, the Commander discovered that he was trying to move them off the boards that could NOT be moved off of. (Again, it is a matter of reading the instructions properly.) (Note - Even if the American Commander had done everything right, it would have been a tough row to hoe. I would give the edge in this one to the Germans every time.) |
||||||||||||||
| 0 Comments |