Panzer Grenadier Battles on October 24th:
Afrika 1944 #22 - PAKfront Leyte '44 #12 - Flying Wedge
Fronte Russo #9 - Potemkin Village Leyte '44 #13 - Failure at Buri Airfield
Red & White #28 - Bastion
Errors? Omissions? Report them!
The Sened Raid
An Army at Dawn 2nd Ed #16
(Defender) Germany
(Defender) Italy
vs United States (Attacker)
Formations Involved
Italy 50ª Brigata Speciale
United States 1st "Old Ironsides" Armored Division
Display
Balance:


Overall balance chart for AAD2016
Total
Side 1 1
Draw 0
Side 2 0
Overall Rating, 2 votes
5
4
3
2
1
3
Scenario Rank: --- of 1094
Parent Game An Army at Dawn 2nd Ed
Historicity Historical
Date 1943-01-24
Start Time 11:45
Turn Count 18
Visibility Day
Counters 63
Net Morale 1
Net Initiative 1
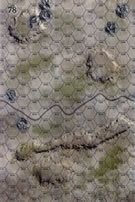
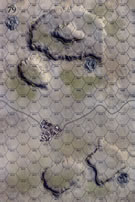
Maps 2: 78, 79
Layout Dimensions 56 x 43 cm
22 x 17 in
Play Bounty 168
AAR Bounty 168
Total Plays 1
Total AARs 1
Duplicates AAAD015
Battle Types
Exit the Battle Area
Urban Assault
Conditions
Minefields
Off-board Artillery
Smoke
Terrain Mods
Joint Forces Battle
Scenario Requirements & Playability
An Army at Dawn 2nd Ed Base Game
Introduction

While Combat Command B fought on the northern segment of the front with mixed results, II corps Commander Lloyd Fredendall held back the remainder of the 1st Armored Division. The division's commander, Orlando Ward, drew up a plan for them to secure one of the key passes through the Eastern Dorsal at Maknassy. II Corps commander Lloyd Fredendall overruled him, changing the plan to just raiding Sened Station twenty-eight miles away, using "Combat Command C," a scratch force drawing from all of the division's combat elements.

Conclusion

The successful raid elated Fredendall, who called his superiors, exclaiming “Trump that if you can.” Successful it may have been, but the blowhard corps commander micromanaged the 1st Armored Division throughout this period, often bypassing its commander, Orlando Ward. These flaws accumulated over time and eventually cost both men their commands; Ward would command the 20th Armored Division late in the war while Fredendall received a promotion and command of the Second Army headquaters in Memphis, Tennessee, where he attended weddings and gave away brides. But for now, the raid captured the Germans’ attention and highlighted the vulnerability of Maknassy. They quickly responded just as the 1st Armored Division commander had predicted.

Additional Notes

Update of 1st Edition scenario 15, "Bad Blood".


Display Relevant AFV Rules

AFV Rules Pertaining to this Scenario's Order of Battle
  • Vulnerable to results on the Assault Combat Chart (7.25, 7.63, ACC), and may be attacked by Anti-Tank fire (11.2, DFT). Anti-Tank fire only affects the individual unit fired upon (7.62, 11.0).
  • AFV's are activated by tank leaders (3.2, 3.3, 5.42, 6.8). They may also be activated as part of an initial activating stack, but if activated in this way would need a tank leader in order to carry out combat movement.
  • AFV's do not block Direct Fire (10.1).
  • Full-strength AFV's with "armor efficiency" may make two anti-tank (AT) fire attacks per turn (either in their action segment or during opportunity fire) if they have AT fire values of 0 or more (11.2).
  • Each unit with an AT fire value of 2 or more may fire at targets at a distance of between 100% and 150% of its printed AT range. It does so at half its AT fire value. (11.3)
  • Efficient and non-efficient AFV's may conduct two opportunity fires per turn if using direct fire (7.44, 7.64). Units with both Direct and AT Fire values may use either type of fire in the same turn as their opportunity fire, but not both (7.22, 13.0). Units which can take opportunity fire twice per turn do not have to target the same unit both times (13.0).
  • Demoralized AFV's are not required to flee from units that do not have AT fire values (14.3).
  • Place a Wreck marker when an AFV is eliminated in a bridge or town hex (16.3).
  • AFV's do not benefit from Entrenchments (16.42).
  • AFV's may Dig In (16.2).
  • Open-top AFV's: Immune to M, M1 and M2 results on Direct and Bombardment Fire Tables, but DO take step losses from X and #X results (7.25, 7.41, 7.61, BT, DFT). If a "2X" or "3X" result is rolled, at least one of the step losses must be taken by an open-top AFV if present.
  • Closed-top AFV's: Immune to M, M1 and M2 results on Direct and Bombardment Fire Tables. Do not take step losses from Direct or Bombardment Fire. If X or #X result on Fire Table, make M morale check instead (7.25, 7.41, 7.61, BT, DFT).
  • Closed-top AFV's: Provide the +1 modifier on the Assault Table when combined with infantry. (Modifier only applies to Germans in all scenarios; Soviet Guards in scenarios taking place after 1942; Polish, US and Commonwealth in scenarios taking place after 1943.) (ACC)
  • Tank: all are closed-top and provide the +1 Assault bonus, when applicable
  • Self-Propelled Artillery: do not provide the +1 Assault bonus, even if closed-top (SB)
  • APC – Armored Personnel Carrier: These are Combat Units, but stack like Transports. They can transport personnel units or towed units. They are not counted as combat units for the +1 stacking modifier on the Direct Fire and Bombardment Tables (4.4). They may be activated by regular leaders and tank leaders (1.2, 3.34, 4.3, 5.43). They do not provide the +1 Assault bonus (ACC).

Display Order of Battle

Germany Order of Battle
Heer
  • Leader
  • Towed
Italy Order of Battle
Regio Esercito
  • Motorized
  • Towed
United States Order of Battle
Army
  • Motorized

Display AARs (1)

Hold Sened Until Relieved, Capitano!
Author treadasaurusrex (Germany, Italy)
Method VASSAL
Victor Germany, Italy
Participants lgbalsiger
Play Date 2026-04-08
Language English
Scenario AAD2016

I led the defending Italo-German force that mostly consisted of garrison elements of the Italian 50th Special Brigade in the vicinity of the 3-hex town of Sened Station in this 3-session fight. The quick-learning and methodical, lgbalsiger ably led combined-arms, elements of the scratch, Combat Command C from the US 1st Armored Division in a large-scale raid intended to capture & destroy an Axis logistical center located in Sened. This play-through continued my Lenten penance since the defending Axis force contained no armored units.

We used the FOW, consolidation, smoke/Illum and excess initiative optional rules. We also used these FIVE house rules: 1) Road Movement for Mechanized & Foot Units — All FOOT & MECHANIZED units may move on roads at the rate of 1/2 Movement Point (MP) per road hex, just like MOTORIZED units, 2) Standardized Movement for Mechanized Units — All mechanized units may move through clear hexes at a movement cost of only 1 movement point (MP) per hex, instead of 1 1/2. Add one to this cost if moving up, across, or down slopes hexes, 3) Dug-In Units on Slopes are Automatically in Limiting Terrain in Desert Games — Unless prohibited by special scenario rules, ALL units that are dug-in on slope hexes are in limiting terrain and are spotted if enemy units approach to within 3 hexes, or 4 hexes for reconnaissance units – unless they are marked with a spotted marker, see 8.22, Revised Gully & Wadi Rule — The 4th Edition Terrain Effects Chart is adjusted as follows: combat units and leaders in gullies or wadis are in limiting terrain for purposes of spotting and are automatically dug in. Entrenching is allowed in this terrain type, as well. Movement within this terrain remains: 2 for Foot, 4 Motorized, 3 for Mechanized units. Combat against units in this terrain is –1 DF, -1 AT and defending units have First Fire in the first segment of assault combat, and 5) Small Caliber AT & AA Rapid Fire Optional Rule — All small caliber (<48mm or less) anti-tank (AT) as well as automatic, anti-aircraft (AA) towed or self-propelled artillery units may fire twice in OPPORTUNITY FIRE (OPFIRE) against moving enemy formations using the same rules as apply for personnel units (INF, RIF, GREN, HMG, ENG, et al) when using OPFIRE. For example, British towed or portee 2-pdr AT guns, all 20mm, 25mm, 28mm, 37mm, 45mm, 47mm towed AT guns, and towed or self-propelled 20mm, 37mm or 40mm AA guns may fire two OPFIRE missions at individual, moving enemy vehicular or personnel unit targets. Units firing OPFIRE may not move or be limbered and loaded in the same turn in which they OPFIRE.

This rule set provided improved playability & simplicity during this high-mobility, play-through.

The initial session (game turns 1-5) was characterized by a probing American advance to the east across the southern half of the battle map. This action included several, brave-but-suicidal truck platoons searching for Italian minefields along the east-west road. Lead elements of the GI’s right flank push eliminated a pesky, Italian 75/27 Howitzer emplacement on the southwestern 20-meter hill on Map 79, thereby exposing this mobile thrust to the lethal 88mm AT platoon, which promptly began detonating loaded M-3 halftracks, as well as a section of M-3 Stuart light tanks. Step losses were: 8 for the US side, and a single Italian step by the end of the session.

Our second session (game turns 6-10) was a grim one for the attacking GIs with another 13 steps lost, mostly in adjacent-hex firefights, opfire and unexpectedly accurate Italian OBA. The sole German 88 mm AT gun platoon was eliminated, along with its Wehrmacht leader by accurate US self-propelled artillery fire. The victory point tally was now 21-3 for the Italians.

The American side consolidated forward positions & conducted multiple morale recovery attempts, while steadily moving assets into jump off positions southeast & west of Sened Station during the third session (game turns 11-14). The Italians continued spoiling OBA strikes and eliminated another 4 steps, as well as a leader, while also dropping an additional infantry step to accurate GI mortar and howitzer fire. The final victory points were 29-4, Italy, an Axis victory. There were 10 FOW-shortened game turns of the 14 played.

This was a rather gamey, scenario that favors the outnumbered, Axis defenders. The victory conditions could use a rewrite, as the American force is barely adequate to complete all three required objectives, if it is able to remain at full strength for all 14 game turns! I give this one a solid 3, as it was a fun-to-play, introductory encounter with a motivated & rapidly improving opponent. It merits a recommendation for both SOLO and SHARED play. As published, the more experienced player should lead the defending Italian side.

0 Comments
You must be a registered member and logged-in to post a comment.
Errors? Omissions? Report them!
Page generated in 0.877 seconds.