
 AAD2007

|
Futility on Route 50 An Army at Dawn 2nd Ed #8 |
||
|---|---|---|
| (Defender) Germany | vs | United States (Attacker) |
| Formations Involved | ||
|---|---|---|
| Germany |  |
10th Panzer Division |
| United States |  |
1st "Old Ironsides" Armored Division |

|


| Overall Rating, 2 votes |
|---|
|
5
|
| Scenario Rank: --- of 1093 |
| Parent Game | An Army at Dawn 2nd Ed |
|---|---|
| Historicity | Historical |
| Date | 1942-12-02 |
| Start Time | 11:30 |
| Turn Count | 14 |
| Visibility | Day |
| Counters | 26 |
| Net Morale | 1 |
| Net Initiative | 0 |
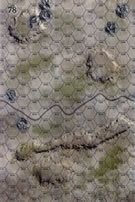
| Maps | 1: 78 |
| Layout Dimensions | 43 x 28 cm 17 x 11 in |
| Play Bounty | 151 |
| AAR Bounty | 163 |
| Total Plays | 2 |
| Total AARs | 2 |
| Duplicates | AAAD007 |
| Battle Types |
|---|
| Hill Control |
| Inflict Enemy Casualties |
| Conditions |
|---|
| Reinforcements |
| Smoke |
| Scenario Requirements & Playability | |
|---|---|
| An Army at Dawn 2nd Ed | Base Game |
| Introduction |
|---|
|
On the previous day the Germans had dominated the fighting and, except for the disputed Route 50, boxed in the British troops defending Tebourba. To open Route 50, Colonel Paul Robinett of the 1st Armored Division's 13th Armored Regiment intended to take command of all Allied tanks in the area and launch a counterattack. He arrived on a ridge four miles west of Tebourba and started to set up his command post. |
| Conclusion |
|---|
|
"Always do whatever you can ," Robinett liked to say, "to keep your superior from making a mistake." He probably should have had his eye on his subordinates instead; just as he arrived but before he took command, Blade Force's Stuarts attacked a concentration of Panzer IV tanks, rumbling forward without any support. The Stuarts destroyed four panzers at great cost to themselves while eight Lee medium tanks burned for no appreciable gain. The remainder of Combat Command B assumed a defensive posture. |
| Additional Notes |
|---|
|
Revision of scenario 7, Not Ready for Prime Time, 1st edition. |

|
|
|---|
| AFV Rules Pertaining to this Scenario's Order of Battle |
|---|
|
| Heer |
|---|
|


| Army |
|---|
|


| 1 Errata Item | |
|---|---|

|
All SS PzIVH tanks should have a movement of 8. (Shad
on 2010 Dec 15)
|
| Hold in Place at All Costs, Captain. | ||||||||||||||
|---|---|---|---|---|---|---|---|---|---|---|---|---|---|---|
The defending German force consisted of combined arms, elements of the 10th Panzer Division in a 14-turn scenario that we completed in 3 fast-paced, sessions. The intrepid & resourceful, lgbalsiger led elements of Combat Command B of the American 1st Armored Division. Thankfully this play-through featured armored units on both sides. The leader draw was better than average for the 10th Panzer. All the American leaders were tank leaders. We used the FOW (starting on game turn 2, to allow the US force a fast approach march) consolidation and excess initiative optional rules. We also tried these FOUR house rules: 1) Road Movement for Mechanized & Foot Units — All FOOT & MECHANIZED units may move on roads at the rate of 1/2 Movement Point (MP) per road hex, just like MOTORIZED units, 2) Standardized Movement for Mechanized Units — All mechanized units may move through clear hexes at a movement cost of only 1 movement point (MP) per hex, instead of 1 1/2. Add one to this cost if moving up, across, or down slopes hexes, 3) Towed Anti-Tank (AT) Hidden Emplacement — Unless prohibited by special scenario rules, ALL dug-in, entrenched, or town- occupying, towed AT gun units always begin scenarios in HIDDEN mode if allowed to dig-in per scenario special rules (please see Optional Rules for Hidden Units; Plotting Position; Revealing; and No Hidden Units Specified on Page 37). For example: dug-in, PaK 38 (50mm); Soviet 45mm, or British 2-pdr and/or 6-pdr towed AT gun platoons are eligible under this house rule, and 4) Dug-In Units on Slopes are Automatically in Limiting Terrain in Desert Games — Unless prohibited by special scenario rules, ALL units that are dug-in on slope hexes are in limiting terrain and are spotted if enemy units approach to within 3 hexes, or 4 hexes for reconnaissance units – unless they are marked with a spotted marker, see 8.22. This rule set provided improved playability & simplicity during this high mobility, play-through. The fast-paced, initial session (game turns 1-5) included an American approach in two prongs from the northeast (right flank) and southeast (left flank) map corners. The initial turns proceeded quickly with the southeasternmost 20-meter hill being rapidly overrun by charging US armor. The advance was slightly delayed by German opfire, as the panzers began moving out of their dug-in positions on all three 20-meter elevations. In the north, well-placed US smoke screens helped a company of Stuart tanks and TDs to deploy on the long, east-west ridge, thereby menacing the small ridgetop Africa Corps garrison. Many long-range AT shots were exchanged and the American mobile elements spread out to create crossfire opportunities against the stronger German tanks. These mostly successful maneuvers came at a heavy cost, as multiple US units were engaged & either demoralized or destroyed outright by the scrambling panzers. A platoon of deadly Pz-IVH tanks was eliminated in a crossfire by the company of Lee tanks on the westernmost hillock. Nevertheless, one hill was cleared by the charging Americans at the end of the 4th game turn, and elsewhere, US platoons drew into decisive range on the east-west ridge and the westernmost hill, where a Jerry 75mm AT gun unit was emplaced. The session ended with a close assault in process against the small garrison on the east-west ridge. Step losses, so far, were 27 for the undaunted GIs and 6, plus a leader captured, for the defending Germans. Initiative levels were reduced to zero for both sides. Our action-packed & costly, second session (game turns 6-10) was a very grim one for scrambling American armor. Twenty steps were lost, while the Jerries lost another 2 in a high mobility, mostly long-range, slugfest. The good news for the GIs was that the Wehrmacht’s stinking 75mm ATG & and officer was eliminated in an adjacent-hex firefight. Thus, removing the fulcrum for potential AT crossfires. The bad news for the GIs, is that the remaining Pz-IVF2 Special was eating Stuarts and TD units like they were chips & salsa. This was probably the decisive session as the few US platoons units left, no longer had the strategic advantage. The costly, third & final session (game turns 11-14) was marked by multiple long-range AT shots that went in the German’s favor, along with a suicidal charge by the remaining, full-strength, infantry platoon & leader. The ending step losses were 47-12 to the Germans. The final result was a German minor victory. There were 8 FOW-shortened game turns of the 14 played. A heck of an entertaining & relatively balanced, introductory scenario that slightly favors the outnumbered, German defenders. I give this one a 5, as it was a fun-to-play, with a challenging & rapidly improving opponent. However, I very much doubt that a US player can win EVER this one without incredible die rolling luck, and the opposing German player having incredibly dismal die rolling from start to finish. Even so, this one merits a recommendation for both SOLO and SHARED play. As published, the more experienced player should lead the defending German side. |
||||||||||||||
| 0 Comments |

| A very challenging time for the Americans | ||||||||||||||
|---|---|---|---|---|---|---|---|---|---|---|---|---|---|---|
The defending German force consisted of combined arms, elements of the 10th Panzer Division in a 14-turn scenario that we completed in _-sessions. The intrepid and resourceful, treadasauresrex led elements of Combat Command B of the American 1st Armored Division. This play-through featured armored units on both sides. The leader draw was a little above average for the 10th Panzer. All the American leaders were tank leaders. We used the FOW, extended assault and excess initiative optional rules and also tried these FOUR house rules: 1) Road Movement for Mechanized & Foot Units — All FOOT & MECHANIZED units may move on roads at the rate of 1/2 Movement Point (MP) per road hex, just like MOTORIZED units, 2) Standardized Movement for Mechanized Units — All mechanized units may move through clear hexes at a movement cost of only 1 movement point (MP) per hex, instead of 1 1/2. Add one to this cost if moving up, across, or down slopes hexes, 3) Towed Anti-Tank (AT) Hidden Emplacement — Unless prohibited by special scenario rules, ALL dug-in, entrenched, or town- occupying, towed AT gun units always begin scenarios in HIDDEN mode if allowed to dig-in per scenario special rules (please see Optional Rules for Hidden Units; Plotting Position; Revealing; and No Hidden Units Specified on Page 37). For example: dug-in, PaK 38 (50mm); Soviet 45mm, or British 2-pdr and/or 6-pdr towed AT gun platoons are eligible under this house rule, and 4) Dug-In Units on Slopes are Automatically in Limiting Terrain in Desert Games — Unless prohibited by special scenario rules, ALL units that are dug-in on slope hexes are in limiting terrain and are spotted if enemy units approach to within 3 hexes, or 4 hexes for reconnaissance units – unless they are marked with a spotted marker, see 8.22. This rule set provided improved playability & simplicity during this highly mobile play-through. The fast-paced, initial session (game turns 1-6) included an American approach in two prongs from the east (right flank) and the south (left flank) map corners. The initial German shot eliminated an American M3/75 platoon, and the second shot reduced a step from another American M3/75 platoon. German long range shots took two more steps from American M3 Stuarts in the first turn. The initial turns proceeded quickly with the Americans focusing their efforts on clearing the southeastern-most 20-meter hill held by a German dug-in infantry platoon and a dug-in panzer in the adjacent hex. The German infantry platoon survived through the first three turns, but was destroyed in the subsequent turns. The panzer unit on that hill-top was forced to move out of its dug-in position and head north due to the overwhelming forces of the American armor. Several American tank units suffered disruption and demoralization and were forced to hide out in the very southeast corner of the map behind the southeastern hill there. These units were not successful to recover their morale, and could not contribute further to the battle in this session. There were 2 FOW-shortened game turns of the 6 played, so far, with 6 “combat 7” die rolls for the Germans and 6 for the Americans in the first 6 turns. The Americans suffered a total of 29 step losses while there were four German step losses in this first session. Our action-packed & costly, second session (game turns 7 - 14 ) was a bloodbath for the poor, green Americans. They approached the hill in the southwest (left flank) and were eventually assaulted by the German infantry platoon (left their dug-in position to assault) which successfully pinned two American tank units. These units were subsequently dispatched by German anti-tank fire from the 75mm AT gun and by a panzer in cross fire. Several of the American units that had suffered disruption and demoralization and were hiding behind the southeastern most hill were unsuccessful in their recovery attempts for most of this session. The Americans successfully deployed smoke to hide these units, but on a later turn, when the mortar unit fired smoke again, it missed, so these units were exposed to the German panzers positioned to fire at long range at these units which ultimately led to their destruction. On the last turn of the game, the final American units were destroyed. A total of 29 consecutive steps were lost in today’s session, and the entire American force of 56 steps was eliminated. The Germans did not suffer any additional losses in this session, so total steps lost was 4. The result was a German Major victory. I counted 1 combat 7 for Americans, and two for Germans in this session, with three FOW shortened turns. A very fun scenario to play, no matter which side one plays. It is an entertaining and relatively balanced, introductory scenario that slightly favors the outnumbered, German defenders. I rate this one a 5 because of how fun it is, and is quite a challenge for both sides. It merits a recommendation for both SOLO and SHARED play. |
||||||||||||||
| 1 Comment |
A succinct, informative and colorful AAR.
I think that we completed this brawl in only two - very costly for the GIs - sessions.
Not sure that his one is winnable by the scrambling American, AFV-heavy force without divine intervention.