Panzer Grenadier Battles on October 24th:
Afrika 1944 #22 - PAKfront Leyte '44 #12 - Flying Wedge
Fronte Russo #9 - Potemkin Village Leyte '44 #13 - Failure at Buri Airfield
Red & White #28 - Bastion
Errors? Omissions? Report them!

Japan Imperial Japanese Army Type 95
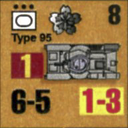
Panzer Grenadier Headquarters Library Unit: Japan Imperial Japanese Army Type 95 for Panzer Grenadier game series Panzer Grenadier Headquarters Library Unit: Japan Imperial Japanese Army Type 95 for Panzer Grenadier game series Panzer Grenadier Headquarters Library Unit: Japan Imperial Japanese Army Type 95 for Panzer Grenadier game series Panzer Grenadier Headquarters Library Unit: Japan Imperial Japanese Army Type 95 for Panzer Grenadier game series Panzer Grenadier Headquarters Library Unit: Japan Imperial Japanese Army Type 95 for Panzer Grenadier game series Panzer Grenadier Headquarters Library Unit: Japan Imperial Japanese Army Type 95 for Panzer Grenadier game series
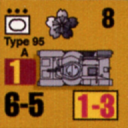
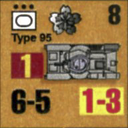
Unit Counter Data
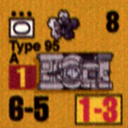
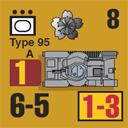
Historical Name Type 95 Ha-Gō
Movement Class Mechanized
Movement Points 8
AFV Type Closed-top AFV - Tank
Armor Rating 1
Anti-tank Fire 1-3 1-3
Direct Fire 6-5 3-5
Overall Rating, 214 votes
5
4
3
2
1
3.7
Unit Rank: 439 of 1747
Additional Notes

Display Relevant AFV Rules

AFV Rules Pertaining to this Unit
  • Vulnerable to results on the Assault Combat Chart (7.25, 7.63, ACC), and may be attacked by Anti-Tank fire (11.2, DFT). Anti-Tank fire only affects the individual unit fired upon (7.62, 11.0).
  • AFV's are activated by tank leaders (3.2, 3.3, 5.42, 6.8). They may also be activated as part of an initial activating stack, but if activated in this way would need a tank leader in order to carry out combat movement.
  • AFV's do not block Direct Fire (10.1).
  • Full-strength AFV's with "armor efficiency" may make two anti-tank (AT) fire attacks per turn (either in their action segment or during opportunity fire) if they have AT fire values of 0 or more (11.2).
  • Each unit with an AT fire value of 2 or more may fire at targets at a distance of between 100% and 150% of its printed AT range. It does so at half its AT fire value. (11.3)
  • Efficient and non-efficient AFV's may conduct two opportunity fires per turn if using direct fire (7.44, 7.64). Units with both Direct and AT Fire values may use either type of fire in the same turn as their opportunity fire, but not both (7.22, 13.0). Units which can take opportunity fire twice per turn do not have to target the same unit both times (13.0).
  • Demoralized AFV's are not required to flee from units that do not have AT fire values (14.3).
  • Place a Wreck marker when an AFV is eliminated in a bridge or town hex (16.3).
  • AFV's do not benefit from Entrenchments (16.42).
  • AFV's may Dig In (16.2).
  • Closed-top AFV's: Immune to M, M1 and M2 results on Direct and Bombardment Fire Tables. Do not take step losses from Direct or Bombardment Fire. If X or #X result on Fire Table, make M morale check instead (7.25, 7.41, 7.61, BT, DFT).
  • Closed-top AFV's: Provide the +1 modifier on the Assault Table when combined with infantry. (Modifier only applies to Germans in all scenarios; Soviet Guards in scenarios taking place after 1942; Polish, US and Commonwealth in scenarios taking place after 1943.) (ACC)
  • Tank: all are closed-top and provide the +1 Assault bonus, when applicable

Display Scenario List (51)

Game Scenario Plays AARs Rating
Ancient Armor 3. Armor of Guam 0 0 ---
Alaska's War 11. Kiska Evacuation 7 3 3.9
Dragon Rampant 8. Highway 2 0 0 ---
Dragon Rampant 9. Ruahine Foothills 0 0 ---
Guadalcanal 20. Diversion I 20 9 3.9
Kokoda Campaign 25. Milne Bay Scenario 1: Milne Bay - The Landing 4 3 2.8
Kokoda Campaign 26. Milne Bay Scenario 2: Milne Bay - Second Night 3 1 3
Kokoda Campaign 27. Milne Bay Scenario 3: Milne Bay - The Breakout 3 1 3.3
Kokoda Campaign 28. Milne Bay Scenario 4: Assault on No. 3 Airstrip 3 2 3
Kokoda Campaign 29. Milne Bay Scenario 5: Australian Pursuit 3 2 3.5
Kokoda Trail 5. Milne Bay — The Landing 12 8 2.8
Kokoda Trail 6. Milne Bay — Second Night 6 5 3.5
Kokoda Trail 7. Milne Bay — The Breakout 5 4 3.2
Kokoda Trail 10. Assault on No. 3 Airstrip 5 3 3.8
Lost Battalion 3. Defense of Porong 1 1 4
Leyte '44 42. Vlug’s Bazooka 2 3 4.7
Marianas 1944 4. Tanks on the Right! 5 3 3.2
Marianas 1944 14. Into the Night 5 2 4.4
Marianas 1944 18. Along the Agat-Sumay Road and the Drive to Orote 3 3 4.3
Marianas 1944 26. Yigo and the Approach to Mt. Santa Rosa 5 2 4.4
Marianas 1944 29. The Last Japanese Tanks 4 2 4
Nihon Silk 10. San Manuel and the 2nd Armor 4 2 4.4
Pacific Armor 1. Tanks in the Barrio 2 2 3.5
Pacific Armor 4. First Probe at San Manuel 1 1 ---
Pacific Armor 5. The Defense of San Manuel 1 1 ---
Pacific Armor 6. Morning in San Manuel 1 1 ---
Pacific Armor 7. The Empire Strikes Back 1 1 ---
Pacific Armor 13. First Clash at Lupao 1 1 ---
Pacific Armor 14. Lupao Again 1 1 ---
Pacific Armor 16. Roadblock at Muñoz 1 1 ---
Pacific Armor 17. Ruins of Muñoz 1 1 ---
Pacific Armor 18. Escape from Muñoz 1 1 ---
Power of the East 6. Battle of Baintsagan 2 1 3.7
Power of the East 10. Last Attempt 1 0 3
Saipan 1944 1. Red Beach 20 11 4.2
Saipan 1944 3. Probing Marines 24 13 3.5
Saipan 1944 7. Throw Them Into the Sea! 9 6 3.9
Saipan 1944 10. Tanks in the Jungle 7 4 4.3
Saipan 1944 19. Exploring Hill 790 5 3 3.8
Saipan 1944 26. Overlooking Radio Road 12 3 3.6
Saipan 1944 36. Shifting the Lines 5 2 3.7
Saipan 2 1. Red Beach 1 1 ---
Saipan 2 4. Stumbling Armor 1 1 ---
Saipan 2 8. Night Action on Red Beach 1 1 ---
Saipan 2 11. Tank Battle on Saipan 1 1 ---
Saipan 2 23. Patrol Action on Hill 790 1 1 ---
Saipan 2 26. Warehouse Find 1 1 ---
Saipan 2 33. Attack Ruthlessly 1 1 ---
Secret Weapons 8. Red Dragons 3 2 2
Waltzing Matilda 3. Dutch Treat 2 1 4
Waltzing Matilda 4. Brisbane Line 2 1 3

Display Games (16)

Errors? Omissions? Report them!
Page generated in 0.166 seconds.